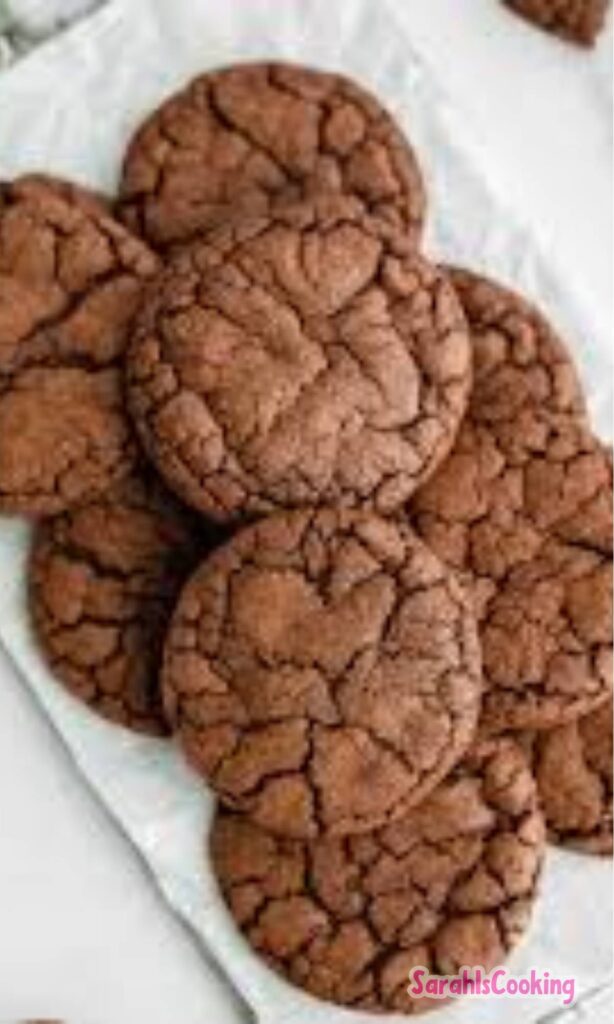
There are days when a cookie just will not cut it, and a brownie feels like too much commitment. That exact moment is where brownie cookies shine. They land right in the middle, with crisp edges, soft centers, and that unmistakable crackly top.
I have made a lot of chocolate cookies over the years, and I keep coming back to this one. It has the soul of a brownie but the convenience of a cookie. You get deep chocolate flavor without turning on a mixer for an hour or dirtying half the kitchen.
What I love most is the texture. Chewy on the outside, fudgy in the middle, and just set enough to hold together. They feel indulgent, but not fussy, and that balance is hard to beat.
This recipe is especially close to my heart because it fixes a common disappointment. Too many brownie cookies turn cakey or dry, or they spread into sad flat puddles. These stay thick, shiny, and rich, every single time.
The secret is simple but important. You beat the eggs and sugar until light and airy, then chill the dough so it behaves in the oven. A little patience here pays off in a big way.
If you love chocolate and want something that feels bakery-worthy without being complicated, these brownie cookies are for you. They are bold, cozy, and honestly hard to stop eating once they cool.
Ingredients Needed for the Recipe
- Bittersweet chocolate – This gives the cookies their deep, intense chocolate base without making them overly sweet.
- Unsalted butter – Adds richness and helps create that soft, fudgy texture.
- Granulated sugar – Helps form the shiny, crackly top and sweetens the dough.
- Light brown sugar – Brings moisture and a subtle caramel note.
- Eggs – Whipped with sugar to create structure and that signature brownie look.
- Vanilla extract – Rounds out the chocolate flavor and adds warmth.
- All-purpose flour – Just enough to hold everything together without drying the cookies.
- Unsweetened cocoa powder – Boosts the chocolate intensity.
- Salt – Balances sweetness and sharpens the chocolate flavor.
- Baking powder – Gives the cookies a gentle lift.
- Semisweet chocolate chips – Melt into pockets of chocolate throughout each cookie.
Each ingredient here plays a clear role. Nothing extra, nothing confusing. When combined carefully, they create that unmistakable brownie-cookie hybrid texture.
How to make Brownie Cookies?
Step 1 – Melt the chocolate and butter
Start by adding the chopped bittersweet chocolate and butter to a microwave-safe bowl. Heat in short bursts, stirring between each one, until smooth and glossy.
This slow approach prevents scorching and keeps the chocolate silky. Set it aside for a minute so it is warm, not hot, when you add it later.
Step 2 – Beat the eggs and sugars
In a large bowl, combine the granulated sugar, brown sugar, and eggs. Beat with a hand mixer until the mixture turns pale, thick, and slightly fluffy.
This step matters more than it looks. The air you whip in here is what creates that shiny, crinkled brownie top once the cookies bake.
Step 3 – Add melted chocolate and vanilla
Pour the melted chocolate mixture into the egg and sugar mixture. Add the vanilla extract and beat until everything looks smooth and uniform.
The batter will already smell incredible at this point. Try not to rush ahead.
Step 4 – Fold in dry ingredients
Add the flour, cocoa powder, salt, and baking powder to the bowl. Use a spatula and gently stir until most of the flour disappears.
The batter should look thick and glossy, almost exactly like brownie batter. Stop mixing as soon as it comes together.
Step 5 – Stir in chocolate chips and chill
Fold in the chocolate chips until evenly distributed. Cover the bowl and place it in the refrigerator for 30 minutes.
Chilling helps the dough firm up so the cookies bake thick instead of spreading too far. This step is non-negotiable.
Step 6 – Bake the cookies
Preheat the oven to 350°F and line two baking sheets with parchment paper. Scoop the chilled dough into generous portions and space them well apart.
Bake until the cookies spread, crack on top, and look slightly underdone in the center. Let them cool completely on the pan before moving.
Tips
- Beat the eggs and sugar for several minutes to achieve the signature shiny tops.
- Always use room temperature eggs for better volume.
- Measure flour carefully to avoid dry cookies.
- Chill the dough so the cookies bake thick and chewy.
- Add a pinch of espresso powder to intensify the chocolate flavor.
- Use a scoop to keep cookie sizes consistent.
Why These Brownie Cookies Work So Well
I have tested versions of this recipe that skipped steps, and the difference was obvious. When you rush the process, the cookies lose their character. They turn flat or dull.
This method respects what makes brownies special. Air in the eggs, melted chocolate for richness, and minimal flour. Those details add up.
The chilling step might feel like an inconvenience, but it gives the dough time to set. That short wait rewards you with cookies that bake evenly and hold their shape.
Another reason these work is balance. The bittersweet chocolate and semisweet chips keep the sweetness in check. Each bite feels rich, not heavy.
Storage and Make-Ahead Ideas
Once baked, these brownie cookies keep well at room temperature for a few days. Store them in an airtight container to protect that soft center.
If you want to plan ahead, the dough freezes beautifully. Scoop it into balls, chill, then freeze until firm.
When the craving hits, bake straight from frozen with an extra minute or two in the oven. Fresh brownie cookies, no full prep required.
I often keep a small batch tucked away for unexpected guests or late-night chocolate emergencies. It is one of my favorite baking habits.
Serving Ideas That Feel Special
These cookies are wonderful on their own, but they also dress up easily. A light dusting of powdered sugar adds contrast and a bakery-style finish.
For something extra, sandwich a scoop of vanilla ice cream between two cookies. It turns a simple dessert into something memorable.
I also love serving them slightly warm with coffee. The bitterness of the drink pairs beautifully with the fudgy chocolate.
No matter how you serve them, these brownie cookies tend to disappear fast. That is always the best sign of a recipe worth keeping.
If you try them, take your time with the steps and enjoy the process. Baking should feel comforting, a little indulgent, and very chocolate-forward. These cookies deliver all of that, and then some.
Brownie Cookies Recipe
Description
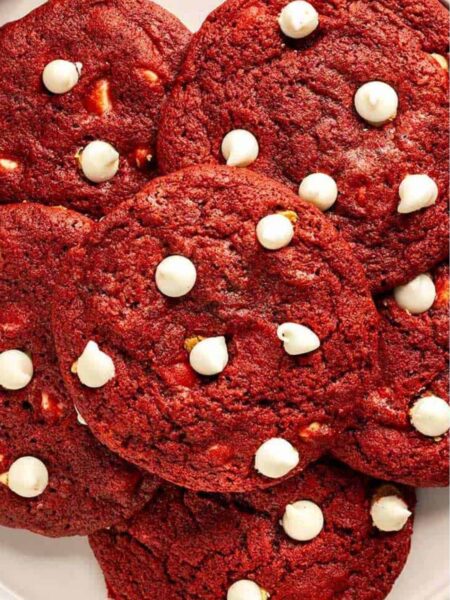
These Red Velvet Cupcakes are soft, tender, and perfectly moist with a subtle chocolate flavor, a gentle tang from buttermilk and vinegar, and a velvety crumb that melts in your mouth. Topped with a silky cream cheese frosting, they’re a timeless treat for birthdays, holidays, or any day you’re craving something sweet and special.
ingredients
For the cupcakes:
For the cream cheese frosting:
Instructions
For the cupcakes:
- Preheat oven to 350°F (177°C) and line a standard 12-cup muffin tin with paper liners.
- In a glass measuring cup or small bowl, whisk the hot coffee and cocoa powder together, then cover and let stand for 5 minutes.
- In a medium mixing bowl, whisk together the flour, baking powder, baking soda, salt, and cinnamon.
- In a large mixing bowl, whisk together the sugar, vegetable oil, and melted butter.
- Add in the egg and whisk for twenty seconds, or until very well combined.
- Add in the buttermilk, vanilla, and red food coloring and whisk to combine. Then whisk in the vinegar and coffee mixture.
- Using a fine-mesh sieve, sift the flour mixture into the batter in three additions, whisking until each addition is incorporated. The batter will be thin.
- Using a spring-loaded scoop, divide the batter evenly among prepared muffin cups. Lightly tap the bottom of the muffin pan against the counter several times to release any air bubbles.
- Bake until cupcake tops are no longer sticky to the touch and a cake tester or toothpick comes out clean (about 17–20 minutes). It’s normal for the tops to look slightly spongy.
- Let cupcakes cool in pan on a wire rack for 10 minutes before removing from the pan to cool completely (about 1 hour).
Make the frosting:
- In the bowl of a stand mixer fitted with the paddle attachment, beat the softened butter and sifted powdered sugar on low. Gradually increase to medium-high to prevent a sugar cloud.
- Beat for 3 minutes until smooth. (It may look dry at first, but it will come together like magic!)
- Scrape down the bottom and sides of the bowl and paddle, then add the cream cheese and beat on medium-high for 1 minute until fluffy.
- Add the vanilla and beat for 30 seconds until fully incorporated. Scrape down the bowl again as needed.
Nutrition Facts
Servings 12
Serving Size 1 cupcake
- Amount Per Serving
- Calories 320kcal
- % Daily Value *
- Total Fat 16g25%
- Saturated Fat 8g40%
- Cholesterol 55mg19%
- Sodium 280mg12%
- Potassium 120mg4%
- Total Carbohydrate 42g15%
- Sugars 32g
- Protein 3g6%
- Calcium 4 mg
- Iron 6 mg
* Percent Daily Values are based on a 2,000 calorie diet. Your daily value may be higher or lower depending on your calorie needs.
Note
- Use real buttermilk for best texture and flavor—DIY substitutes may alter results.
- Gel food coloring yields vibrant red without thinning the batter—avoid liquid dye.
- Cool cupcakes completely before frosting to prevent melting and sliding.
- Storage: Keep covered at room temp for 1 day or refrigerated for up to 3 days.