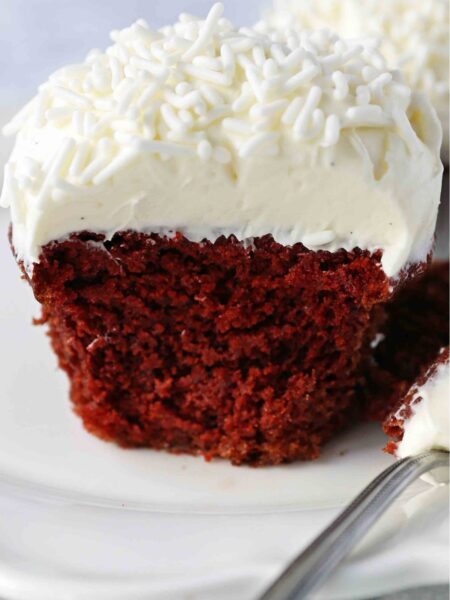
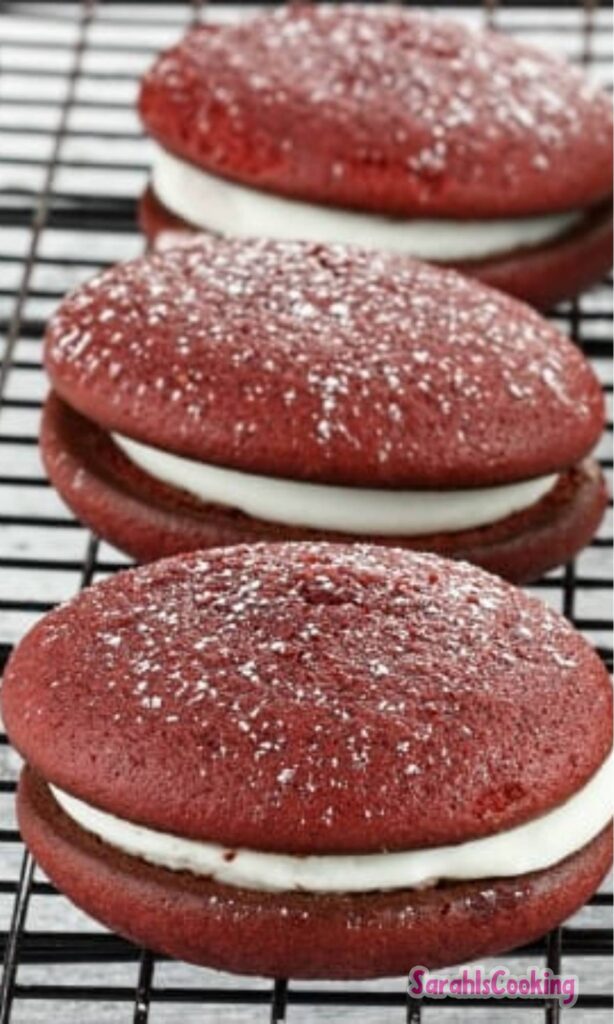
There is something quietly magical about Red Velvet Whoopie Pies. They sit right in that sweet spot between cake and cookie, soft enough to feel indulgent, but sturdy enough to hold a generous layer of filling.
I have always loved desserts that feel playful without being fussy, and these absolutely fit the bill. They are the kind of treat that disappears fast, whether it is a casual afternoon snack or a holiday table moment.
What really makes these special is the balance. The cocoa gives depth, the buttermilk adds that familiar red velvet tang, and the filling ties it all together with a creamy, old-school comfort.
I originally revisited this recipe while updating my classic whoopie pies, and that small detour turned into something much better. Sometimes reworking a favorite reminds you why you loved it in the first place.
These are not flashy desserts, and that is exactly why I adore them. They feel nostalgic, familiar, and just indulgent enough without trying too hard.
Ingredients Needed for the Recipe
- All-purpose flour – Forms the structure of both the soft cookies and the thickened filling base.
- Unsweetened cocoa powder – Adds subtle chocolate flavor and deepens the red velvet character.
- Baking powder – Helps the cookies rise gently and stay light.
- Baking soda – Works with the buttermilk to create tenderness and lift.
- Salt – Balances sweetness and sharpens the cocoa notes.
- Buttermilk – Brings that classic red velvet tang and keeps the cookies soft.
- Liquid red food coloring – Gives the cookies their signature color and familiar flavor note.
- Vanilla extract – Adds warmth and depth to both cookies and filling.
- Unsalted butter – Provides richness and flavor in both layers.
- Brown sugar – Keeps the cookies moist with a hint of caramel flavor.
- Large egg – Binds the batter and adds structure.
- Milk – Used to cook the flour mixture for a smooth, stable filling.
- Granulated sugar – Sweetens the filling without making it heavy.
- Vegetable shortening – Lightens the filling and gives it a fluffy texture.
How to make Red Velvet Whoopie Pies?
Step 1 – Prep the Oven and Pans
Start by preheating the oven to 350°F and lining two baking sheets with parchment paper. This small step keeps the cookies from sticking and helps them bake evenly.
Step 2 – Mix the Dry Ingredients
In a medium bowl, whisk together the flour, cocoa powder, baking powder, baking soda, and salt. This ensures everything is evenly distributed before it hits the wet ingredients.
Step 3 – Combine the Liquid Ingredients
In a separate bowl or liquid measuring cup, whisk the buttermilk, red food coloring, and vanilla. Mixing these together first keeps the color consistent throughout the batter.
Step 4 – Cream Butter and Sugar
Beat the butter and brown sugar together until light and fluffy. This step matters more than it seems, so take a few minutes and let the mixture really aerate.
Step 5 – Add the Egg
Add the egg and mix just until combined. Overmixing here can make the cookies dense, so stop as soon as everything comes together.
Step 6 – Alternate Dry and Wet Ingredients
Add one-third of the dry mixture to the bowl and mix gently. Follow with half of the buttermilk mixture, then continue alternating until everything is incorporated.
Step 7 – Final Gentle Mix
Use a spatula to scrape the bowl and gently fold the batter a few times. You want it smooth, but not overworked.
Step 8 – Scoop the Batter
Use a 2-tablespoon cookie scoop to portion the batter onto the prepared baking sheets. Leave space between each scoop so the cookies can spread slightly.
Step 9 – Bake and Cool
Bake one tray at a time until the cookies are set, about 12 to 14 minutes. Let them cool completely before filling, or the filling will melt.
Step 10 – Cook the Flour and Milk
Whisk the flour and milk together in a saucepan over medium heat. Cook until thick, whisking constantly, then set aside to cool fully.
Step 11 – Make the Filling Base
Beat the sugar, butter, and shortening until light and fluffy. Add the vanilla and mix again until smooth.
Step 12 – Finish the Filling
Add the cooled flour mixture and beat until the filling becomes airy and silky. Rub a little between your fingers to make sure the sugar is fully dissolved.
Step 13 – Chill and Assemble
Transfer the filling to a piping bag and refrigerate briefly so it firms up. Pipe onto half the cookies and sandwich with the remaining cookies.
Serving Thoughts
I like serving these slightly chilled, especially if they have been in the fridge for a few hours. The filling firms up just enough, while the cookies stay soft.
They also travel well, which makes them ideal for sharing. I have packed them for gatherings more times than I can count.
Tips
- Use room temperature ingredients for smoother mixing and better texture.
- If you want perfectly round cookies, pipe the batter instead of scooping.
- Let the flour mixture cool completely before adding it to the filling.
- Do not rush the creaming step, it affects the final softness.
- Watch bake time closely, overbaking dries the cookies out.
Simple Variations Worth Trying
While I love the cooked filling here, a cream cheese filling is also delicious. It adds a little tang and pairs beautifully with the cocoa notes.
You can also adjust the cocoa slightly if you prefer a brighter red color. Using less cocoa gives a more classic red velvet look.
Storage and Make-Ahead Notes
I usually wrap these individually and store them in the refrigerator. They keep well for several days and taste just as good the next afternoon.
If you want to make them ahead, bake the cookies and prepare the filling separately. Assemble them the day you plan to serve for the best texture.
Red Velvet Whoopie Pies are one of those desserts that feel familiar yet special every single time. They are simple, comforting, and always welcome at the table.
Red Velvet Whoopie Pies Recipe
Description
Any red velvet lovers will go crazy for these Red Velvet Whoopie Pies – two soft, cake-like red velvet cookies that are sandwiched with a dreamy, creamy filling. Perfect for snack time, or for any holiday celebration!
ingredients
Cookies
Filling
Instructions
Preheat & Prep
Preheat the oven to 350°F (175°C). Line 2 baking sheets with parchment paper.Mix Dry Ingredients
In a bowl, whisk together the flour, cocoa powder, baking powder, baking soda, and salt.Combine Wet Ingredients
In another bowl or liquid measuring cup, whisk together buttermilk, food coloring, and vanilla.Cream Butter & Sugar
In the bowl of a stand mixer (or large bowl with hand mixer), cream butter and brown sugar until light and fluffy (about 3–4 minutes). Add egg and mix until combined.Alternate Adding Dry & Wet Mixtures
Add 1/3 of the dry mixture and mix until combined. Add half of the buttermilk mixture and mix. Repeat with remaining dry and wet ingredients, ending with dry. Mix just until combined; finish with a spatula to ensure no pockets remain.Scoop & Bake
Use a 2-tablespoon cookie scoop to portion batter onto baking sheets, spacing at least 2 inches apart. Bake one tray at a time for 12–14 minutes, or until set. Cool completely on wire racks.Make Filling Base
While cookies bake, whisk flour and milk in a small saucepan over medium heat. Cook, whisking constantly, until thickened (~3 minutes). Remove from heat and cool completely.Finish Filling
In a mixing bowl, beat granulated sugar, butter, and shortening until light and fluffy. Add vanilla, then cooled flour-milk mixture. Beat until smooth and fluffy (2–3 minutes).Assemble Whoopie Pies
Transfer filling to a piping bag. Refrigerate for 30 minutes. Pipe filling onto flat side of half the cookies. Top with remaining cookies, flat side down.Store
Store assembled whoopie pies covered in the refrigerator. Let come to room temperature before serving or enjoy chilled.
Nutrition Facts
Servings 12
Serving Size 1 whoopie pie
- Amount Per Serving
- Calories 280kcal
- % Daily Value *
- Total Fat 12gg19%
- Saturated Fat 7gg35%
- Trans Fat 0gg
- Cholesterol 35mgmg12%
- Sodium 220mgmg10%
- Potassium 90mgmg3%
- Total Carbohydrate 40gg14%
- Dietary Fiber 1gg4%
- Sugars 28gg
- Protein 3gg6%
- Calcium 6 mg
- Iron 8 mg
* Percent Daily Values are based on a 2,000 calorie diet. Your daily value may be higher or lower depending on your calorie needs.
Note
- Room temperature ingredients ensure even mixing and better texture.
- For perfect circles: Use a piping bag instead of a scoop to shape cookies.
- Cream cheese variation: Replace filling with 8 oz cream cheese, ¼ cup butter, 2 cups powdered sugar, 1 tsp vanilla, and pinch of salt.
- Storage: Wrap individually in plastic and refrigerate for up to 5 days.