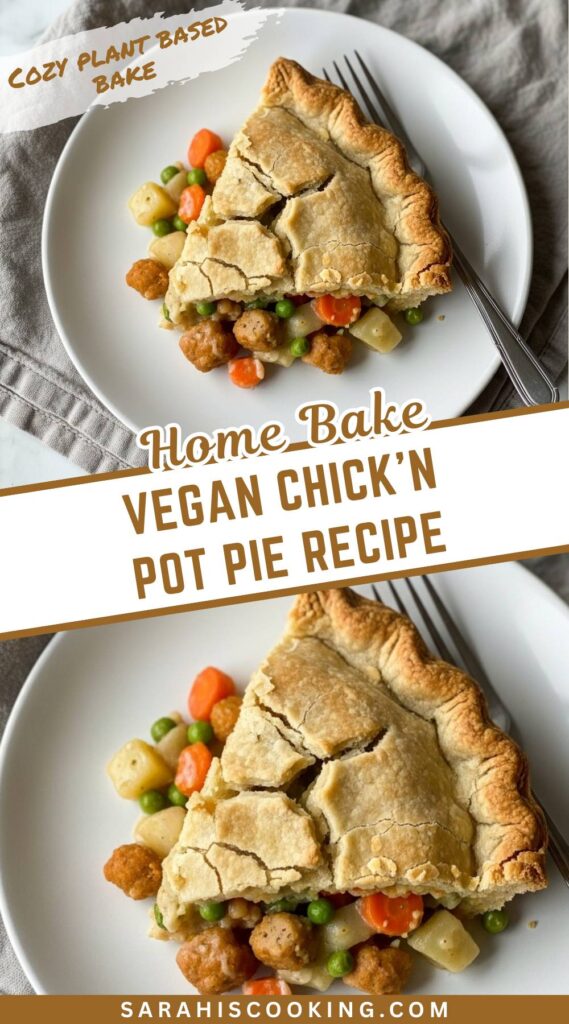
When the weather turns chilly, I find myself craving meals that feel like a warm hug from the inside out. For me, that dish has always been a classic pot pie, with its creamy filling and flaky crust.
This vegan version is my go-to for a cozy night in. It’s surprisingly simple to make, and the puff pastry topping is a wonderfully fuss-free alternative to a traditional pie crust.
Ingredients Needed for the Recipe
- Vegan Puff Pastry: This gives us that beautiful, flaky top without any of the hassle of making a crust from scratch.
- Vegan Butter: It forms the rich base for sautéing our vegetables and building the sauce.
- Onion, Celery & Garlic: These aromatics are the flavor foundation for the entire filling.
- Russet Potato: It adds a lovely, hearty texture that makes the pie so satisfying.
- Dried Thyme, Sage & Rosemary: This classic herb blend brings a warm, savory depth to the dish.
- All-Purpose Flour: This is our thickening agent, which helps create the creamy, luscious sauce.
- Vegan Chicken Broth: It forms the savory liquid base of our filling. A good vegetable broth works perfectly, too.
- Non-Dairy Milk: This adds a touch of creaminess and helps smooth out the sauce.
- Broccoli & Mixed Frozen Vegetables: I love this combination for color and variety, but you can use any veggies you like.
- Nutritional Yeast & Fresh Parsley: The yeast adds a subtle cheesy flavor, while the parsley gives a fresh, bright finish.
Choosing Your Vegetables
The beauty of a pot pie is its flexibility with vegetables. I’ve suggested broccoli and a mixed blend, but feel free to make it your own.
You could use all fresh vegetables, like diced carrots and green beans, or stick with a convenient frozen mix. Just aim for about two cups total, so the filling stays nicely balanced with the sauce.
If you’re using harder vegetables, like raw carrots, just be sure to dice them small so they cook through in the simmering time. Mushrooms, peas, and corn are all wonderful additions, too.
How to Make Vegan Pot Pie?
Step 1 – Prepare the Aromatics
Begin by melting the vegan butter in a large, oven-safe skillet over medium heat. Add the diced onion, celery, and salt, and sauté for about 5 minutes.
You just want them to become soft and fragrant, stirring them now and then so they cook evenly.
Step 2 – Add Potatoes and Herbs
Next, stir in the diced potato, minced garlic, thyme, sage, and rosemary. Let this cook together for another 3 minutes.
The herbs will become wonderfully aromatic, and the potato will start to absorb all those lovely flavors.
Step 3 – Create the Roux
Sprinkle the all-purpose flour over the vegetable mixture. Stir constantly until the flour is fully incorporated and no dry spots remain.
Let this cook for about 2 minutes; this step is key for cooking out the raw flour taste and thickening our sauce later.
Step 4 – Slowly Add Liquids
Now, slowly pour in the vegan chicken broth and non-dairy milk while whisking continuously. This gradual addition prevents lumps from forming.
The mixture will look thick at first, but it will smooth out into a lovely, creamy liquid as you keep whisking.
Step 5 – Incorporate Remaining Vegetables
Add the chopped broccoli, frozen mixed vegetables, nutritional yeast, and fresh parsley to the skillet. Give everything a good stir to combine.
Let the filling simmer on medium-low heat for about 3 minutes, until it has thickened noticeably. Then, remove it from the heat and season with black pepper.
Step 6 – Prepare the Puff Pastry
Preheat your oven to 400°F (200°C). On a lightly floured surface, roll the thawed puff pastry sheet out into a 12-inch square.
Using a sharp knife, cut the pastry into sixteen neat 3-inch squares. A little brush of non-dairy milk on top will help them brown beautifully.
Step 7 – Assemble the Pie
Arrange the puff pastry squares over the top of the filling in your skillet. I like to overlap them slightly, creating a rustic, fully covered top.
It’s okay if it’s not perfect; the charming, uneven look is part of its homemade appeal.
Step 8 – Bake to Perfection
Place the skillet on a rimmed baking sheet to catch any potential bubbles, and bake for 35 to 45 minutes.
You’ll know it’s ready when the pastry is puffed and a deep golden brown, and you can see the filling bubbling around the edges.
Step 9 – Rest and Serve
This is the hardest part, I know. Let the pot pie cool for at least 20 minutes before you serve it.
This waiting time allows the filling to set, making it much easier to slice and serve neatly.
Tips
- For a golden, shiny pastry crust, brush the puff pastry squares with a little non-dairy milk before baking.
- If your skillet isn’t oven-safe, you can transfer the filling to a greased 9×13 inch casserole dish before adding the pastry topping.
- Don’t skip letting the flour cook for a full 2 minutes in Step 3; it’s essential for a smooth, not pasty, sauce.
- If you prefer one solid crust, simply roll the pastry to fit your skillet and place it over the filling, tucking in the edges.
- Letting the pie rest after baking is crucial for a filling that holds its shape when you cut into it.
Adding Plant-Based Protein
While this pot pie is wonderfully hearty on its own, you can easily add a protein boost if you like. It’s a simple way to make the meal even more filling.
I find that a half-can of drained and rinsed chickpeas or white beans blends in perfectly. They add a lovely texture without overpowering the other flavors.
For a “chicken-like” addition, try using about two ounces of dry soy curls, rehydrated in some warm vegan broth before stirring them into the filling with the other vegetables.
Storing and Reheating Your Leftovers
Once cooled to room temperature, any leftover pot pie can be stored in an airtight container in the refrigerator. It will keep well for up to five days.
You can also cover the skillet tightly with plastic wrap and store it right in the pan, if that’s easier for you.
To reheat, the microwave is quickest for a single serving. For a larger portion, I prefer the oven.
Just cover the dish with foil and warm it at 350°F until heated through, which usually takes about 15 to 20 minutes.
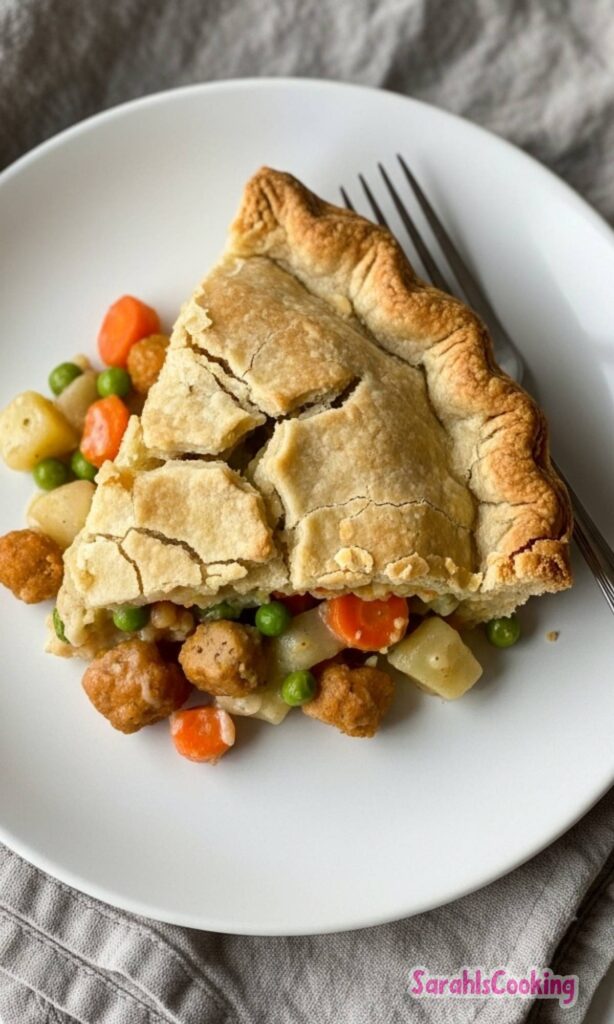
Vegan Pot Pie Recipe
Description
This easy Vegan Pot Pie is the ultimate comfort food! The cozy dish is made directly in an oven-safe skillet, topped with a fuss-free flaky puff pastry topping, and baked until golden and creamy. Easy enough for weeknight dinners, yet impressive enough for special occasions!
Ingredients
Instructions
Thaw Puff Pastry
Remove puff pastry from the freezer and allow it to thaw according to package directions.Sauté Aromatics
Heat a large, oven-safe skillet over medium heat and add in the vegan butter. Once melted, add onions, celery, and salt. Sauté for 5 minutes, stirring frequently.Add Potatoes & Herbs
Add diced potato, garlic, thyme, sage, and rosemary. Cook, stirring occasionally, for 3 minutes.Add Flour
Sprinkle in flour and mix until fully combined. Cook for 2 minutes to remove raw flour taste.Add Liquids
Slowly pour in vegan broth and non-dairy milk, whisking continuously until smooth and combined.Add Vegetables
Stir in broccoli, mixed vegetables, nutritional yeast, and parsley.Simmer Filling
Simmer on medium-low for about 3 minutes, or until thickened. Remove from heat and season with salt and black pepper to taste.Prepare Pastry
Preheat oven to 200°C (400°F). On a lightly floured surface, roll puff pastry into a 12-inch square. Cut into sixteen 3-inch squares. Optional: brush with almond milk for shine.Top & Bake
Arrange pastry squares over filling, slightly overlapping. Place skillet on a rimmed baking sheet. Bake 35–45 minutes until pastry is golden and filling is bubbly.Rest & Serve
Let pot pie cool for at least 20 minutes before slicing and serving.
Nutrition Facts
Servings 6
Serving Size 1 serving
- Amount Per Serving
- Calories 380kcal
- % Daily Value *
- Total Fat 19gg30%
- Saturated Fat 6gg30%
- Trans Fat 0gg
- Cholesterol 0mgmg0%
- Sodium 620mgmg26%
- Potassium 480mgmg14%
- Total Carbohydrate 45gg15%
- Dietary Fiber 6gg24%
- Sugars 5gg
- Protein 8gg16%
- Calcium 120 mg
- Iron 2.5 mg
* Percent Daily Values are based on a 2,000 calorie diet. Your daily value may be higher or lower depending on your calorie needs.
Note
- Puff Pastry Tip: If you don’t want to cut squares, cover the whole top with the rolled-out sheet and cut slits to vent steam.
- Freezing: Freeze filling separately. Thaw overnight, then top with fresh pastry before baking.
- Protein Boost: Add ½ can chickpeas or 2 oz rehydrated soy curls for a “chicken” pot pie version.
- Storage: Keep in an airtight container for up to 5 days in the fridge.
- Reheating: Best reheated covered in the oven (15–20 min) or microwave until hot.