I have learned over years of baking that celebration cakes succeed or fail on structure first, decoration second. A pretty finish only matters if the cake underneath slices cleanly, holds moisture, and tastes intentional.
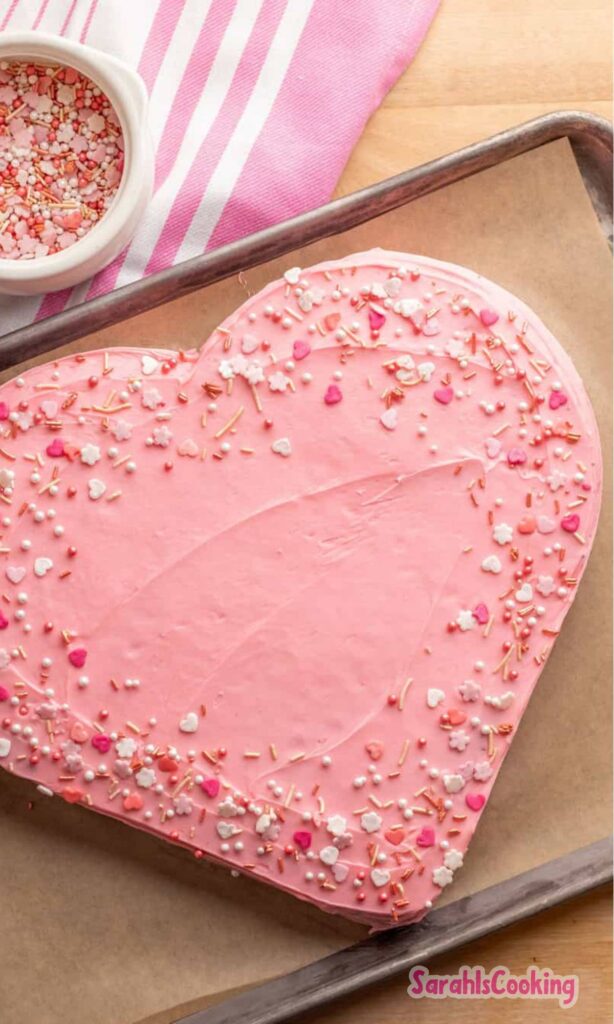
This Valentine’s pink heart cake is built with that exact mindset. It is a soft sponge, balanced buttercream, and sugar paste decoration that works because each step supports the next.
I have made variations of this cake multiple times, adjusting color ratios, chilling windows, and buttercream thickness until the process became reliable instead of fussy. This version reflects that testing.
Who This Recipe Is For
This recipe is for bakers who want a decorative Valentine’s cake without gambling on fragile techniques. It assumes patience, not speed.
If you care about clean edges, stable layers, and predictable results, this cake will feel approachable rather than intimidating.
It is also well suited for home bakers who occasionally sell cakes or gift them and need repeatability more than novelty.
Why This Recipe Works
The structure starts with a sponge designed to stay tender while supporting weight. The buttercream acts as both filling and stabilizer, not just decoration.
Chilling is used intentionally, not excessively. Each cooling step locks in shape so the sugar paste goes on smoothly instead of stretching or tearing.
Color is layered through paste and dust rather than liquid dyes, which prevents moisture imbalance and color bleeding over time.
Ingredients Needed for the Recipe
- FunCakes Sugar Paste Old Rose (350 g) – Forms the main cake covering and provides a smooth, flexible finish without cracking.
- FunCakes Sugar Paste Red Earth (150 g) – Used for contrast elements and decorative borders with deeper, stable color.
- FunCakes Mix for Sponge Cake Deluxe (150 g) – Creates a light but supportive crumb that holds filling cleanly.
- FunCakes Mix for Buttercream (125 g) – Designed for structure and piping stability, not just softness.
- Soft unsalted butter (150 g) – Controls texture and flavor without overpowering sweetness.
- Water (140 ml) – Activates the sponge mix to proper consistency.
- Eggs (2.5 eggs or 125 g) – Provide structure and moisture balance.
- FunCakes Flavour Paste Cherry – Adds a subtle, controlled flavor without thinning the buttercream.
- FunCakes Candy Choco Pearls Bordeaux – Decorative texture with visual weight.
- FunCakes Sparkle Dust Ruby – Enhances surface detail without adding moisture.
- FunCakes Metallic Food Paint Dark Gold – Adds definition to lettering and accents.
- FunCakes Food Colour Gel Red Earth – Tints buttercream without altering consistency.
- FunCakes Edible Glue – Ensures decorations stay in place without melting the paste.
Before You Start: Pan, Temperature, and Setup
This cake benefits from preparation more than improvisation. Have your tools laid out and your colors tested before baking begins.
A deep heart-shaped pan gives cleaner edges than shallow novelty pans. Grease thoroughly and avoid parchment that can wrinkle into the batter.
Oven temperature matters here. A steady 180°C conventional or 160°C convection prevents doming that complicates leveling later.
How to make Pink Heart Cake?
Step 1 – Prepare the Pan and Oven
Preheat the oven and grease the heart pan generously with baking spray. Make sure all corners are coated.
This prevents tearing when unmolding, which is critical for shaped cakes.
Step 2 – Mix and Bake the Sponge
Prepare the sponge mix exactly as directed. Avoid adding extra liquid or eggs.
Spoon the batter evenly into the pan and smooth the surface before baking for 30 to 35 minutes.
Step 3 – Cool and Level the Cake
Turn the cake out immediately onto a cooling grid. Let it cool fully before cutting.
Once cool, level the cake evenly and slice into layers with a cake leveler.
Step 4 – Prepare and Flavor the Buttercream
Prepare the buttercream as instructed and add cherry flavor paste gradually.
The flavor should be noticeable but not sharp, especially for Valentine’s serving.
Step 5 – Fill, Crumb Coat, and Chill
Fill the layers with a thin, even layer of buttercream. Coat the outside lightly.
Chill until firm. This step prevents sugar paste slippage later.
Step 6 – Color and Prepare the Buttercream for Piping
Color the remaining buttercream with Red Earth gel. Mix slowly to avoid air pockets.
Transfer to a decorating bag fitted with the open star nozzle.
Step 7 – Cover with Sugar Paste
Knead the Old Rose sugar paste until pliable, then roll to 2 to 3 mm thickness.
Cover the cake smoothly, working from the top down to avoid pleats.
Step 8 – Add Decorative Border
Form a rope border from Red Earth sugar paste using the mould.
Attach it to the base with edible glue, pressing gently to secure.
Step 9 – Create and Attach the Heart Plaque
Roll Red Earth sugar paste and cut a heart shape. Add lettering with the font set.
Paint the letters with gold and allow to dry before attaching.
Step 10 – Final Piping and Pearl Finish
Pipe small buttercream tufts along the top edge.
Dust the pearls with ruby sparkle and place them onto the buttercream.
Visual and Texture Cues to Watch For
The sponge should spring back lightly when pressed and release cleanly from the pan edges.
Buttercream should hold soft peaks that do not curl or slump.
Sugar paste should drape without tearing and smooth without excessive stretching.
Common Mistakes and How to Fix Them
If the cake bulges under sugar paste, the buttercream layer was too thick or too warm.
Cracking sugar paste usually indicates under-kneading or a dry environment.
Bleeding color comes from overusing gel dye or skipping chill time.
Substitutions and What Changes
You can substitute vanilla flavor for cherry, but the cake will lose its subtle Valentine profile.
Homemade buttercream can work, but only if it is stable enough for piping and chilling.
Liquid food coloring is not recommended. It will compromise texture and finish.
Tips
- Chill between every major decorating step.
- Keep sugar paste wrapped until the moment you roll it.
- Test color intensity on a small batch first.
- Use minimal edible glue to avoid melting details.
- Level the cake while fully cool for clean layers.
Make-Ahead, Storage, and Freezing
The sponge can be baked one day ahead, wrapped tightly, and stored at room temperature.
Fully decorated cakes store best refrigerated for up to three days.
Do not freeze a fully decorated sugar paste cake. Freeze the sponge layers only.
Testing Notes and Trust Signals
I tested this cake with varying buttercream thicknesses and found thinner coats more stable.
The color ratios listed prevent oversaturation while still reading clearly as Valentine tones.
This process has held up consistently across multiple bakes and environments.
Helpful Internal Linking Opportunities
Ingredient section – Link to “How to Work with Sugar Paste Without Cracking” to support confident handling.
Buttercream preparation section – Link to “Stable Buttercream for Piped Cakes” for readers scaling the recipe.
Storage section – Link to “How to Store Decorated Cakes Safely” to prevent texture loss.
Decoration steps – Link to “Clean Cake Edges and Sharp Finishes” for visual refinement.
This Valentine’s pink heart cake is about intention. Each step earns its place, and nothing is rushed. That is how decorative cakes become dependable, not stressful.
Valentine’s Pink Heart Cake Recipe
Description
The way to your loved one’s heart is through a beautifully crafted cake. This Valentine’s Pink Heart Cake features a tender sponge base, cherry-flavored buttercream, and elegant sugar paste decorations in romantic shades of Old Rose and Red Earth—perfectly embodying the spirit of love and celebration.
Ingredients
Cake & Frosting
Decorations
Instructions
Bake the Cake
Preheat the oven to 180°C (160°C for convection). Grease a PME Deep Heart Cake Pan (15 x 7.5 cm) with FunCakes Bake Release Spray.Prepare Sponge
Mix 150 g FunCakes Sponge Cake Deluxe as per package instructions. Pour into pan and bake 30–35 minutes until a skewer comes out clean. Immediately invert onto a cooling grid and let cool completely.Make Buttercream
Prepare 125 g FunCakes Buttercream mix per instructions. Stir in cherry flavour paste.Assemble Cake
Level cake if needed. Slice horizontally into two layers. Fill and crumb-coat with plain buttercream. Chill 30 minutes to set.Color Buttercream
Tint remaining buttercream with Red Earth gel. Transfer to a decorating bag fitted with Wilton #1M nozzle.Cover Cake
Knead Old Rose sugar paste and roll to 2–3 mm thickness. Drape over cake and smooth. Use Katy Sue rope mould with Red Earth paste to create a border; attach to base with edible glue.Add Decorative Heart
Cut a heart from Red Earth paste using PME cutter. Press message with alphabet stamps. Paint letters with Dark Gold food paint. Attach to cake with edible glue.Final Touches
Pipe buttercream rosettes around top edge. Toss Bordeaux pearls in Ruby sparkle dust, then place on rosettes.
Nutrition Facts
Servings 8
Serving Size 1 slice
- Amount Per Serving
- Calories 420kcal
- % Daily Value *
- Total Fat 20g31%
- Saturated Fat 12g60%
- Cholesterol 85mg29%
- Sodium 280mg12%
- Potassium 120mg4%
- Total Carbohydrate 58g20%
- Dietary Fiber 1g4%
- Sugars 42g
- Protein 5g10%
- Calcium 4 mg
- Iron 8 mg
* Percent Daily Values are based on a 2,000 calorie diet. Your daily value may be higher or lower depending on your calorie needs.
Note
- Make ahead: Bake and crumb-coat the cake a day in advance; decorate fresh on Valentine’s Day.
- Allergy note: Contains eggs, dairy, and gluten. Not suitable for vegan or gluten-free diets unless alternative products are used.
- Storage: Keep refrigerated; bring to room temperature 30 minutes before serving for best texture.