I burned the crust the first time. Not even dramatically. Just… quietly too brown on the edges while I was busy scrolling something dumb on my phone. I remember pulling the pan out and thinking, yeah, this is still salvageable. It wasn’t terrible, but it wasn’t that soft, pale base these bars are supposed to have. So I tried again the next day. Same ingredients. Less distraction. Way better ending.
That’s kind of how these Rhubarb Dream Bars landed in my regular rotation. Not perfect right away, a little messy, but worth figuring out. They sit somewhere between a tart and a custard square, but softer, sweeter, and with that sharp rhubarb bite that sneaks up at the end.
I didn’t even grow the rhubarb myself. Got it from a neighbor who basically forced a bag into my hands like I owed them something. I had no plan. Then I remembered these bars. Good call.
Ingredients I Used for the Recipe
- 1 cup all-purpose flour – for the base, nothing fancy
- 1/2 cup granulated sugar – gives the crust a light sweetness
- 1/2 cup butter, room temp – I used salted, because that’s what I had
- 2 large eggs – helps the filling set properly
- 1 cup sugar – yes, more sugar, it balances the rhubarb
- 1/4 cup all-purpose flour – thickens the filling just enough
- 1/4 tsp salt – tiny amount, but it matters
- 2 cups diced rhubarb – fresh, slightly uneven cuts because I got lazy
How to make Rhubarb Dream Bars?
Step 1 – Get the pan ready
I lined an 8×8 pan with parchment paper and left some hanging over the sides. Not for aesthetics. Just so I wouldn’t struggle later trying to pry the bars out. I’ve done that before and it turns into a crumbly mess real quick.
Step 2 – Mix the crust
I tossed flour, sugar, and butter into a bowl and started mixing with my hands. I know, food processor is easier, but I didn’t feel like washing extra parts. The butter was a little softer than ideal, so it got sticky. Still worked. Pressed it into the pan. Not perfectly even. I smoothed it out with the back of a spoon and called it good.
Step 3 – Bake the base
Into the oven at 350°F. About 15 minutes. Here’s where I messed up the first time. I left it too long. This time I pulled it when it still looked pale and slightly underdone. That’s actually what you want. It firms up later.
Step 4 – Make the filling
While the crust baked, I whisked eggs, sugar, flour, and salt. I went a little aggressive with the whisk at first, then remembered I shouldn’t overdo it. So I stopped after about a minute. Stirred in the rhubarb. The pieces were uneven, some bigger than others, but honestly I like that. You get different textures in each bite.
Step 5 – Pour and bake again
I poured the filling straight onto the hot crust. It felt wrong at first, like it might just soak in and disappear, but it doesn’t. Back into the oven for about 40 to 45 minutes. I checked around 38 because my oven runs hot sometimes. The center should be set but still a little soft if you poke it.
Step 6 – Cool… or try to
This is the hardest part. Waiting. I didn’t wait long enough the first time and cut into it too early. It was gooey. Still delicious, but messy. This time I let it sit properly. Lifted it out using the parchment and cut clean squares. Way more satisfying.
What surprised me halfway through
There’s a moment when the filling goes from liquid-looking to something glossy and almost custardy. I kept opening the oven door like I didn’t trust it to happen on its own. Probably not the best move, but I was curious. It still set fine.
Also, rhubarb smells sharper when it bakes than I expected. Not bad. Just… bright. It kind of fills the kitchen in a way that makes you think something fancy is happening, even if you’re standing there in pajamas with flour on your hands.
I almost added vanilla. Then I didn’t. Glad I held back. The simplicity works better here. The rhubarb gets to be loud without competition.
Tips
- Don’t overbake the crust. Pale is good. Golden is risky.
- If your rhubarb is super green, the bars won’t be as pink. Still tastes the same though.
- Let them cool fully unless you enjoy slightly chaotic slicing
- If edges cook faster, cover them lightly with foil and keep baking
- Frozen rhubarb works, but thaw and drain it a bit or things get watery
- Cut uneven rhubarb on purpose sometimes. It adds texture variety
Where I went slightly off-script
I added a pinch more salt than listed. Not a lot, just a tiny extra shake. It made the sweetness feel less heavy. I also didn’t measure the rhubarb super precisely. It was closer to maybe 2 and a half cups. The bars still held together fine, just a little more tart, which I actually liked.
One weird habit I have – I tap the pan on the counter before putting it in the oven. No idea if it helps. I just do it. This time the batter settled nicely, so I’m pretending it made a difference.
I thought about dusting powdered sugar on top. Didn’t. They looked good as is. Slightly glossy, soft pink top, clean edges once sliced. Didn’t need dressing up.
Why these keep happening in my kitchen
They’re easy, yeah, but that’s not the only reason. It’s the balance. Sweet, tart, soft, a little chewy at the edges. Not too rich, so you don’t feel done after one bite. I ended up eating two squares while standing by the counter and didn’t even realize it until I reached for another and… they were almost gone.
They also travel well. I packed a few in a container and they held up fine. No crumbling, no weird soggy bottom. Just solid little bars that feel homemade in the best way.
I’ve already thought about trying them with strawberries next time. Or maybe a mix. But part of me doesn’t want to mess with it yet. This version feels right. Slightly imperfect, a little unpredictable, but that’s kind of the charm.
Also, next time I’m setting a timer. Not trusting myself with the crust again.
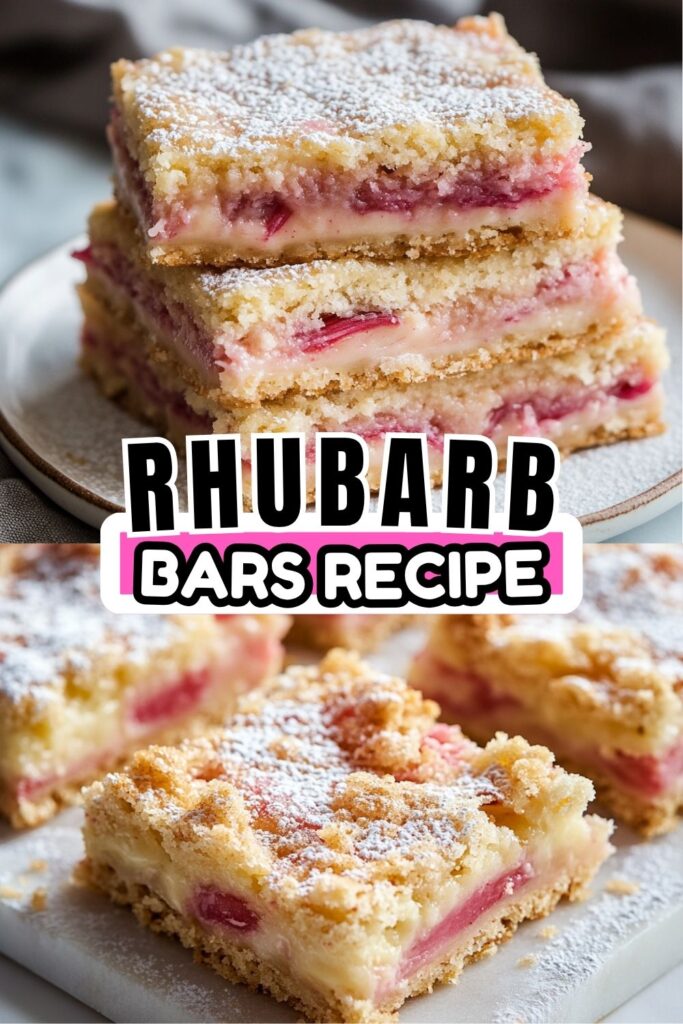
Rhubarb Dream Bars Recipe
Description
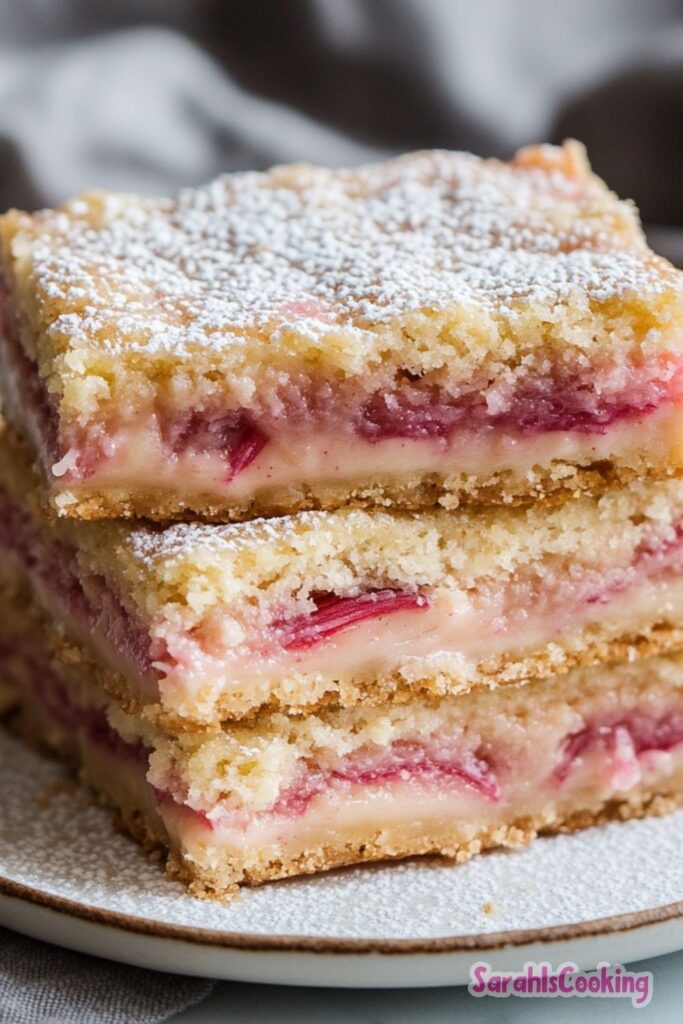
These Rhubarb Dream Bars are the perfect way to utilize fresh or frozen rhubarb from your garden or local market. Featuring a buttery shortbread crust and a sweet-tart, custard-like filling, these bars are easy to make and bursting with spring flavor. They are portable, delicious, and ideal for picnics, BBQs, or any celebration.
Ingredients
Crust
Filling
Instructions
Prepare Pan and Oven
Preheat your oven to 350°F (175°C). Line an 8x8 inch baking pan with parchment paper, ensuring the paper hangs over the sides for easy removal later.Make the Crust
In a food processor, combine 1 cup flour, 1/2 cup sugar, and 1/2 cup room temperature butter. Pulse until the mixture comes together. Press the mixture firmly and evenly into the bottom of the prepared pan.Bake Crust
Bake the crust for 15 minutes. It should remain very pale in color. Remove from oven but keep the oven on.Prepare Filling
While the crust is baking, whisk together the eggs, 1 cup sugar, 1/4 cup flour, and salt in a medium bowl for about 1 minute. Do not over-whisk. G stir in the diced rhubarb.Assemble and Bake
Pour the rhubarb filling over the hot crust. Return to the oven and bake for 40-45 minutes, or until the center is set and the top is lightly golden. If edges brown too quickly, cover with foil.Cool and Serve
Allow the bars to cool completely in the pan. Lift out using the parchment paper overhang and cut into squares. Dust with powdered sugar if desired before serving.
Nutrition Facts
Servings 16
Serving Size 1 bar
- Amount Per Serving
- Calories 210kcal
- % Daily Value *
- Total Fat 8g13%
- Saturated Fat 5g25%
- Trans Fat 0.3g
- Cholesterol 45mg15%
- Sodium 130mg6%
- Potassium 95mg3%
- Total Carbohydrate 34g12%
- Dietary Fiber 1g4%
- Sugars 22g
- Protein 3g6%
* Percent Daily Values are based on a 2,000 calorie diet. Your daily value may be higher or lower depending on your calorie needs.
Note
For the best visual appeal, use ruby-red rhubarb stalks. These bars can be stored in an airtight container in the refrigerator for up to 3 days. Freezing is not recommended as the texture may become gooey upon thawing.