These Oreo Shamrock Shake Cookies are built to deliver consistent, bakery-style results without guesswork. The goal is a soft, chewy mint chocolate cookie with balanced flavor and dependable structure every single time.
I developed this version to capture that familiar mint-and-chocolate profile while keeping the method approachable for home bakers. Every step has a purpose, and none of them are decorative.
This is not a novelty cookie that only looks festive. It is a carefully structured dough designed to bake evenly, hold moisture, and stay tender for days.
Who This Recipe Is For
This recipe is for home bakers who want something seasonal but still technically sound. If you enjoy understanding why a recipe works, you will feel comfortable making these.
It suits beginner to intermediate skill levels because the method is straightforward, yet the results feel polished enough to serve or sell. The process is forgiving when followed carefully.
If you have ever struggled with cookies spreading too much or turning dry the next day, this formula addresses those exact issues.
Why This Recipe Works
The balance of granulated sugar and brown sugar controls both spread and moisture retention. Brown sugar adds chew while granulated sugar allows the edges to set without becoming crisp.
A moderate amount of cocoa powder gives chocolate flavor without drying the dough, which can happen in heavier chocolate cookies. The flour ratio keeps the cookies structured but not cakey.
Mint extract is used sparingly so it complements rather than dominates. Oreo pieces add texture contrast, while chocolate chips create pockets of melted richness that reinforce the flavor theme.
Ingredients Needed for the Recipe
- Unsalted butter – Provides fat for tenderness and helps create a smooth, cohesive dough.
- Granulated sugar – Encourages slight spread and gives the edges gentle structure.
- Brown sugar – Adds moisture, chewiness, and a subtle molasses depth.
- Eggs – Bind the dough and provide stability during baking.
- Vanilla extract – Rounds out the flavor and softens the intensity of the mint.
- Mint extract – Delivers the signature Shamrock-style flavor in a controlled amount.
- All-purpose flour – Forms the structural base that supports mix-ins without collapsing.
- Unsweetened cocoa powder – Adds chocolate flavor while keeping the crumb soft.
- Baking soda – Provides lift and prevents dense cookies.
- Salt – Balances sweetness and sharpens the chocolate notes.
- Green food coloring – Adds visual identity without affecting texture.
- Oreo cookies, chopped – Introduce crunch and a cookies-and-cream contrast.
- Chocolate chips – Melt into the dough to create richness and flavor continuity.
Ingredient Insights and Function
Room-temperature butter is critical because it creams properly with sugar, forming air pockets that help the cookies bake evenly. Melted butter will cause spreading, while cold butter will not incorporate well.
Mint extract varies widely in strength depending on brand, which is why measured restraint matters. Too much will create a sharp aftertaste that overwhelms the chocolate base.
If you substitute a gluten-free flour blend, choose one designed for 1:1 baking with stabilizers included. Without those, the cookies may crumble because the Oreo pieces add weight to the dough.
Using dark cocoa instead of regular cocoa will intensify flavor but can slightly dry the cookies. If making that change, reduce flour by a tablespoon to maintain softness.
How to make Oreo Shamrock Shake Cookies?

Step 1 – Cream the Butter and Sugars
Beat the butter, granulated sugar, and brown sugar until the mixture looks lighter in color and fluffy in texture. This stage should take several minutes and should not be rushed.
Proper creaming builds the foundation for soft cookies. If the mixture looks dense or greasy, keep mixing until it smooths out.
Step 2 – Add Eggs and Flavoring
Add the eggs one at a time, mixing fully after each addition to maintain a stable emulsion. Scrape down the bowl to ensure everything blends evenly.
Stir in the vanilla and mint extracts at this point so they disperse uniformly through the dough.
Step 3 – Combine Dry Ingredients Separately
Whisk the flour, cocoa powder, baking soda, and salt in another bowl to eliminate clumps. This ensures the leavening is distributed evenly before entering the dough.
Adding dry ingredients gradually prevents overmixing and keeps the cookies tender.
Step 4 – Mix Wet and Dry Together
Incorporate the dry mixture into the wet ingredients on low speed just until combined. Stop mixing as soon as no visible flour remains.
Overmixing at this stage develops gluten and leads to tougher cookies, which we want to avoid.
Step 5 – Add Color and Fold in Mix-Ins
Add green food coloring slowly, adjusting until you reach a soft mint shade. Gentle folding keeps the dough from becoming overworked.
Fold in chopped Oreos and chocolate chips using a spatula so the pieces stay intact and evenly distributed.
Step 6 – Chill the Dough
Cover and chill the dough for at least 30 minutes to firm up the butter and hydrate the flour. This step controls spread and deepens flavor.
The dough should feel slightly firm but still scoopable when ready to bake.
Step 7 – Portion and Prepare for Baking
Scoop evenly sized portions and place them on a parchment-lined baking sheet with space between each mound. Uniform sizing ensures even baking.
If desired, press a few extra Oreo pieces on top for visual texture.
Step 8 – Bake with Attention to Doneness
Bake at 350°F (175°C) until the edges are set and the centers look slightly underdone. This visual cue is essential for chewiness.
The cookies will continue to cook on the tray after removal, which prevents overbaking.
Step 9 – Cool Properly
Let the cookies rest on the baking sheet for about five minutes before transferring to a rack. This allows the structure to stabilize.
Moving them too soon can cause breakage, while leaving them too long can over-set the bottoms.
How I Tested and Refined This Recipe
The first version used more cocoa powder, which gave great color but produced a slightly dry crumb the next day. Reducing the cocoa and adjusting flour created a softer interior.
I also tested melted butter for convenience, but the cookies spread too thin and lost their chewy center. Returning to creamed butter restored structure and improved shelf life.
Another round involved increasing mint extract, which initially seemed appealing but became overpowering after baking. The final ratio keeps the mint noticeable yet smooth.
I experimented with skipping the chill time as well, and the cookies baked unevenly with greasy edges. Chilling proved essential for flavor development and shape control.
Common Mistakes and How to Avoid Them
- Using butter that is too soft or melted, which causes excessive spreading.
- Adding too much mint extract, leading to a harsh, artificial flavor.
- Skipping the chilling step, resulting in flat cookies with uneven texture.
- Overmixing after adding flour, which creates dense cookies.
- Overbaking until the centers look fully done, removing the chewy quality.
- Not measuring flour correctly, which can dry out the dough.
Make-Ahead, Storage, and Freezing Guidance
The dough can be refrigerated for up to 48 hours before baking, which actually improves flavor as the ingredients hydrate fully. Let it sit briefly at room temperature if it becomes too firm to scoop.
Baked cookies stay soft for about four days when stored in an airtight container. Their texture remains stable because of the brown sugar and controlled moisture ratio.
For freezing, portion the dough into balls and freeze solid before storing in a sealed bag. Bake directly from frozen, adding one to two minutes to the bake time.
Already baked cookies also freeze well and thaw without losing structure. Warm them briefly in a low oven to restore that fresh-baked softness.
Tips
- Use a cookie scoop to keep sizes uniform for even baking.
- Line pans with parchment to prevent overbrowning on the bottoms.
- Press extra chocolate chips on top before baking for a more finished look.
- Let cookies cool completely before storing to avoid trapped moisture.
- Taste the dough base before baking to confirm mint intensity.
- Rotate baking trays halfway through if your oven has hot spots.
Oreo Shamrock Shake Cookies Recipe
Description
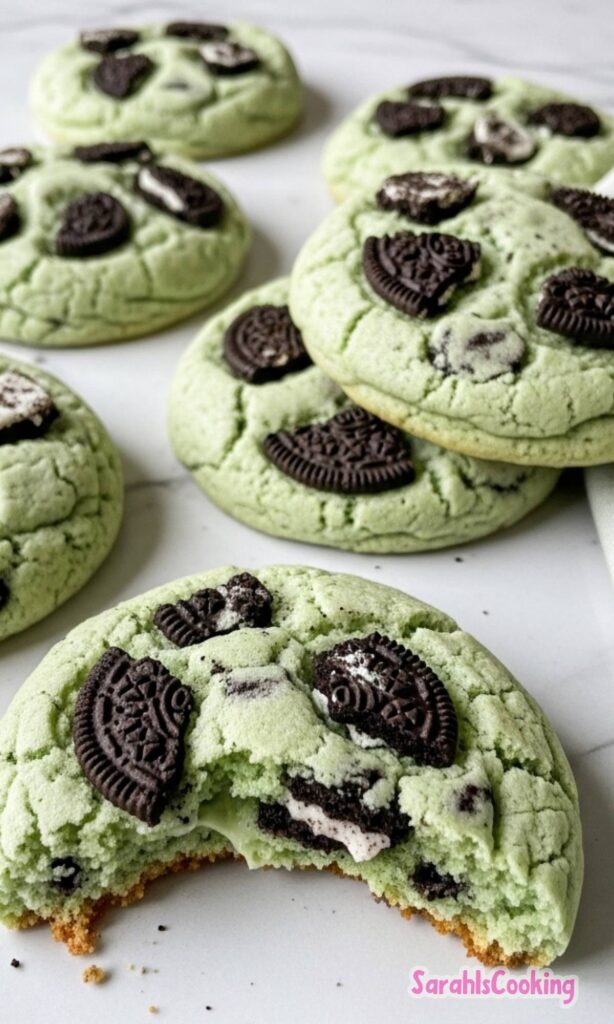
Oreo Shamrock Shake Cookies are soft, chewy mint chocolate cookies loaded with crushed Oreo pieces and chocolate chips. Inspired by the classic Shamrock Shake, these festive green cookies combine cool mint flavor with rich cocoa and a cookies-and-cream texture, making them perfect for St. Patrick's Day or any mint chocolate lover.
ingredients
Instructions
- In a large bowl, cream the butter, granulated sugar, and brown sugar together until light and fluffy.This incorporates air for soft, tender cookies
- Add the eggs one at a time, mixing well after each addition. Stir in the vanilla extract and mint extract.Ensure mint extract is evenly distributed
- In a separate bowl, whisk together the flour, cocoa powder, baking soda, and salt.
- Gradually add the dry ingredients to the wet ingredients, mixing just until combined.Do not overmix to avoid tough cookies
- Add green food coloring a few drops at a time until the dough reaches the desired shade of green.Gel coloring gives vibrant color without altering consistency
- Fold in the chopped Oreo cookies and chocolate chips until evenly distributed.
- Cover and chill the dough for at least 30 minutes.Chilling prevents excessive spreading and enhances texture
- Preheat the oven to 175°C (350°F) and line baking sheets with parchment paper.
- Scoop the dough into balls (about 1.5 tbsp each) and place them on the prepared baking sheets, leaving 2 inches between each.
- Bake for 10–12 minutes, until the edges are set and the centers are slightly soft.Do not overbake for chewy centers
- Allow the cookies to cool on the baking sheet for 5 minutes before transferring to a wire rack to cool completely.Cookies continue to set as they cool
Nutrition Facts
Servings 24
Serving Size 1 cookie
- Amount Per Serving
- Calories 190kcal
- % Daily Value *
- Total Fat 9g14%
- Saturated Fat 5g25%
- Cholesterol 30mg10%
- Sodium 150mg7%
- Total Carbohydrate 26g9%
- Dietary Fiber 1g4%
- Sugars 18g
- Protein 2g4%
* Percent Daily Values are based on a 2,000 calorie diet. Your daily value may be higher or lower depending on your calorie needs.
Note
- Do not overbake: Pull cookies when centers look slightly soft for chewy texture.
- Mint adjustment: Mint extract is potent; start with 1 tsp and add more if desired.
- Chill time matters: Don't skip chilling—it prevents spreading and improves flavor.
- Storage: Keep in airtight container at room temp up to 4 days, or freeze up to 3 months.
- Make ahead: Freeze dough balls and bake fresh whenever cravings strike!