This Lemon Garlic Chicken is one of those recipes that earns a permanent place in a home kitchen because it is dependable. The method is simple, the ingredients are intentional, and the result is tender chicken with balanced brightness and richness.
I approach recipes with the same mindset I bring to baking and studying pharmacy. Every step should have a purpose, and every ingredient should contribute to flavor, texture, or structure in a measurable way.
This is not a complicated dinner, but it is a precise one. When done correctly, it delivers juicy chicken, a light pan sauce, and clean flavors that feel complete without being heavy.
Who This Recipe Is For
This recipe is for the home cook who wants a reliable weeknight meal without guesswork. If you value clear instructions and repeatable results, this method will feel comfortable and trustworthy.
It works well for beginners because the steps are straightforward, but it also satisfies experienced cooks who appreciate why certain techniques matter. Nothing here is trendy or decorative. It is simply good cooking.
If chicken breasts have disappointed you in the past by turning dry or bland, this recipe addresses those exact problems. The process is built to prevent them before they happen.
Why This Recipe Works
Chicken breasts are naturally lean, which means they need both moisture management and controlled heat. This recipe uses oil for seasoning adhesion and butter for cooking, creating a balance between flavor development and protection against dryness.
The cross-hatch cuts increase surface area, allowing seasoning and heat to penetrate evenly. This small structural change makes the difference between flavor sitting on the outside and flavor being carried throughout the meat.
Lemon zest provides aromatic oils, while lemon juice adds acidity at the end of cooking to keep it fresh rather than sharp. Garlic is added late to prevent scorching, ensuring it rounds out the sauce instead of turning bitter.
The overall ratio is designed to create a light coating rather than a heavy sauce. You get clarity of flavor, not coverage.
Ingredients Needed for the Recipe
- Boneless skinless chicken breasts – the primary protein, chosen for their lean structure and ability to absorb flavor when properly prepared.
- Extra virgin olive oil – helps distribute seasoning evenly and prevents the surface from drying during the initial cooking phase.
- Fresh parsley – adds freshness and mild herbal contrast that keeps the dish from tasting flat.
- Italian seasoning – provides a balanced herb base that supports both the lemon and garlic without overpowering them.
- Lemon zest – delivers concentrated citrus oils that carry aroma into the chicken itself.
- Kosher salt – enhances natural flavor while aiding in moisture retention.
- Black pepper – adds gentle heat and depth rather than spice.
- Unsalted butter – creates browning, richness, and the foundation of the pan sauce.
- Fresh lemon juice – brightens the finished dish and deglazes the pan.
- Minced garlic – gives savory warmth and rounds out the acidity.
- Additional parsley for garnish – reinforces freshness at the end and adds visual contrast.
Ingredient Insights and Function
Pounding the chicken to an even thickness is not just about appearance. It ensures the meat cooks at the same rate, preventing the thinner edges from drying out before the center is done.
If substituting chicken thighs, expect a longer cook time and a slightly richer flavor due to higher fat content. The method remains the same, but temperature monitoring becomes more important.
Dried parsley can be used in place of fresh, though the flavor will be less vibrant. Fresh herbs release moisture and aroma that dried versions cannot fully replicate.
Bottled lemon juice is not recommended here. Fresh juice contains volatile compounds that provide brightness, while bottled versions tend to taste flat and overly acidic.
Using salted butter may push the seasoning too far, especially since the sauce reduces slightly. Unsalted butter allows control over the final balance.
How to make Lemon Garlic Chicken?
Step 1 – Prepare the Chicken
Pat the chicken dry thoroughly so the seasoning adheres properly. Make shallow cross-hatch cuts on one side, being careful not to slice through the meat.
This step allows heat and seasoning to travel inward, creating even flavor distribution. Skipping it will result in a seasoned exterior but bland interior.
Step 2 – Build the Seasoning Mixture
Combine olive oil, parsley, Italian seasoning, lemon zest, salt, and pepper in a small bowl. Stir until the mixture forms a loose paste.
The oil acts as a carrier for the herbs and zest, helping them coat the chicken evenly. You should see specks of seasoning suspended throughout the mixture.
Step 3 – Season Thoroughly
Rub the mixture over each chicken breast, pressing it into the cross-hatch cuts. Take a moment to ensure every surface is coated.
This is where flavor layering begins, not just surface seasoning. Proper coverage ensures consistency after cooking.
Step 4 – Start Cooking in Butter
Melt butter in a large skillet over medium heat until it begins to foam gently. Place the chicken cross-hatch side up into the pan.
The moderate heat allows browning without burning the butter. You should hear a steady sizzle, not aggressive frying.
Step 5 – Baste and Develop Flavor
Cook for about five minutes, occasionally spooning butter over the chicken. This basting promotes even cooking and adds richness.
Turn the chicken and repeat, watching for a golden surface rather than a dark crust. The goal is controlled caramelization.
Step 6 – Finish with Lemon and Garlic
Flip the chicken again so the cut side faces up, then add lemon juice and minced garlic to the pan. Let it cook for another two minutes.
This timing prevents the garlic from burning while allowing the lemon to loosen browned bits. The result is a light, cohesive sauce.
Step 7 – Check for Doneness
Ensure the internal temperature reaches 165°F before removing from heat. The chicken should feel firm yet still spring slightly when pressed.
Rest the chicken briefly to allow juices to redistribute. This small pause makes a noticeable difference in texture.
Step 8 – Garnish and Serve
Sprinkle with fresh parsley just before serving. The herb adds a final layer of freshness that keeps the dish balanced.
Serve immediately while the sauce is still fluid and aromatic. This is when the flavors are most defined.
How I Tested and Refined This Recipe
The first version I tested used high heat to speed up cooking, which resulted in uneven browning and a slightly tough texture. Lowering the heat created a more controlled environment and improved tenderness.
I also experimented with adding garlic earlier in the process. That batch developed bitterness, confirming that garlic needs to be added near the end to maintain sweetness.
Adjusting the ratio of lemon juice to butter was another key change. Too much acid overwhelmed the dish, while too little made it feel heavy.
The final version balances brightness with richness and uses timing rather than additional ingredients to build flavor. That restraint is what makes it repeatable.
Common Mistakes and How to Avoid Them
- Cooking over heat that is too high, which causes butter to burn and chicken to seize.
- Skipping the step of pounding the chicken, leading to uneven doneness.
- Adding garlic too early and ending up with a bitter sauce.
- Not drying the chicken before seasoning, which prevents proper browning.
- Overcooking past 165°F, resulting in dry texture.
- Using bottled lemon juice, which dulls the overall flavor.
Make-Ahead, Storage, and Freezing Guidance
This chicken can be stored in an airtight container in the refrigerator for up to four days. The flavor holds well, though the sauce will absorb slightly into the meat over time.
For reheating, use a skillet over low heat with a small splash of water or broth. This helps restore moisture without overcooking.
Freezing is possible, but the texture will firm slightly after thawing. Wrap tightly and freeze for up to two months for best quality.
Leftovers are especially good sliced and added to salads or grain bowls, where the lemon and garlic continue to complement other ingredients.
Tips
- Use a heavy skillet to maintain consistent heat.
- Zest the lemon before juicing to make preparation easier.
- Let the chicken rest after cooking to retain moisture.
- Do not overcrowd the pan, or the chicken will steam instead of brown.
- Taste the sauce before serving and adjust salt if needed.
- Slice against the grain when serving for the most tender bite.
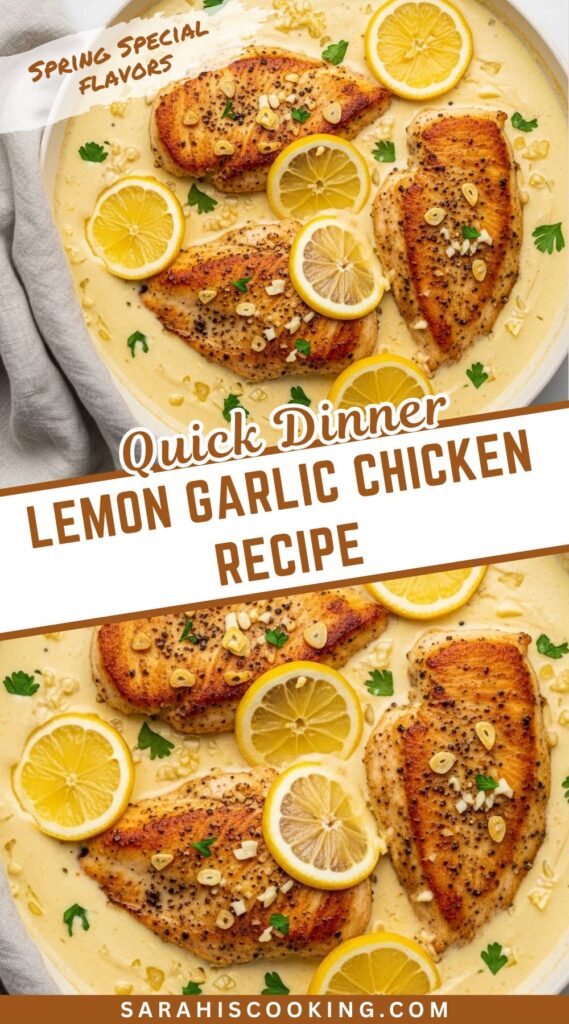
Lemon Garlic Chicken Recipe
Description
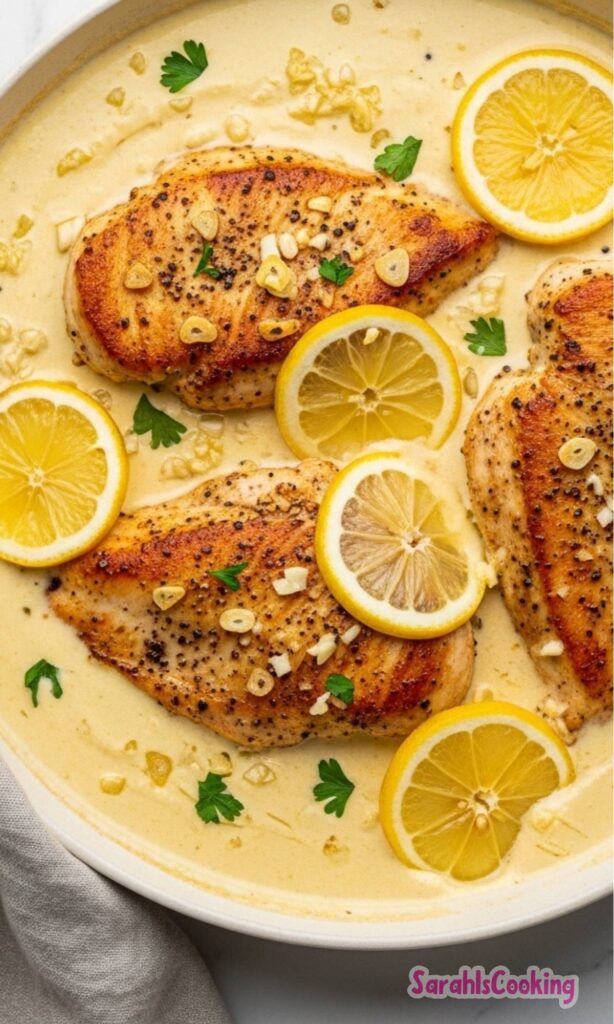
Lemon Garlic Chicken features chicken breasts flavored with a vibrant blend of fresh parsley, Italian seasoning, and lemon zest, then pan-fried in butter with aromatic garlic and bright lemon juice. It's an easy yet delicious way to serve tender, flavorful chicken that the entire family will love—and you can have dinner on the table in about 30 minutes! Perfect for busy weeknights or when you want a fresh, zesty meal without the fuss.
ingredients
Instructions
- Pat chicken dry with a paper towel. Use a sharp knife to make 4-5 cross-hatch cuts on one side of each chicken breast, ensuring not to cut all the way through.This allows seasonings to infuse deeply for maximum flavor
- In a small bowl, combine olive oil, parsley, Italian seasoning, lemon zest, salt, and pepper.
- Rub the seasoning mixture evenly into each chicken breast, making sure to season between the cross-hatch cuts as well.
- To a large non-stick skillet over medium heat, add butter. Once the butter has melted, add chicken, cross-hatch side up, and cook for 5 minutes, basting with the butter every few minutes.Basting helps create a golden, flavorful crust
- Flip chicken and repeat on the opposite side, cooking until the chicken reaches an internal temperature of 165°F (74°C).Cooking time may vary depending on thickness of breasts
- Flip the chicken over, cross-hatch side up. Add lemon juice and minced garlic to the pan. Continue cooking for an additional 2 minutes, allowing the garlic to cook and the sauce to combine.Don't let garlic burn—keep heat at medium
- Garnish with fresh chopped parsley and serve immediately.Pairs wonderfully with roasted vegetables, mashed potatoes, or a crisp salad
Nutrition Facts
Servings 4
Serving Size 1 chicken breast
- Amount Per Serving
- Calories 201kcal
- % Daily Value *
- Total Fat 4gg7%
- Saturated Fat 2gg10%
- Trans Fat 0gg
- Cholesterol 70mgmg24%
- Sodium 450mgmg19%
- Potassium 350mgmg10%
- Total Carbohydrate 2gg1%
- Dietary Fiber 0gg0%
- Sugars 1gg
- Protein 26gg52%
- Calcium 20mg mg
- Iron 1mg mg
* Percent Daily Values are based on a 2,000 calorie diet. Your daily value may be higher or lower depending on your calorie needs.
Note
- Even cooking tip: Pound chicken breasts to uniform thickness so they cook evenly and stay juicy.
- Make it dairy-free: Substitute butter with additional olive oil or a dairy-free butter alternative.
- Extra lemony: Add a splash more fresh lemon juice at the end for an extra bright finish.
- Leftovers: Store cooled chicken in an airtight container in the refrigerator for up to 3-4 days. Reheat gently or slice cold over salads for added protein.