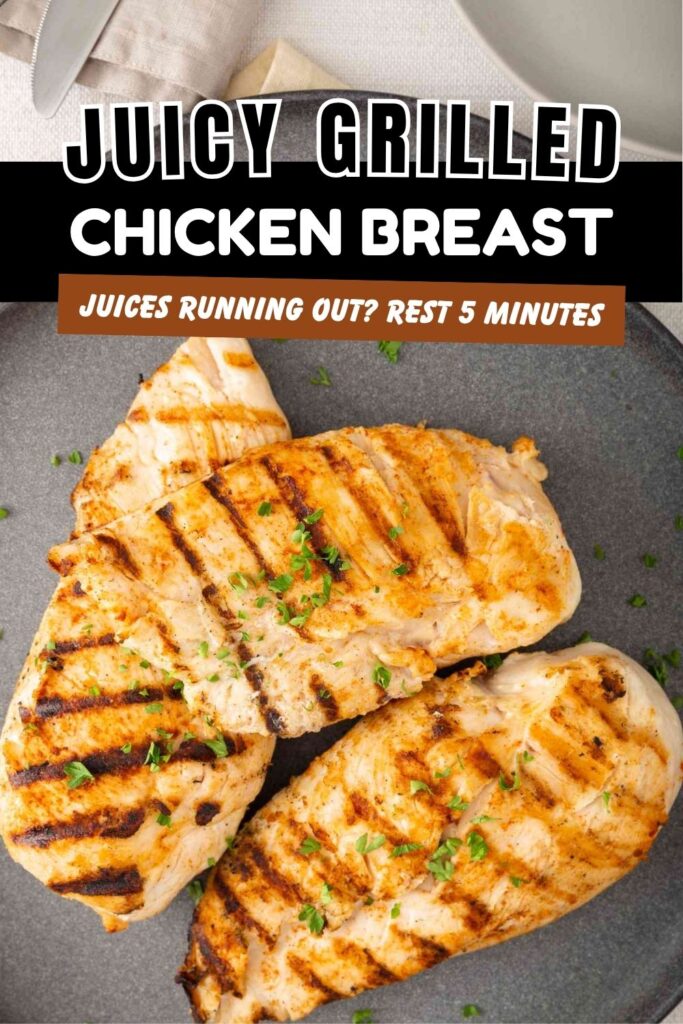
Juicy grilled chicken breast made foolproof with a simple brine, even cooking, and precise timing for tender, flavorful results every time.
Grilled chicken breast should be juicy, flavorful, and dependable. When done right, it becomes a go-to protein that fits into everything from quick dinners to meal prep without losing quality.
I approach this recipe with the same precision I use in baking. Small details matter, and once you control them, you get consistent results every single time.
This method removes the guesswork. A simple brine, even thickness, and controlled grilling work together to produce chicken that stays tender instead of drying out.
Ingredients Needed for the Recipe
- Boneless, skinless chicken breasts – the primary protein, lean and prone to drying out, which makes preparation technique essential for moisture retention.
- Kosher salt – dissolves into the brine and penetrates the meat, improving internal seasoning and helping retain moisture during cooking.
- Granulated sugar – balances the salt in the brine and subtly enhances browning on the grill without making the chicken taste sweet.
- Olive oil – lightly coats the surface to promote even heat transfer and prevent sticking while encouraging a clean sear.
- Garlic – infuses the brine with a mild aromatic base that enhances flavor without overpowering the chicken.
- Water – acts as the carrier for the salt and sugar, allowing the brine to evenly distribute seasoning throughout the meat.
How to make Juicy Grilled Chicken Breast?
Step 1 – Prepare the Brine
Combine cool water with kosher salt, granulated sugar, and crushed garlic until fully dissolved. The solution should taste lightly salty but not harsh.
This balance is important. Too much salt overwhelms the meat, while too little will not effectively retain moisture during grilling.
Step 2 – Pound the Chicken Evenly
Place the chicken breasts between two sheets of parchment or plastic and gently pound them to an even thickness. Aim for uniformity rather than thinness.
Uneven pieces cook at different rates, which leads to dry edges and undercooked centers. This step eliminates that problem before it starts.
Step 3 – Brine the Chicken
Submerge the chicken fully in the brine and refrigerate for at least 1 hour. This allows the salt to penetrate and restructure the protein fibers.
You will notice a slight firming of the meat after brining. That is a good sign and means it will hold onto moisture during cooking.
Step 4 – Preheat the Grill
Heat your grill to medium-high. The grates should be hot enough that a drop of water sizzles immediately on contact.
Temperature control is critical here. Too hot and the exterior burns before the inside cooks, too low and you lose the sear that locks in juices.
Step 5 – Dry and Oil the Chicken
Remove the chicken from the brine and pat it completely dry. Excess moisture will interfere with proper browning.
Lightly coat each piece with olive oil. This ensures even contact with the grill and prevents sticking without making the surface greasy.
Step 6 – Grill the Chicken
Place the chicken on the grill and cook for 4 to 7 minutes per side. Do not move it too early or you risk tearing the surface.
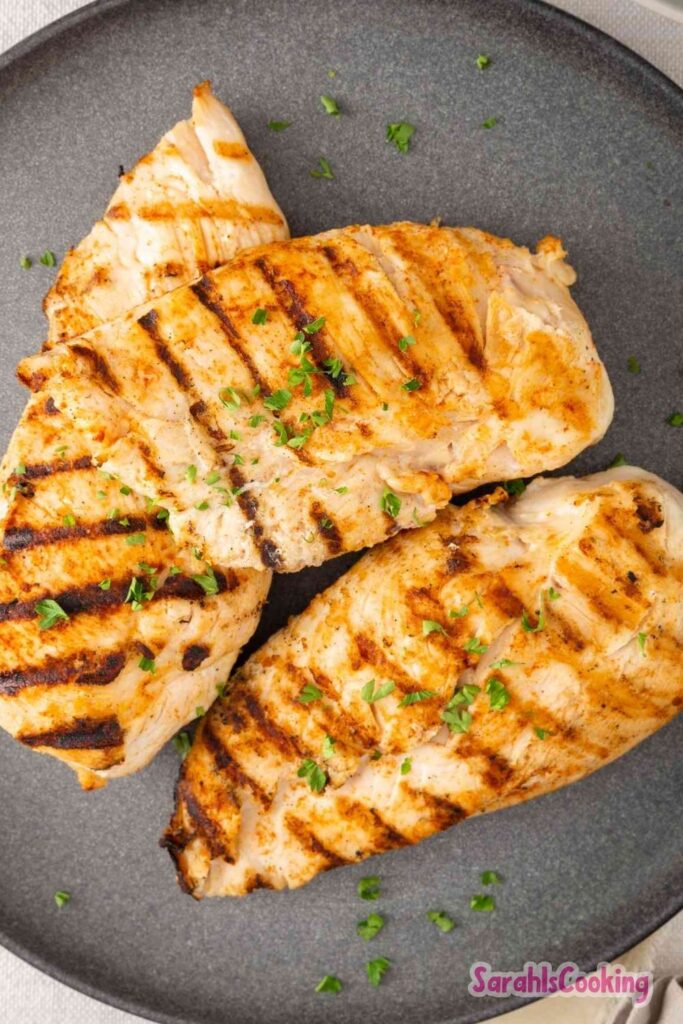
Look for clear grill marks and a slight release from the grates before flipping. The internal temperature should approach 165°F at the thickest point.
Step 7 – Rest Before Serving
Transfer the chicken to a plate and let it rest for 5 minutes. This allows the juices to redistribute evenly throughout the meat.
Cutting too soon causes those juices to run out, leaving the chicken dry despite proper cooking.
Why This Recipe Works
The brining step is the foundation of this method. Salt alters the protein structure in the chicken, allowing it to retain more moisture during high-heat cooking.
Adding a small amount of sugar balances the salinity and contributes to better surface browning. This creates a more appealing texture without relying on heavy seasoning.
Pounding the chicken ensures uniform thickness, which eliminates uneven cooking. This is one of the most overlooked steps but has the biggest impact on consistency.
Controlled grill temperature allows the exterior to develop color while the interior cooks through gently. The combination of heat and timing is what keeps the chicken tender.
How I Tested and Refined This Recipe
I started with unbrined chicken and immediately ran into the usual issue. The exterior looked perfect, but the inside was dry and inconsistent.
From there, I tested multiple brine ratios. Too much salt made the texture slightly firm in an unpleasant way, while too little had no noticeable effect.
Time in the brine also mattered. Short soaks under 30 minutes did not penetrate enough, while overly long brines started to affect texture negatively.
I adjusted grill temperatures next. High heat alone caused rapid surface browning without proper internal cooking, especially on thicker cuts.
Pounding the chicken became a turning point. Once I standardized thickness, the cooking time stabilized and results became predictable.
The final version reflects all of those adjustments. It is simple, but each step is intentional and directly tied to the final texture and flavor.
Common Mistakes and How to Avoid Them
- Skipping the brine – leads to dry, under-seasoned chicken that cannot be corrected after cooking.
- Over-brining – causes an overly firm or slightly spongy texture that feels unnatural.
- Not pounding the chicken – results in uneven cooking with dry edges and undercooked centers.
- Grilling over excessively high heat – burns the outside before the inside reaches a safe temperature.
- Moving the chicken too early – prevents proper sear formation and can tear the surface.
- Cutting immediately after cooking – releases juices and leaves the meat dry.
- Not drying the chicken before grilling – creates steam instead of sear, reducing flavor and texture.
Make-Ahead, Storage, and Freezing Guidance
Cooked grilled chicken breast stores well in the refrigerator for up to 4 days when kept in an airtight container. It maintains flavor but gradually loses some surface texture.
For best results, slice only what you plan to eat immediately. Keeping the pieces whole helps retain moisture during storage.
This chicken freezes well if tightly wrapped. Thaw in the refrigerator overnight to preserve texture and avoid excess moisture loss.
Reheat gently in a covered pan or microwave with a small splash of water. High heat during reheating can quickly dry it out.
Tips
- Use a meat thermometer to remove guesswork and ensure precise doneness.
- Let the grill fully preheat before adding the chicken for better searing.
- Do not overcrowd the grill, as it lowers the temperature and creates uneven cooking.
- Rest the chicken on a warm plate to maintain temperature without overcooking.
- Brush the grill grates lightly with oil to reduce sticking.
- Slice against the grain for a more tender bite.
- Keep seasoning simple after brining to avoid overpowering the natural flavor.
Juicy Grilled Chicken Breast Recipe
Description
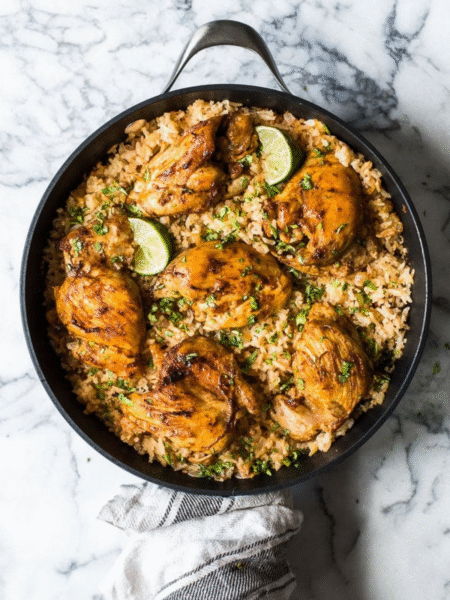
Of all the ways to cook chicken breast, there’s no method I love more than grilling. A well-seasoned, juicy chicken breast partnered with a simple summer side dish is the perfect easy dinner for busy parents. Leftover grilled chicken breast will never go to waste either: It can be used to turn any salad into a meal, or even assembled into a great chicken sandwich.
If you’ve been plagued by dry, lackluster grilled chicken breast in the past, this is the foolproof method you need that gives you tender, super juicy, flavorful grilled chicken breast every single time. The secret is a simple wet brine, which means soaking the chicken in a mixture of cool water, salt, and a little bit of sugar. This locks in the moisture and seasons it from the inside out.
Ingredients
For the Brine
For the Chicken
Instructions
Prepare the Brine
In a large bowl or container, whisk together the cold water, kosher salt, sugar, and smashed garlic until the salt and sugar are completely dissolved.Prep the Chicken
Place the chicken breasts between two sheets of plastic wrap or in a zip-top bag. Using a meat mallet or rolling pin, pound the thicker end of the breasts until they are an even thickness (about ¾ inch). This ensures even cooking.Brine the Chicken
Submerge the chicken breasts in the brine. Cover and refrigerate for at least 1 hour, but no longer than 4 hours. Remove from brine and pat very dry with paper towels.Season and Grill
Preheat your grill to medium-high heat (approx. 400°F/200°C). Brush the chicken lightly with olive oil and season with black pepper and paprika. Place chicken on the grill. Cook for 4–7 minutes per side, depending on thickness, until the internal temperature reaches 165°F (74°C).Rest and Serve
Transfer the chicken to a clean plate or cutting board. Tent loosely with foil and let rest for 5 minutes before slicing or serving. This allows the juices to redistribute throughout the meat.
Nutrition Facts
Servings 4
Serving Size 1 breast
- Amount Per Serving
- Calories 285kcal
- % Daily Value *
- Total Fat 10g16%
- Saturated Fat 2g10%
- Cholesterol 95mg32%
- Sodium 580mg25%
- Potassium 450mg13%
- Total Carbohydrate 2g1%
- Sugars 2g
- Protein 45g90%
* Percent Daily Values are based on a 2,000 calorie diet. Your daily value may be higher or lower depending on your calorie needs.
Note
Storage: Refrigerate leftovers in an airtight container for up to 4 days. Reheat gently to avoid drying out.