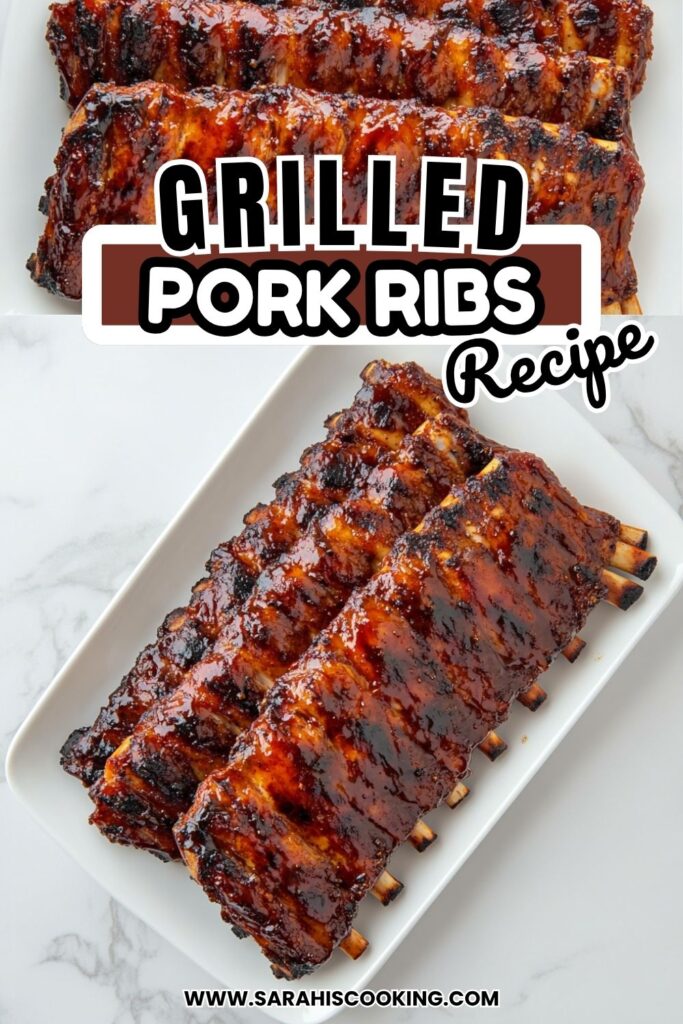
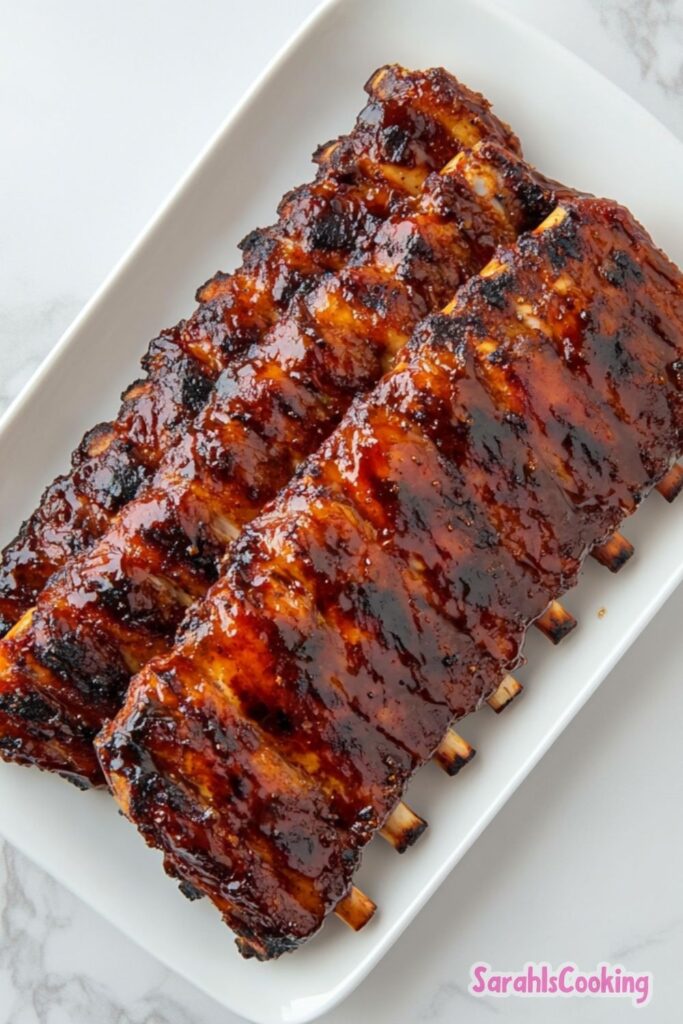
Tender grilled ribs with a flavorful dry rub and sweet tangy BBQ glaze, cooked low and slow for perfect texture and reliable results every time.
Grilled ribs should feel approachable, not like a project reserved for professionals. This method delivers tender, fall-off-the-bone ribs with a balanced sweet and tangy finish, all on a standard grill.
I’ve made this recipe enough times to trust it. It doesn’t rely on guesswork or complicated steps, just controlled heat, a well-structured dry rub, and timing that actually works in a home kitchen.
The result is consistent. You get deeply seasoned meat, a caramelized exterior, and that unmistakable backyard barbecue flavor without hours of smoking or special equipment.
Ingredients Needed for the Recipe
- Pork ribs (2 racks) – The base of the recipe; the fat and connective tissue break down during grilling, creating tenderness and rich flavor.
- Cumin (1 tablespoon) – Adds earthy depth that anchors the spice blend and enhances the meat’s natural savoriness.
- Smoked paprika (1 tablespoon) – Brings subtle smokiness and color, reinforcing that grilled flavor even on a gas grill.
- Garlic powder (1 tablespoon) – Provides a consistent savory note that distributes evenly across the ribs.
- Onion powder (1 tablespoon) – Adds sweetness and body to the rub, helping balance stronger spices.
- Brown sugar (2 tablespoons) – Crucial for caramelization; it melts into the meat and forms a lightly sticky crust.
- Salt (2 tablespoons) – Enhances flavor and helps draw moisture into the meat for better texture.
- Black pepper (1 teaspoon) – Adds mild heat and sharpness without overpowering the rub.
- Cayenne pepper (1 teaspoon) – Introduces controlled heat that lingers but doesn’t dominate.
- Sweet and tangy barbecue sauce – Provides the finishing glaze; its sugars caramelize while the acidity cuts through the richness.
How to make Grilled Ribs?
Step 1 – Preheat the Grill
Set your grill to low heat and allow it to preheat for about 15 minutes. This ensures even cooking and prevents hot spots that can burn the exterior too quickly.
If using charcoal, give yourself extra time so the heat stabilizes. You’re aiming for steady, indirect heat rather than intense flames.
Step 2 – Bring the Ribs to Room Temperature
Take the ribs out of the refrigerator and let them sit for 15 minutes. This reduces the temperature shock when they hit the grill.
Cold meat placed directly on heat tends to cook unevenly. This short rest helps the ribs cook more consistently from edge to center.
Step 3 – Remove the Membrane
Flip the ribs bone-side up and locate the thin membrane along the back. Gently lift one edge and pull it off in one piece.
Removing this layer is essential. It prevents toughness and allows the seasoning to penetrate properly.
Step 4 – Prepare and Apply the Dry Rub
Mix all dry rub ingredients in a bowl until evenly combined. Sprinkle the mixture over the ribs, then press it into the surface.
Coat both sides thoroughly. The rub should form a visible layer, not just a light dusting.
Step 5 – Start Grilling Meat Side Down
Place the ribs on the grill with the meat side down. Close the lid and let them cook undisturbed for about 45 minutes.
This stage builds the foundation of flavor. Avoid opening the grill too often, as it releases heat and interrupts the cooking process.
Step 6 – Add Sauce and Flip
After 45 minutes, brush the ribs generously with barbecue sauce. Flip them over and coat the other side.
The sauce should be applied thickly enough to create a glossy layer. This is where the caramelization begins.
Step 7 – Finish Cooking Bone Side Down
Continue grilling the ribs bone side down for another 10 to 15 minutes. The sauce will bubble slightly and begin to set.
Look for a sticky, lacquered surface. Avoid letting the sauce burn by keeping the heat low and controlled.
Step 8 – Rest the Ribs
Remove the ribs from the grill and loosely cover them with foil. Let them rest for 10 to 15 minutes.
This step allows juices to redistribute, keeping the meat moist and tender when sliced.
Step 9 – Slice and Serve
Cut the ribs into sections of one or two bones. Serve warm with extra barbecue sauce on the side.
The meat should pull away easily from the bone, with a tender but structured texture rather than mushy softness.
Why This Recipe Works
The balance of dry heat and moisture is what makes this method effective. Cooking low and slow allows the connective tissue in the ribs to break down without drying out the meat.
The dry rub is intentionally structured. Salt penetrates early, sugar caramelizes later, and spices layer flavor without overwhelming the meat.
Adding the sauce at the end prevents burning. The sugars in barbecue sauce can scorch quickly, so finishing with it ensures a glossy, controlled glaze instead of a bitter crust.
How I Tested and Refined This Recipe
My first attempts leaned too heavily on high heat. The ribs browned quickly but stayed tough inside, which made it clear that lower heat and longer cooking were necessary.
I also experimented with applying the sauce earlier. It consistently burned before the ribs were tender, which led me to shift the timing toward the final stage.
Adjusting the dry rub took a few rounds. Too much sugar caused uneven caramelization, while too little left the ribs lacking depth. The final ratio strikes a balance between sweetness, spice, and structure.
I tested both bone-side-down and meat-side-down starts. Beginning with the meat side down gave better initial browning and a more developed flavor layer.
Common Mistakes and How to Avoid Them
- Cooking over high heat – This leads to burnt exteriors and undercooked interiors. Always keep the grill on low.
- Skipping membrane removal – Leaving it on results in chewy, unpleasant texture.
- Opening the grill too often – Heat loss slows cooking and affects consistency.
- Applying sauce too early – Causes burning instead of proper caramelization.
- Not resting the ribs – Juices escape too quickly, leaving the meat dry.
- Under-seasoning the rub – Leads to bland ribs with no depth of flavor.
Make-Ahead, Storage, and Freezing Guidance
Cooked ribs can be stored in the refrigerator for up to 4 days. Keep them tightly wrapped or in an airtight container to prevent drying out.
The texture remains stable for the first couple of days, though the exterior may soften slightly as it absorbs moisture.
For freezing, wrap the ribs well and store for up to 2 months. Thaw overnight in the refrigerator before reheating.
Reheat in the oven at a low temperature, covered with foil. This preserves moisture and prevents the sauce from burning.
Tips
- Use indirect heat zones if your grill allows it for better control.
- Let the rub sit on the ribs for a few minutes before grilling for better adhesion.
- Keep a small bowl of extra sauce nearby for layering during the final stage.
- Check doneness by gently twisting a bone – it should move slightly but not fall out.
- Clean the grill grates before cooking to prevent sticking and off flavors.
Grilled Ribs Recipe
Description
Experience the ultimate summer classic with these fall-off-the-bone Grilled Ribs. Coated in a perfectly balanced sweet and spicy dry rub and finished with a generous glaze of homemade sweet and tangy barbecue sauce, these pork ribs are a backyard barbecue staple. Easy to prepare and bursting with smoky, savory flavor, they are sure to impress your guests without the need for a smoker.
Ingredients
Dry Rub
Ribs & Sauce
Instructions
Prepare the Dry Rub
In a small bowl, combine the cumin, smoked paprika, garlic powder, onion powder, brown sugar, salt, black pepper, and cayenne pepper. Mix thoroughly until well blended.Prep the Ribs
Remove the ribs from the refrigerator about 15 minutes before grilling to take the chill off. Remove the membrane from the back of the ribs by sliding a knife under it, lifting it up, and pulling it off with a paper towel for grip. Discard the membrane.Season the Meat
Pat the ribs dry with paper towels. Using one hand to sprinkle and the other to rub (to keep your spice mix dry), coat both sides of the ribs generously with the dry rub mixture.Preheat the Grill
Preheat your grill to low heat (around 250°F - 275°F / 120°C - 135°C). Allow it to heat up for at least 15 minutes. Clean and oil the grates.Grill the Ribs
Place the ribs on the grill meat-side down. Cover the grill and cook for 45 minutes. Avoid opening the lid frequently to maintain consistent heat.Sauce and Finish
After 45 minutes, brush the top of the ribs generously with barbecue sauce. Flip the ribs over so they are bone-side down. Brush the other side with more barbecue sauce. Cook for an additional 10-15 minutes, or until the sauce is caramelized and sticky.Internal temperature should reach 190°F-203°F (88°C-95°C) for tender meat.Rest and Serve
Remove the ribs from the grill and place them on a large sheet of aluminum foil. Loosely cover and let them rest for 10-15 minutes. This allows the juices to redistribute. Slice into individual ribs or sections and serve with extra sauce on the side.
Nutrition Facts
Servings 4
Serving Size 1/4 of recipe
- Amount Per Serving
- Calories 420kcal
- % Daily Value *
- Total Fat 28g44%
- Saturated Fat 10g50%
- Cholesterol 85mg29%
- Sodium 1200mg50%
- Potassium 450mg13%
- Total Carbohydrate 18g6%
- Dietary Fiber 1g4%
- Sugars 14g
- Protein 26g52%
* Percent Daily Values are based on a 2,000 calorie diet. Your daily value may be higher or lower depending on your calorie needs.
Note
For best results, use baby back ribs. If using spare ribs, increase cooking time by 15-20 minutes. You can also prep the ribs with the rub ahead of time and let them sit in the fridge for up to 24 hours for deeper flavor.