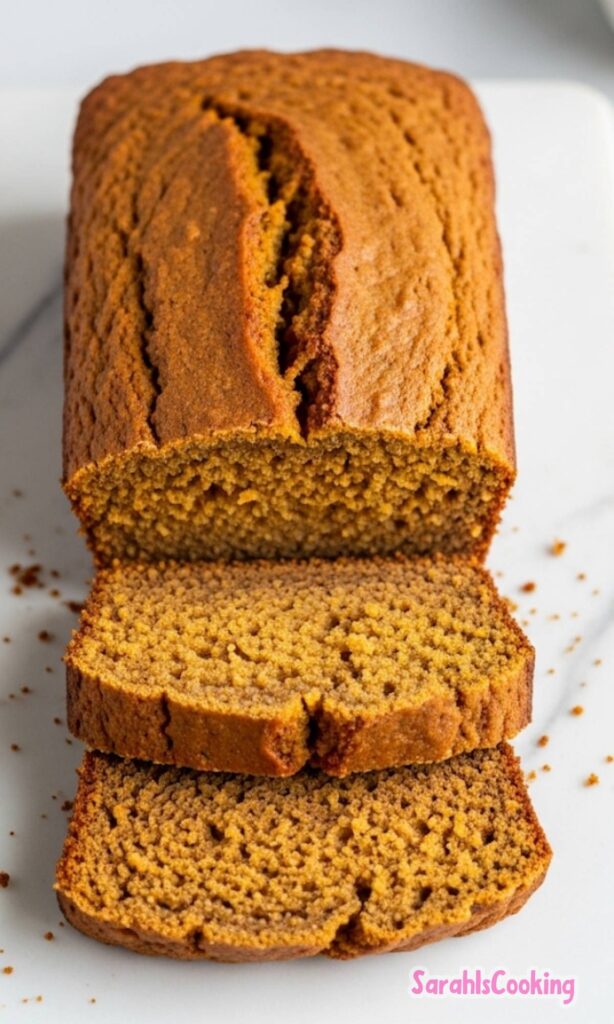
There’s something so comforting about a slice of pumpkin bread, especially when it’s still a bit warm from the oven. This version is my absolute favorite, and it just happens to be gluten free.
It’s incredibly soft and moist, packed with all those warm fall spices, and it has this delightful crunchy cinnamon-sugar top. I think you’re going to love how simple it is to make, too.
Ingredients Needed for the Recipe
Unsalted Butter (melted): This gives the bread its rich, tender crumb and lovely moisture.
Light Brown Soft Sugar: It adds a deep, caramel-like sweetness and helps keep the bread super soft.
Pumpkin Puree: The star of the show, it provides flavor, color, and a lot of that signature moist texture.
Eggs (room temperature): They help bind everything together and give the bread its structure.
Whole Milk (room temperature): This adds a bit more richness and helps bring the batter together smoothly.
Plain Gluten Free Flour Blend: The main flour base; using a good blend is key for the right texture.
Almond Flour: This adds a little extra fat and protein, which improves the crumb and keeps it from being dry.
Xanthan Gum: It acts as a binder, replacing the gluten and giving the bread a better, less crumbly texture.
Baking Powder & Baking Soda: These are our leaveners, working together to make the bread rise beautifully.
Salt: It balances all the sweetness and enhances the other flavors.
Spices (Cinnamon, Ginger, Nutmeg, Allspice): This warm, cozy blend is what gives the bread its classic fall flavor.
Granulated Sugar & Cinnamon (for topping): This simple mix creates that irresistible crunchy crust on top.
Why This Pumpkin Bread Stays So Moist
Gluten free baking can sometimes lean towards the dry side, but this bread is the complete opposite. It stays wonderfully moist for days.
The combination of pumpkin puree and brown sugar locks in a lot of moisture. They work together to create a soft, almost velvety texture that I just adore.
Adding a bit of almond flour also helps, as it introduces more natural oils into the mix. It’s a simple trick that makes a world of difference in the final result.
How to Make The Best Gluten Free Pumpkin Bread?
Step 1 – Prepare Your Pan and Oven
Start by moving your oven rack to the center and preheating your oven to 350°F (180°C). Then, carefully line a 2lb loaf tin with some parchment paper.
Taking this extra minute to line the pan ensures your bread will come out cleanly and easily after baking. It’s a small step that saves a lot of hassle later.
Step 2 – Combine the Butter and Sugar
In a large mixing bowl, whisk together the melted butter and light brown sugar. You’ll want to keep whisking until the mixture looks paler in color and feels smooth.
This step isn’t just about mixing; you’re actually dissolving the sugar into the butter a little, which helps create a more even texture in the baked bread.
Step 3 – Add the Pumpkin Puree
Now, spoon in all of that pumpkin puree. Whisk it in until it’s fully incorporated and the mixture is a uniform, beautiful orange color.
This is where the flavor really starts to build, and the batter will begin to smell amazing already.
Step 4 – Incorporate the Eggs and Milk
Next, crack in the eggs and pour in the milk. Make sure they are at room temperature, as this helps them blend in seamlessly without solidifying the butter.
Whisk everything together until the batter looks smooth and well-emulsified. It should be lovely and pourable at this stage.
Step 5 – Add the Dry Ingredients
It’s time for the flour and spices. I like to sift my gluten free flour blend, almond flour, xanthan gum, baking powder, baking soda, salt, and all the spices right into the bowl.
Whisk everything together gently but thoroughly, just until you have a smooth batter with no visible pockets of flour. Be careful not to overmix here.
Step 6 – Transfer and Smooth the Batter
Pour the finished batter into your prepared loaf tin. Use a spatula or the back of a spoon to smooth out the top so it’s nice and even.
A smooth surface will help the cinnamon-sugar topping distribute evenly and promote a more controlled rise in the oven.
Step 7 – Add the Topping and Score
Mix the granulated sugar and cinnamon in a small bowl, then sprinkle it all over the surface of the batter. Now, here’s a little secret for a pretty loaf.
Take a toothpick or the tip of a sharp knife and draw a very shallow line, about 1 mm deep, right down the center of the batter. This guides the crack that forms as it bakes.
Step 8 – Bake to Perfection
Place the loaf in the preheated oven and bake for about 1 hour and 20 to 25 minutes. The bread is done when it’s golden, well-risen, and a toothpick inserted in the center comes out clean.
If the top is getting too dark before the middle is cooked, just tent a piece of aluminum foil over the top, shiny side up, to protect it.
Step 9 – Cool Completely
Let the bread cool in the tin for about 5 to 10 minutes after you take it out of the oven. This allows it to set a bit so it doesn’t fall apart.
Then, carefully lift it out using the parchment paper and transfer it to a wire rack to cool completely. I know it’s hard to wait, but it’s worth it for the perfect texture.
Tips for the Perfect Loaf
For the best results, use a kitchen scale to measure your ingredients. Gluten free flours can be tricky to measure by volume, and accuracy really matters here.
Make sure your eggs and milk are at room temperature. This helps them blend smoothly into the batter and supports a better rise during baking.
Don’t skip the step of scoring the top of the batter. It’s a simple trick that gives you a beautiful, controlled crack down the center of the loaf.
If you find your loaf is browning too quickly, don’t hesitate to loosely cover it with foil partway through the baking time. This prevents the top from burning.
Allow the bread to cool almost completely before slicing. It continues to set as it cools, and slicing it too soon can make it seem gummy.
Fun Variations to Try
While I love this recipe just as it is, it’s also a wonderful base for adding your own personal touch. You can easily mix in a handful of your favorite ingredients.
A half cup of chocolate chips, either semi-sweet or dark, is a classic and always popular addition. Just fold them in gently at the end, right before you transfer the batter to the pan.
If you’re a fan of nuts, toasted pecans or walnuts would be absolutely delicious. Chop them roughly and fold in about three-quarters of a cup for a lovely crunch in every bite.
Storing Your Pumpkin Bread
Once your pumpkin bread has cooled completely, the best way to store it is in an airtight container. I just leave mine right on the counter in a cool, dry spot.
It will stay perfectly soft and moist for about 3 to 4 days this way. The crust will soften a bit, which I actually really enjoy.
If you’d like to keep it for longer, you can wrap it tightly and freeze it for up to two months. Just thaw it at room temperature whenever a slice sounds good.
I truly hope this recipe becomes a cherished part of your fall baking routine. It’s a simple joy that fills the kitchen with the most wonderful aroma.
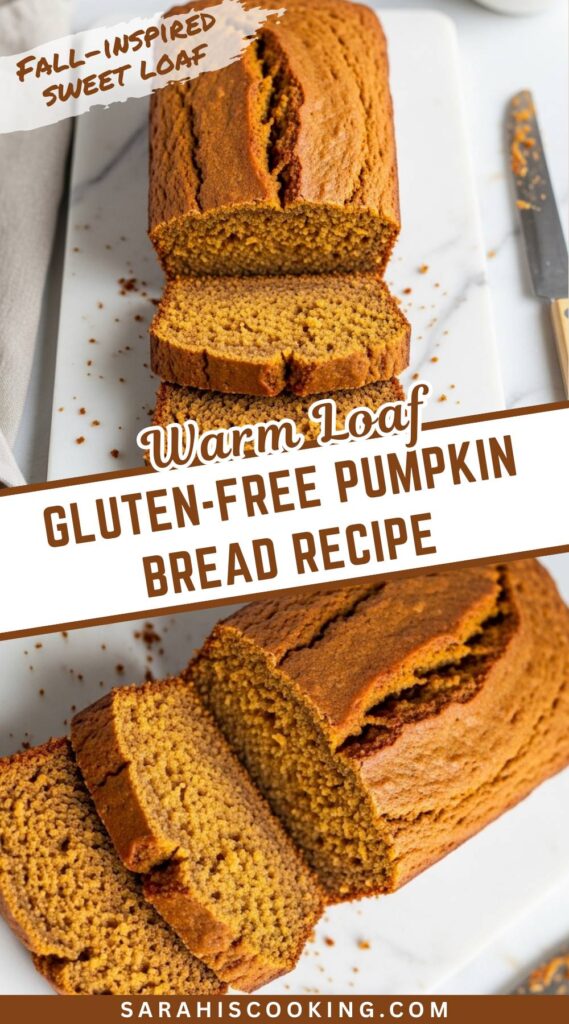
This gluten free pumpkin bread is perfectly soft and moist, packed full of pumpkin puree and fall spices, and finished with a deliciously crunchy cinnamon-sugar crust. It’s incredibly easy to make and guaranteed to become one of your favourite fall desserts.
Ingredients
For gluten free pumpkin bread:
200g unsalted butter, melted ((1 ¾ sticks))
200g light brown soft sugar ((1 cup))
330g pumpkin puree ((1 ½ cups))
3 UK medium / US large eggs (room temperature)
80g whole milk ((⅓ cup), room temperature)
240g plain gluten free flour blend ((2 cups; ensure xanthan gum is added if not included))
50g almond flour ((½ cup))
0.5tsp xanthan gum (omit if your GF flour blend already contains it)
1.5tsp baking powder
1tsp baking soda
0.25tsp salt
2tsp ground cinnamon
1tsp ground ginger
0.5tsp ground nutmeg
0.25tsp ground allspice
For cinnamon-sugar mixture:
1.5tbsp granulated sugar
0.5tsp ground cinnamon
Instructions
1
Adjust the oven rack to the middle position, pre-heat the oven to 180°C (350°F) and line a 2 lb/900 g loaf baking tin with greaseproof/baking paper. (Dimensions: 8in/21cm long, 4in/11cm wide, 3in/7cm high.)
2
In a large bowl, whisk together the melted butter and sugar until pale.
3
Add the pumpkin puree and whisk well until combined.
4
Add the eggs and milk, and whisk well until combined.
5
Sift together the plain gluten free flour blend, almond flour, xanthan gum (if needed), baking powder, baking soda, salt and spices, and add them to the wet ingredients. Whisk or stir well until you get a smooth batter with no flour clumps.
6
Transfer the batter into the lined loaf tin and smooth out the top.
7
Mix together the granulated sugar and cinnamon for the cinnamon-sugar mixture, and sprinkle it evenly across the top.
8
Use a toothpick or sharp knife to draw a line (about 1 mm deep) lengthwise down the middle of the pumpkin bread batter – this will help control the cracking.
9
Bake in the pre-heated oven at 180°C (350°F) for about 1 hour 20 minutes – 1 hour 25 minutes, or until well risen, golden brown on top and an inserted toothpick/skewer comes out clean or with a few stray crumbs attached.
If the pumpkin bread starts browning too quickly, cover it with aluminium foil (shiny side up) and continue baking until done.
10
Once baked, allow it to cool in the tin for 5–10 minutes, then remove from the tin and allow to cool completely on a wire cooling rack. (Although it's rather wonderful still slightly warm.)
Nutrition Facts
Servings 10
Serving Size 1 slice
Amount Per Serving
Calories220kcal
% Daily Value *
Total Fat12g19%
Saturated Fat7g35%
Cholesterol80mg27%
Sodium260mg11%
Potassium180mg6%
Total Carbohydrate27g9%
Dietary Fiber2g8%
Sugars14g
Protein4g8%
Calcium 80 mg
Iron 1.5 mg
* Percent Daily Values are based on a 2,000 calorie diet. Your daily value may be higher or lower depending on your calorie needs.
Note
Storage: Keeps well in a closed container in a cool dry place for 3–4 days.
Add-ins: You can add chocolate chips or chopped nuts like pecans or walnuts for extra texture.
Crack control: Drawing a line down the center before baking helps guide the crack for a neater loaf.
Pin this recipe to share with your friends and followers.
Sarah
Food and Lifestyle Blogger
Hi, I’m Sarah, a home cook and baker who believes that good food doesn’t need to be complicated to be meaningful. This blog is where I share approachable, dependable recipes made with care — the kind of dishes you can come back to again and again.