Red velvet desserts can easily miss the mark. Too much color, not enough flavor, or a texture that feels more like a brownie than a cookie. These red velvet chocolate chip cookies were developed to avoid all of that. They bake up soft but structured, deeply chocolatey without being bitter, and visually striking without tasting artificial.
I tested this recipe multiple times with an eye toward consistency. The goal was a cookie that holds its shape, bakes evenly, and delivers the familiar red velvet flavor in a form that actually makes sense for a cookie. Not a novelty. Not a cake in disguise. A cookie you can rely on.
This is the kind of recipe I’d feel comfortable selling, gifting, or baking for a holiday tray where every cookie needs to perform the same way. It rewards careful measuring and attention, but it does not require professional equipment or shortcuts.
Who This Recipe Is For
This recipe is for bakers who like to understand why a cookie works, not just that it does. If you value predictable spread, clear visual cues, and a dough that behaves the same way every time, you’ll feel comfortable here.
It’s also well suited for bakers who enjoy seasonal baking but still want something grounded. These cookies are festive enough for Valentine’s Day, but restrained enough to bake any time you want something chocolate-forward and a little special.
If you’ve ever been disappointed by red velvet desserts that taste like food coloring or turn dry the next day, this recipe was written with you in mind.
Why This Recipe Works
Red velvet is fundamentally a balance of cocoa, fat, and acidity. In cookie form, that balance needs even more precision because there’s no frosting to cover flaws and no tall crumb to hide mistakes.
This dough uses cocoa powder for real chocolate flavor, but in a controlled amount so the cookies stay soft instead of crumbly. Brown sugar provides moisture and chew, while a small amount of granulated sugar helps the edges set without becoming crisp.
Chilling the dough is not optional here. It gives the flour time to hydrate, firms the butter, and ensures the cookies spread slowly in the oven. That slow spread is what creates a soft center with a slightly crackled surface.
Ingredients Needed for the Recipe
- All-purpose flour - Provides structure. Measuring accurately is important so the cookies hold their shape without becoming dense.
- Unsweetened cocoa powder - Gives the cookies their chocolate backbone. Too much cocoa would dry them out, so the amount is intentional.
- Baking soda - Helps the cookies spread and rise slightly, creating a soft interior.
- Salt - Balances sweetness and sharpens the chocolate flavor.
- Unsalted butter - Adds richness and controls moisture. Softened butter creams more evenly with the sugars.
- Brown sugar - Adds moisture, chew, and depth of flavor.
- Granulated sugar - Helps the cookies spread and lightly sets the edges.
- Egg - Binds the dough and contributes to structure.
- Milk - Adds moisture and supports the classic red velvet profile.
- Vanilla extract - Rounds out the chocolate and sugar flavors.
- Red food coloring - Provides the signature color without affecting texture when used correctly.
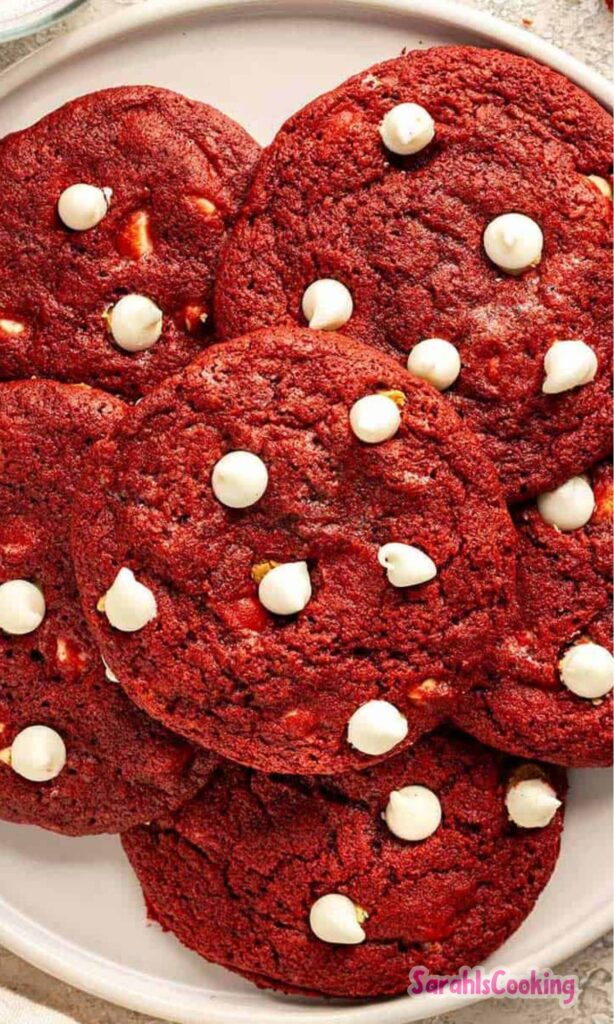
- Chocolate chips - Melt into the dough and provide pockets of sweetness. A mix of semi-sweet and white chocolate works well.
How to make Red Velvet Chocolate Chip Cookies?
Step 1 - Prepare the Dry Ingredients
Whisk the flour, cocoa powder, baking soda, and salt together in a medium bowl. This step ensures the cocoa is evenly distributed, which prevents streaking and uneven flavor later.
Take a moment to break up any cocoa clumps. Cocoa powder likes to hide pockets of bitterness if it isn’t fully blended.
Step 2 - Cream the Butter and Sugars
Cream the softened butter until smooth and lightened slightly. Add the brown sugar and granulated sugar and mix until fully combined.
You’re not looking for extreme fluffiness here. The mixture should look cohesive and creamy, not airy or whipped.
Step 3 - Add the Wet Ingredients
Mix in the egg, milk, and vanilla until smooth. Scrape down the bowl to ensure everything is incorporated evenly.
Add the red food coloring and mix just until the color is uniform. The dough should be deeply red but not glossy or wet.
Step 4 - Combine Wet and Dry Ingredients
Add the dry ingredients to the wet mixture and mix on low speed. Stop as soon as no dry flour remains.
Overmixing at this stage will tighten the dough and reduce spread, so restraint matters.
Step 5 - Fold in the Chocolate Chips
Fold in the chocolate chips gently. The dough will be thick but pliable.
If the dough feels sticky or loose, that is normal before chilling.
Step 6 - Chill the Dough
Cover the dough and refrigerate for at least one hour. This rest time is essential for texture and color development.
Skipping this step will result in cookies that spread too quickly and bake unevenly.
Step 7 - Shape and Bake
Scoop the chilled dough into even portions and roll gently into balls. Place them on lined baking sheets with enough space for spreading.
Bake until the edges are set and the centers still look soft. If needed, gently press the tops right after baking to encourage a crackled surface.
Visual and Texture Cues to Watch For
Before baking, the dough balls should hold their shape without sagging. If they flatten on the tray, the dough needs more chilling.
During baking, the cookies will spread and develop small cracks across the surface. The centers should look slightly underbaked when you remove them.
As they cool, the cookies will firm up around the edges while staying soft in the middle. This contrast is intentional and part of what makes them successful.
Common Mistakes and How to Fix Them
If the cookies spread too much, the butter was likely too warm or the dough wasn’t chilled long enough. Chilling longer almost always corrects this.
If the cookies taste dry, too much flour or cocoa powder is usually the cause. Spoon and level dry ingredients rather than scooping.
If the color looks dull or brownish, the cocoa may be overpowering the food coloring. Stick to the measured amount and use a quality red coloring.
Tips
- Weigh your flour if possible for the most consistent results.
- Use room temperature ingredients so the dough mixes evenly.
- Chill the dough fully before baking to control spread.
- Press a few extra chocolate chips into the tops right after baking for a polished look.
- Do not overbake. Slightly soft centers are the goal.
Substitutions and What to Expect
You can use all semi-sweet or all white chocolate chips, but the sweetness balance will change. White chocolate will make the cookies noticeably sweeter.
Gel food coloring is preferred, but liquid coloring works if measured carefully. Using too much liquid coloring can soften the dough.
Plant-based butter can work, but the cookies may spread more and lose some structure. If using it, chill the dough longer.
Make-Ahead, Storage, and Freezing
The dough can be made up to two days ahead and stored tightly covered in the refrigerator. Let it sit at room temperature for a few minutes if it becomes too firm to scoop.
Baked cookies keep well at room temperature for up to three days when stored in an airtight container. They remain soft but not fragile.
The dough balls freeze well. Freeze solid, then store in a freezer bag and bake directly from frozen with an extra minute added to the bake time.
Fully baked cookies can also be frozen, though the texture is best when frozen as dough.