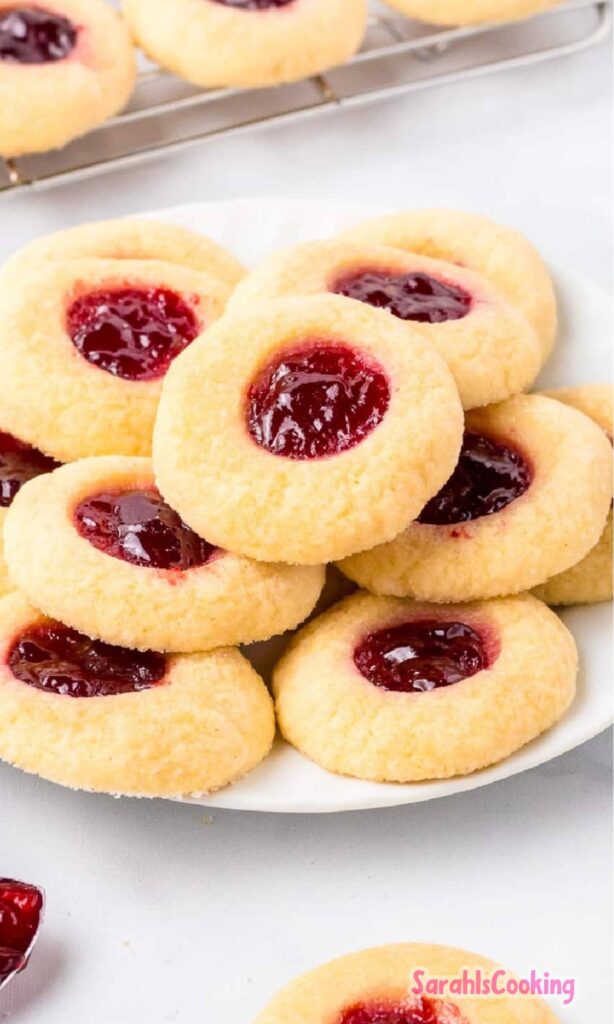
There are some cookies that quietly steal the show, and these raspberry thumbprint cookies are exactly that kind. They don’t shout for attention, but once they’re on the table, people keep circling back. One more. Then another.
I’ve been making these for years, especially when the house feels a little extra cozy and the calendar starts filling up with gatherings. They’re soft, buttery, and just sweet enough, with that pop of raspberry that cuts through in the best way.
What I love most is how approachable they are. No chilling drama, no complicated steps, no fancy techniques. Just a bowl, a spoon, and a batch of cookies that feel like they belong in a family recipe box.
The almond glaze is optional in theory, but I never skip it. That light drizzle ties everything together and makes the cookies look like they came from a bakery, even though they were made right at home.
Ingredients Needed for the Recipe
- Unsalted butter – This is the base of the dough and gives the cookies their rich, tender texture when softened properly.
- Granulated sugar – Adds sweetness and helps create a light, delicate crumb.
- Vanilla extract – Brings warmth and depth to the dough without overpowering the other flavors.
- All-purpose flour – Provides structure so the cookies hold their shape while baking.
- Salt – A small amount sharpens all the flavors and balances the sweetness.
- Raspberry jam – Fills the center with a bright, slightly tart contrast to the buttery cookie.
- Powdered sugar – Forms the base of the almond glaze for a smooth, sweet finish.
- Water – Loosens the glaze to the right drizzling consistency.
- Almond extract – Adds that signature almond note that pairs so well with raspberry.
Why these cookies always work
Some cookies look great but taste forgettable. These do both. The dough bakes up soft with just a hint of crispness at the edges, while the center stays tender and rich.
The raspberry jam brings color and flavor without being too sweet. I especially like it during the holidays, when that bright red center makes every tray look festive without extra effort.
They’re also sturdy in a good way. You can stack them, gift them, or pack them up for later, and they still look just as pretty when it’s time to serve.
How to make Raspberry Thumbprint Cookies?
Step 1 - Prepare the baking sheets
Start by lining two baking sheets with parchment paper or silicone mats. This keeps the cookies from sticking and makes cleanup painless later, which is always a win.
Set the sheets aside so everything is ready once the dough comes together.
Step 2 - Cream the butter and sugar
In a large mixing bowl, beat the softened butter and granulated sugar together until light and fluffy. This usually takes about two to three minutes with a hand or stand mixer.
You’re looking for a pale, creamy texture that feels smooth, not greasy.
Step 3 - Add the remaining dough ingredients
Add the flour, salt, and vanilla extract to the bowl. Mix just until a soft dough forms. It might look a little crumbly at first, but keep mixing gently.
As long as the dough holds together when pressed, it’s ready.
Step 4 - Shape the cookies
Scoop about one tablespoon of dough and roll it into a smooth ball. Place each ball on the prepared baking sheets, leaving space between them so they can bake evenly.
Try to keep the size consistent so all the cookies finish at the same time.
Step 5 - Make the thumbprint
Use your thumb or the back of a small measuring spoon to press an indentation into the center of each dough ball. Don’t press all the way through.
This little well is where the jam will sit, so make it just deep enough to hold the filling.
Step 6 - Fill with raspberry jam and chill
Spoon about half a teaspoon of raspberry jam into each indentation. Less is more here, since too much jam can spill out during baking.
Once filled, refrigerate the cookies for at least two hours so the jam sets nicely in the oven.
Step 7 - Bake until just set
Preheat the oven to 350°F and bake the cookies for 10 to 14 minutes. The edges should look set and the bottoms lightly golden.
Let them cool on the baking sheet for a few minutes before moving them to a wire rack.
Step 8 - Glaze and finish
Whisk the powdered sugar, almond extract, and a bit of water until smooth. Adjust with more water or sugar until it drizzles easily.
Drizzle the glaze over the cooled cookies and let it set before serving or storing.
Tips
- Mix the dough just until it comes together to keep the cookies soft.
- Roll all the dough balls the same size for even baking.
- Use less jam than you think to prevent overflow.
- Let the cookies cool fully before glazing so the icing sets properly.
- Adjust the glaze slowly to avoid making it too thin.
Flavor variations worth trying
Raspberry is classic, but this recipe is flexible. Apricot, strawberry, or even cherry jam work beautifully and still pair well with the almond glaze.
If you want something richer, a dollop of chocolate spread or thick preserves can change the vibe completely while keeping the same cookie base.
You can also skip the glaze and sprinkle the cookies lightly with powdered sugar for a softer, simpler finish.
Storing and making ahead
Once the glaze has set, store the cookies in an airtight container at room temperature for up to four days. They stay soft and flavorful the whole time.
These cookies also freeze well. I like to freeze them unglazed, then thaw and drizzle with fresh glaze before serving.
If you want to get a head start, the dough can be made a day ahead and kept in the fridge. Let it sit at room temperature before rolling so it’s easy to work with.
Raspberry thumbprint cookies have a way of feeling both nostalgic and special at the same time. They’re the kind of treat people remember, even after the last crumb is gone.