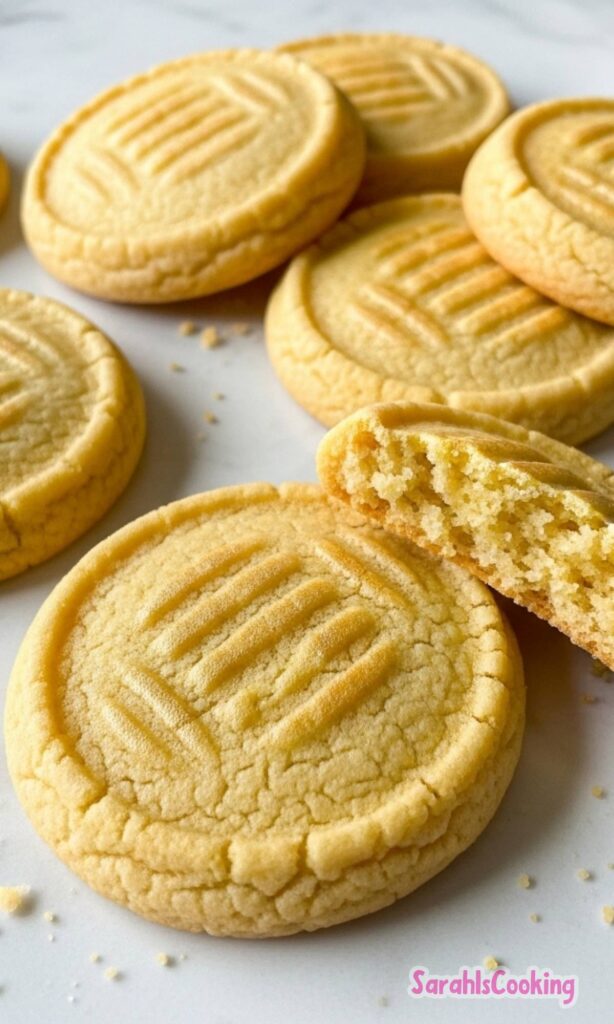
These gold coin butter cookies are built to deliver exactly what a butter cookie should be. Crisp edges, delicate structure, and a clean, buttery finish that does not rely on excess sweetness. They are simple in appearance, but technically very intentional.
I developed this version to be reliable for home bakers who want repeatable results, not guesswork. The dough handles easily, the bake time is short, and the texture stays consistent from batch to batch.
They are festive when you need them to be, but the real goal here is precision. A cookie that holds its shape, bakes evenly, and tastes balanced rather than sugary.
Who This Recipe Is For
This recipe is for bakers who prefer structure over softness. If you like cookies with a light snap rather than a chewy center, you will feel right at home with this method.
It also works well for anyone who wants a straightforward dough that does not require complicated techniques. The steps are clear, controlled, and forgiving as long as you follow the temperature and mixing cues.
If you enjoy understanding why something works, not just how, this recipe gives you that clarity. It is approachable for beginners but precise enough to satisfy experienced bakers.
Why This Recipe Works
Butter cookies depend on fat structure rather than moisture for their texture. That means the ratio of butter to flour must support spreading without collapsing, which is why this dough includes powdered sugar instead of granulated sugar.
Powdered sugar contains a small amount of starch that stabilizes the dough. That starch helps create a fine crumb and prevents the cookies from becoming dense or greasy.
Egg whites provide protein without extra fat, allowing the cookies to set firmly and bake up crisp. Using whole eggs would introduce too much richness and interfere with the clean snap these cookies need.
A short chill time firms the butter just enough to control spread while still allowing the dough to scoop easily. This balance keeps the cookies uniform and prevents excessive browning.
Ingredients Needed for the Recipe
Butter - The primary flavor and structural fat. It creates the tender crumb and defines the classic butter cookie taste.
Powdered Sugar - Provides sweetness while contributing starch that softens the texture and improves stability.
Egg Whites - Add protein for structure without extra fat, helping the cookies bake crisp instead of cakey.
Vanilla Extract - Rounds out the butter flavor and adds aromatic depth without overpowering.
Baking Powder - Gives slight lift so the cookies are not dense, ensuring a light bite.
Baking Soda - Assists with browning and contributes to the delicate spread needed for even baking.
All-Purpose Flour - Forms the framework of the cookie, providing enough strength to hold shape.
Gold Sanding Sugar - Creates the exterior sparkle while adding a subtle crunch.
Gold Sugar Crystals - Provide decorative texture and reinforce the coin-like appearance.
Ingredient Insights and Function
Butter must be properly softened, not melted. Soft butter creams smoothly with sugar and traps air, while melted butter would cause uncontrolled spreading and a greasy surface.
Margarine is not a suitable substitute here. Its higher water content changes how the dough emulsifies, which leads to flat cookies with a dull flavor.
Powdered sugar is essential for texture control. Swapping it for granulated sugar will produce a coarser crumb and noticeably harder cookie.
Egg whites should be used at room temperature so they incorporate evenly. Cold whites can cause the mixture to look curdled and prevent proper emulsification.
If you need to adjust flour slightly due to humidity, add only a tablespoon at a time. Too much flour will make the cookies dry instead of crisp.
How to make Gold Coin Butter Cookies?
Step 1 - Cream the Butter and Sugar
Beat the softened butter and powdered sugar together until smooth and light. The mixture should look fluffy but not airy like cake batter.
This stage creates the base texture, so scrape the bowl and mix evenly. Uneven creaming leads to inconsistent baking.
Step 2 - Add Egg Whites and Vanilla
Mix in the egg whites gradually, allowing them to fully incorporate before adding more. The dough should become silky and cohesive.
Stir in the vanilla extract just until blended. Overmixing here can break the emulsion you just created.
Step 3 - Incorporate Dry Ingredients
Add the baking powder, baking soda, and flour, mixing on low speed. Stop as soon as a soft dough forms.
The dough should feel smooth and slightly tacky but not sticky. Overworking will toughen the cookies.
Step 4 - Chill the Dough
Cover and refrigerate the dough for about 30 minutes. This firms the butter and allows the flour to hydrate fully.
If chilled longer, let the dough sit briefly at room temperature so it can be scooped without cracking.
Step 5 - Portion the Dough
Scoop small portions about the size of a gumball. Consistent sizing ensures even baking across the tray.
If shaping by hand, roll gently without compressing the dough too much.
Step 6 - Coat in Sanding Sugar
Roll each dough ball in sanding sugar to create an even coating. This layer adds texture and visual definition.
If the dough begins drying while portioning, cover it lightly to maintain surface moisture.
Step 7 - Flatten Slightly
Use the bottom of a glass to press each ball into a thick disk. The goal is a coin shape, not a thin cookie.
This controlled flattening ensures the cookies bake evenly without spreading too far.
Step 8 - Add Sugar Crystals
Sprinkle sugar crystals on top and press lightly so they adhere. This step adds both decoration and crunch.
A gentle press is enough. Too much pressure will distort the shape.
Step 9 - Bake
Bake at 350°F for about 8 minutes. The cookies should remain pale with just a hint of golden color underneath.
Do not wait for deep browning. Butter cookies finish setting as they cool.
Step 10 - Cool Completely
Transfer to a wire rack and allow them to cool fully. The crisp texture develops during this stage.
Moving them too soon can cause breakage because they are delicate while warm.
How I Tested and Refined This Recipe
I tested multiple sugar ratios before settling on powdered sugar as the primary sweetener. Early versions with granulated sugar spread unpredictably and lacked the fine texture I wanted.
I also experimented with whole eggs versus egg whites. Whole eggs made the cookies softer and slightly cakey, which moved them away from the traditional butter cookie profile.
Adjusting chill time turned out to be critical. No chill caused excessive spread, while over-chilling made the dough crack during shaping.
The final method uses a short rest to stabilize the dough without sacrificing workability. That balance gave the most consistent results across repeated batches.
Bake time was intentionally kept short to preserve a light color and delicate snap. Longer baking created bitterness from over-browned butter solids.
Common Mistakes and How to Avoid Them
Using melted butter instead of softened butter, which causes excessive spreading.
Skipping the chill time, leading to flat cookies that lose their shape.
Adding too much flour, resulting in dry, crumbly texture.
Overmixing after adding flour, which makes the cookies tough.
Baking until golden brown instead of pale, which creates hardness.
Flattening the dough too thin, preventing the proper crisp structure.
Using margarine, which weakens flavor and alters texture.
Make-Ahead, Storage, and Freezing Guidance
The dough can be prepared a day in advance and kept refrigerated. Let it soften slightly before shaping so it rolls smoothly.
Baked cookies store well in an airtight container for up to five days. Their crisp texture actually improves after the first day as moisture equalizes.
For longer storage, freeze the baked cookies in a single layer before transferring to a container. They thaw quickly at room temperature without losing structure.
A brief warm-up in a low oven can refresh their texture if needed. Avoid microwaving, which introduces unwanted softness.
Tips
Weigh flour if possible for the most consistent structure.
Use a small scoop to keep all cookies uniform in size.
Line baking sheets with parchment to prevent over-browning.
Work in small batches if your kitchen is warm to keep the dough stable.
Press decorations gently so they adhere without compressing the dough.
Let cookies cool fully before stacking to maintain crispness.
Keep the flavor simple so the butter remains the focus.
These gold coin butter cookies are a fun, festive treat perfect for St. Patrick's Day celebrations or pirate-themed parties! With a crisp, buttery texture and sparkling gold sugar coating, they're easy to make and sure to bring a little luck to your dessert table.
ingredients
1cup butter (softened, no substitutes)
1 ½cups powdered sugar
2 egg whites
1teaspoon vanilla extract
½teaspoon baking powder
½teaspoon baking soda
2 ½cups all-purpose flour
gold sanding sugar (for coating)
gold sugar crystals (for topping)
Instructions
1
Cream the butter and powdered sugar together until smooth. Add the egg whites and vanilla extract, mixing until well combined.
2
Stir in the baking powder, baking soda, and flour until a dough forms. Cover and refrigerate the dough for 30 minutes.
If chilling longer, let dough warm slightly before scooping.
3
Preheat the oven to 350°F (175°C). Line baking sheets with parchment paper or spray with non-stick cooking spray.
4
Scoop the dough by ½ tablespoonfuls. Roll into balls about the size of gumballs if not using a scooper.
Cover dough balls with a damp paper towel to prevent drying if preparing all at once.
5
Roll each dough ball through gold sanding sugar until completely coated. Place on prepared baking sheets.
6
Slightly flatten each cookie ball using the bottom of a small glass or drinking glass.
7
Sprinkle the flattened tops with gold sugar crystals and gently press them into the dough to help them stick.
8
Bake at 350°F (175°C) for 8 minutes. Cool completely on a wire rack before serving.
Nutrition Facts
Servings 66
Serving Size 1 cookie
Amount Per Serving
Calories40kcal
% Daily Value *
Total Fat0.1gg1%
Saturated Fat0.1gg1%
Trans Fat0.01gg
Cholesterol0mgmg0%
Sodium39mgmg2%
Potassium4mgmg1%
Total Carbohydrate9gg3%
Dietary Fiber0.1gg1%
Sugars4gg
Protein0.4gg1%
Calcium 16mg mg
Iron 0.3mg mg
* Percent Daily Values are based on a 2,000 calorie diet. Your daily value may be higher or lower depending on your calorie needs.
Note
Gold sugar sources: Find gold sanding sugar and crystals at cooking specialty stores or craft stores.
Keep dough moist: Cover scooped dough balls with a damp paper towel to prevent drying before coating.
Storage tip: Store cooled cookies in an airtight container at room temperature for up to 1 week.
Make ahead: Dough can be chilled up to 3 days; bring to room temp before shaping.
Keywords:
St. Patrick's Day cookies, gold coin cookies, butter cookies, festive desserts, Irish treats, crispy cookies
Pin this recipe to share with your friends and followers.
Sarah
Food and Lifestyle Blogger
Hi, I’m Sarah, a home cook and baker who believes that good food doesn’t need to be complicated to be meaningful. This blog is where I share approachable, dependable recipes made with care — the kind of dishes you can come back to again and again.