I think there’s something so comforting about a pot of chili simmering on the stove.
This gluten-free version, with its hearty beef and beans, has become my go-to for easy weekends and busy weeknights alike.
Why This Recipe Works So Well
What I love about this chili is how simple the process is. You don't need any special skills, just a little time for the flavors to get to know each other.
It’s one of those meals that feels like a warm hug, and it’s even better the next day for lunch.
Plus, you can make it right on your stovetop or let a slow cooker do the work for you.
Ingredients Needed for the Recipe
Ground Beef: This forms the hearty, savory base of the chili. I find an 80/20 blend has great flavor, but lean beef works well too.
Celery, Sweet Onion, Green Bell Pepper, and Garlic: This combination creates a classic, aromatic foundation that builds a deep flavor from the very start.
Olive Oil: Just a tablespoon is used to sauté the vegetables until they’re tender and fragrant.
Beef Broth: It adds richness and depth. Always double-check that your broth is certified gluten-free, as not all brands are.
Fire-Roasted Diced Tomatoes: These lend a subtle, smoky sweetness that regular diced tomatoes just don't have.
Tomato Sauce: This is key for creating the thick, comforting texture we all love in a good chili.
Black Beans or Dark Red Kidney Beans: They add wonderful texture and help make the meal more filling. You can skip them if you prefer.
Worcestershire Sauce: This is my little secret for a flavor boost. Just be sure to grab a gluten-free brand.
Chili Powder & Cumin: These spices provide that warm, classic chili flavor. Always check the labels to ensure they’re pure and gluten-free.
Kosher Salt & Black Pepper: Used to season everything perfectly and bring all the flavors together.
How to Make Gluten-Free Chili with Beef and Beans?
Step 1 – Brown the Ground Beef
Place a large pot or Dutch oven over medium-high heat. Once it's warm, add the ground beef.
Cook it until it's nicely browned and no longer pink, using a spoon to break it up into small pieces as it cooks.
Step 2 – Prepare the Aromatics
While the beef is cooking, you can dice your celery, onion, and green bell pepper.
Go ahead and mince the garlic now too, so it's all ready when you need it.
Step 3 – Drain the Beef
Once the beef is fully cooked, carefully remove it from the pot with a slotted spoon.
Let it drain on a plate lined with a paper towel to soak up any excess grease.
Step 4 – Sauté the Vegetables
Return the same pot to the stove and add the olive oil. Then, stir in the diced celery, onion, and bell pepper.
Sauté them for about 5 minutes, until they have softened and the onion becomes translucent.
Step 5 – Add the Garlic and Spices
Stir the minced garlic into the vegetables and cook for just another minute, until it becomes fragrant.
Next, sprinkle in the chili powder, cumin, salt, and pepper, giving everything a good stir.
Step 6 – Deglaze the Pot
Pour in the beef broth, just a splash at a time at first.
Use your spoon to scrape up all the browned bits from the bottom of the pot; that's where a lot of the flavor is hiding.
Step 7 – Combine Everything
Now, add the diced tomatoes, tomato sauce, drained beans, and Worcestershire sauce to the pot.
Return the cooked ground beef to the pot as well, and give everything a thorough stir to combine.
Step 8 – Simmer to Perfection
Reduce the heat to low and let the chili simmer gently for at least 30 minutes.
I like to give it an occasional stir, and if I have more time, I let it go even longer for a deeper flavor.
My Simple Slow Cooker Method
If you’d rather use your crock pot, this recipe adapts beautifully. The long, slow cooking time really develops the flavors.
I do recommend browning the beef and sautéing the vegetables in a skillet first, for the best taste.
Once that's done, simply transfer everything to your slow cooker, stir it all together, and cook on low for 4 to 6 hours, or on high for 2 to 4 hours.
Tips
Let it simmer. The flavor of chili truly improves with time. If you can let it bubble away for an hour or more, you’ll be rewarded with a much richer taste.
Adjust the thickness. If your chili becomes thicker than you’d like, just stir in a little extra broth or some water until it reaches your preferred consistency.
Control the lid. For a quick-cooking, thicker chili, simmer it with the lid off. For a long, slow simmer, keep the lid on to prevent too much liquid from evaporating.
Check your labels. This is the most important step for gluten-free cooking. A quick glance at your broth, Worcestershire sauce, and spices can ensure everything is safe.
Don't rush the vegetables. Giving the celery, onion, and pepper enough time to soften in the pot builds a sweetness and depth that is the foundation of the whole dish.
Choosing Your Cooking Appliance
While I love my multi-cooker for many things, I find that chili is best made on the stovetop or in a slow cooker.
The enclosed environment of a pressure cooker doesn't allow for the same evaporation that naturally thickens and concentrates the flavors of the chili.
You might save a few minutes, but the final texture and taste are often worth the extra simmering time.
What to Serve with Your Chili
A big bowl of chili is wonderful on its own, but a few toppings and sides can make it a real feast. I love setting out a few small bowls with different options so everyone can build their own perfect bowl.
Some shredded cheese, a dollop of sour cream, and a few sliced green onions are my personal favorites.
A side of fluffy gluten-free cornbread is practically a requirement in my house. It’s perfect for dipping and scooping up every last bit.
For a fun twist, you could also serve it over baked potatoes, a pile of french fries for chili cheese fries, or even with a simple side salad for a fresh contrast.
Storing and Freezing Your Leftovers
This chili stores wonderfully, making it a fantastic meal prep option. Any leftovers will keep in the refrigerator for 3 to 4 days.
To freeze it, I let the chili cool completely before portioning it into airtight containers. It will be great in the freezer for 3 to 4 months.
When you’re ready to eat, just thaw it overnight in the fridge. You can reheat it gently on the stovetop, in the microwave, or even back in the slow cooker.
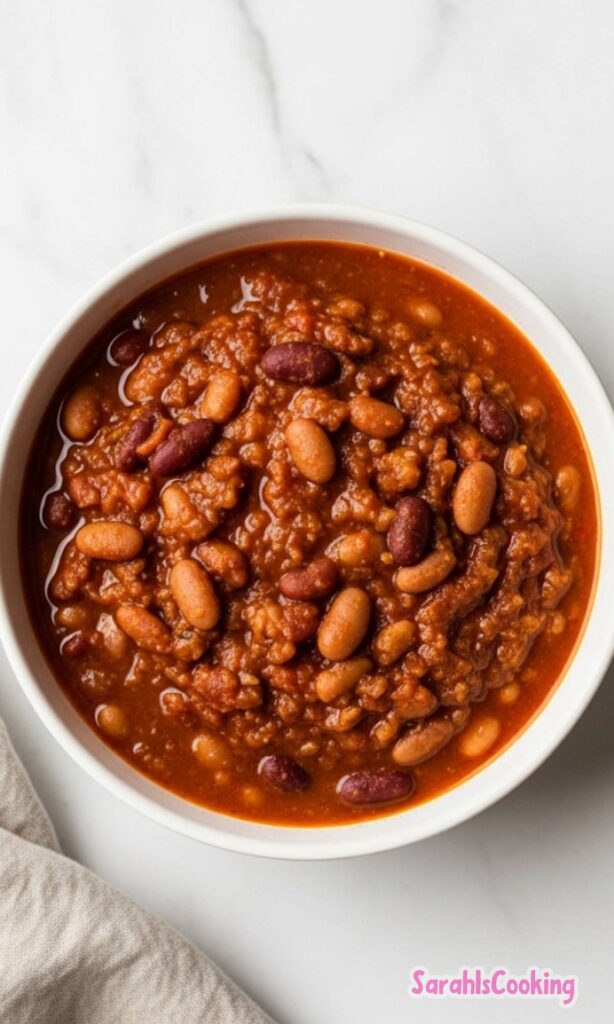
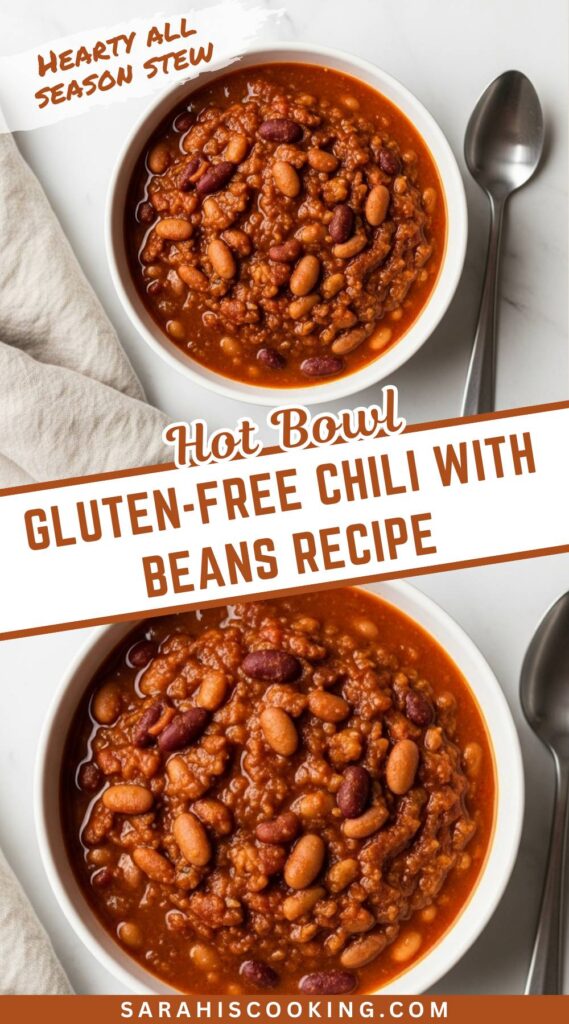
This gluten-free chili recipe with beef and beans is a classic, go-to chili recipe! This hearty chili is perfect for lazy Sundays, football parties, or busy weeknight dinners. Make it on the stove top or in the crock pot.
ingredients
1pound ground beef
2stalks celery (diced)
1medium onion (diced)
1 green bell pepper (diced)
3cloves garlic (minced)
1Tablespoon olive oil
1.5Tablespoons chili powder
1teaspoon cumin
0.5teaspoon kosher salt (more/less to taste)
0.25teaspoon black pepper (more/less to taste)
2cups beef broth (gluten-free)
1(15 ounce) can fire-roasted diced tomatoes
1(15 ounce) can tomato sauce
1(15 ounce) can black beans or dark red kidney beans (drained and rinsed)
1Tablespoon Worcestershire sauce (gluten-free)
Instructions
1
Heat a large heavy bottomed pot over medium-high heat. Once warm, add the ground beef. Sauté the beef until browned and cooked through, breaking up with a wooden spoon or meat chopper into small pieces.
2
While the beef cooks, dice the celery, onion, and bell pepper. Mince the garlic.
3
Once cooked, remove the beef to a paper towel lined plate to drain and remove excess fat from the pot.
4
Return the pot to the heat. Add the olive oil along with the celery, onion, and bell pepper. Sauté the vegetables until tender, about 5 minutes.
5
Once the vegetables are tender, add the garlic and sauté another minute or so.
6
Stir in the chili powder, cumin, salt and pepper.
7
Add the beef broth, a splash at a time, using a wooden spoon to scrape up any bits stuck to the bottom of the pot.
8
Now stir in the remaining ingredients; diced tomatoes, tomato sauce, beans, and Worcestershire sauce. Also, return the ground beef back to the pot.
9
Turn the heat to low and simmer the chili for at least 30 minutes, stirring occasionally. Serve warm with desired garnishes.
Nutrition Facts
Servings 8
Serving Size 1 bowl (approx. 1.5 cups)
Amount Per Serving
Calories380kcal
% Daily Value *
Total Fat18 gg28%
Saturated Fat6 gg30%
Trans Fat0.5 gg
Cholesterol55 mgmg19%
Sodium980 mgmg41%
Potassium890 mgmg26%
Total Carbohydrate32 gg11%
Dietary Fiber9 gg36%
Sugars8 gg
Protein24 gg48%
Calcium 8 mg
Iron 25 mg
* Percent Daily Values are based on a 2,000 calorie diet. Your daily value may be higher or lower depending on your calorie needs.
Note
Let it simmer! Chili is one of those recipes that gets better with time. The longer you can let it simmer, the more flavor you'll develop. Be sure to stir occasionally.
Add more broth or water. If you feel your chili has gotten a little thick, feel free to add a splash of broth or water as needed.
Keep the lid on... or off. If you're planning to let the chili sit on low heat for quite a while, leave the lid on as it simmers. If you need to cook the chili more quickly, keep the lid off. This will allow more water to evaporate and speed up the process a bit.
Crock Pot Option: Brown meat and sauté vegetables first, then transfer everything to a slow cooker. Cook on low for 4–6 hours or high for 2–4 hours.
Keywords:
gluten-free chili, beef chili, chili with beans, easy chili recipe, crock pot chili
Pin this recipe to share with your friends and followers.
Sarah
Food and Lifestyle Blogger
Hi, I’m Sarah, a home cook and baker who believes that good food doesn’t need to be complicated to be meaningful. This blog is where I share approachable, dependable recipes made with care — the kind of dishes you can come back to again and again.