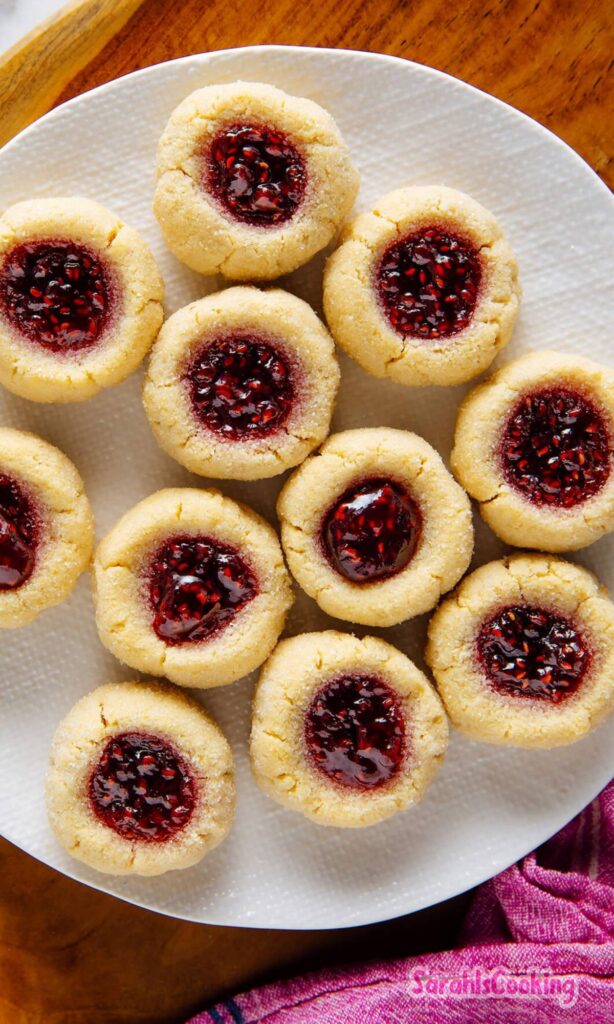
There’s something about a classic thumbprint cookie that just screams cozy holidays and warm kitchens. I’ve been making almond flour thumbprint cookies for a few years now, and they’ve become a go-to when I want something festive yet easy. The beauty of this recipe is how simple it is—just six ingredients—but the results are rich, chewy, and irresistibly sweet. Whether you’re baking for a family gathering or just for yourself, these cookies are a little bite of holiday joy.
Ingredients Needed for the Recipe
- 1 cup finely ground almond flour: Forms the base of the cookie and keeps it naturally gluten-free.
- 3 Tablespoons ghee, softened butter, or vegan butter: Adds richness and helps bind the dough together.
- 3 Tablespoons maple syrup: Provides sweetness and moisture, giving the cookies a soft, chewy texture.
- 1/2 teaspoon vanilla extract: Brings a subtle warmth and depth to the flavor.
- 1/4 teaspoon salt: Balances the sweetness and enhances the nutty flavor of the almond flour.
- 3 Tablespoons jam (homemade or store-bought): Creates the classic thumbprint center, with flavors like raspberry, orange, or fig.
Choosing the Right Almond Flour
Almond flour is the star of these cookies, so picking the right one matters. I always go with finely ground, blanched almond flour because it creates a smooth dough and a delicate texture. Using coarser almond meal can make the cookies crumbly and dense, which is not what you want in a thumbprint cookie.
Bob’s Red Mill Almond Flour is my personal favorite—it’s finely milled, consistent, and gives a slightly sweet, nutty flavor without overpowering the jam. You don’t want to substitute regular flour here; almond flour is essential for the soft, chewy texture that makes these cookies stand out.
How to make Almond Flour Thumbprint Cookies?
Step 1 – Preheat and Prep
First things first, preheat your oven to 350°F. Line a baking sheet with parchment paper or use an ungreased baking stone. This prevents sticking and makes cleanup easy. Trust me, you’ll thank yourself later when you’re not scraping cookie crumbs off your pan.
Step 2 – Mix the Dough
In a small bowl, combine almond flour, softened butter, maple syrup, vanilla extract, and salt. At first, it might look a little crumbly, but keep mixing. The dough will come together, soft and pliable, ready to be shaped. I like to use my hands for the last bit—it’s messy, but it helps everything stick together beautifully.
Step 3 – Scoop and Shape
Use a tablespoon to portion the dough, rolling each piece into a ball. Place the balls on your prepared baking sheet, spaced evenly. Then comes the fun part—use your thumb or finger to gently press an indentation in the center of each cookie. Don’t worry about making it perfect; the charm of thumbprint cookies is in their handmade look.
Step 4 – Add the Jam
Fill each indentation with 1/2 to 1 teaspoon of your favorite jam. Raspberry, orange marmalade, or even fig jam work beautifully. You can mix and match flavors for a colorful batch. I like a little overflow—gives the cookies a rustic, homemade charm.
Step 5 – Bake to Perfection
Bake the cookies for 10-12 minutes, or until the bottoms turn a light golden brown. Keep an eye on them—almond flour browns quickly. Once baked, allow them to cool on the pan for 10 minutes before transferring to a wire rack. Cooling fully is important so the cookies firm up without losing that soft, chewy texture.
How to Store and Preserve Freshness
After baking, you might wonder how to keep these cookies fresh and tasty. Once completely cooled, store them in an airtight container in the refrigerator for up to a week. Layering with parchment paper prevents sticking. For longer storage, you can freeze the cookies in an airtight container, also layered with parchment paper, for up to three months. Just thaw them at room temperature before serving—sometimes I pop them in a warm oven for a few minutes to refresh that just-baked aroma.
Another tip: If you want to bake ahead for holiday gatherings, freezing unbaked dough balls is a lifesaver. Just shape them, press your thumbprints, and freeze. When ready, bake straight from the freezer, adding a minute or two to the bake time. It’s a little hack I swear by every year.
Tips
- Make sure your butter or ghee is soft; it blends more easily into the almond flour, giving a smoother dough.
- If your dough feels too dry, a tiny splash of maple syrup or a few drops of almond milk can help bring it together.
- Don’t overfill the thumbprint with jam—too much can make the cookies spill over while baking.
- Experiment with jams: raspberry is classic, but apricot, fig, or even a chocolate spread can be delightful.
- For extra festive cookies, sprinkle a tiny pinch of coarse sugar or finely chopped nuts on top before baking.
- Use a small cookie scoop for uniform cookies that bake evenly.
- These cookies pair wonderfully with a hot cup of tea or coffee, making them a perfect afternoon treat.
Baking almond flour thumbprint cookies is more than a holiday task—it’s a joyful ritual. The combination of nutty, chewy dough with a sweet jam center always brings smiles. Whether it’s your first time making them or your fifth, this recipe delivers consistently delicious cookies that feel homemade in the best way possible. Sarah swears by these for a reason, and once you try them, I promise you’ll see why too.
From mixing the dough to seeing that golden bottom peek through the oven, every step is satisfying. And the best part? Sharing them with friends, family, or a little one, like Liv, adds that extra layer of warmth. So grab your almond flour, preheat that oven, and dive in—these thumbprint cookies are waiting to become a holiday favorite in your kitchen.
Almond Flour Thumbprint Cookies Recipe
Description
These easy and healthy almond flour thumbprint cookies are made with just six simple ingredients. They’re festive, grain-free, gluten-free, and perfect for the holidays. No one will guess they’re made with almond flour-the texture is perfectly chewy with a slightly crisp edge and a sweet jam center!
Ingredients
Instructions
- Preheat oven to 350°F (177°C).
- Line a baking sheet with parchment paper or use an ungreased baking stone.
- In a small bowl, mix almond flour, softened butter (or ghee/vegan butter), maple syrup, vanilla extract, and salt until a cohesive dough forms. It may seem dry at first—keep mixing until it comes together.
- Use a tablespoon to portion out the dough and roll each into a ball. Place on the prepared baking sheet.
- Press your thumb into the center of each ball to create a small indentation. Fill each with ½–1 teaspoon of jam.
- Bake for 10–12 minutes, until the bottoms begin to turn light golden brown.
- Let cool on the baking sheet for 10 minutes, then transfer to a wire rack to cool completely before serving.
To store:
Store in an airtight container in the refrigerator for up to 1 week or freeze for up to 3 months (layered between parchment paper).
Nutrition Facts
Servings 12
Serving Size 1 cookie
- Amount Per Serving
- Calories 120kcal
- % Daily Value *
- Total Fat 8g13%
- Saturated Fat 2g10%
- Cholesterol 10mg4%
- Sodium 65mg3%
- Potassium 45mg2%
- Total Carbohydrate 10g4%
- Dietary Fiber 1g4%
- Sugars 7g
- Protein 2g4%
- Calcium 40 mg
- Iron 0.5 mg
* Percent Daily Values are based on a 2,000 calorie diet. Your daily value may be higher or lower depending on your calorie needs.
Note
- Flour note: Use blanched, finely ground almond flour (like Bob’s Red Mill). Almond meal or coarse almond flour will yield a grainier texture.
- Vegan option: Use vegan butter and ensure your jam is vegan-friendly.
- Sugar-free version: Substitute maple syrup with monk fruit maple syrup or erythritol-based syrup (results may vary as this hasn’t been tested by the original recipe author).
- Jam ideas: Raspberry, strawberry, apricot, or orange marmalade all work beautifully. Try chia jam for a lower-sugar homemade alternative.