A simple, reliable rhubarb jam recipe with perfect sweet-tart balance, clear steps, and foolproof texture for consistent homemade results.
This rhubarb jam is built for consistency. It delivers a balanced sweet-tart flavor with a soft set that spreads easily without being runny or overly stiff.
I approach jam-making the same way I approach baking. Ratios matter, heat control matters, and small details make the difference between a batch that works and one that disappoints.
The method here is intentionally simple. It relies on the natural behavior of rhubarb, sugar, and acid to create structure without unnecessary complexity.
If you follow the cues closely, you will get a jam that sets properly, tastes bright, and holds up well in storage.
Ingredients Needed for the Recipe
- 1 kg chopped rhubarb – This is the base of the jam. Rhubarb breaks down quickly when heated, creating body and natural thickness.
- 1 kg sugar – Sugar is essential for both sweetness and preservation. It also binds water, helping the jam thicken and set.
- Juice of one lemon – Adds acidity, which sharpens flavor and supports proper gel formation during cooking.
How to make Rhubarb Jam?
Step 1 – Prepare the Rhubarb
Wash the rhubarb thoroughly and trim any dry or tough ends. Cut it into small, even pieces so it cooks down at a consistent rate.
Uniform size matters here. Large chunks take longer to soften and can lead to uneven texture in the finished jam.
Step 2 – Combine and Rest
Place the chopped rhubarb in a large pot and add the sugar and lemon juice. Stir gently until everything is coated.
Let this mixture sit for at least one hour. During this time, the sugar draws moisture from the rhubarb, creating a natural syrup.
Step 3 – Begin Slow Heating
Set the pot over low heat and stir regularly. The goal here is to dissolve the sugar completely before increasing the temperature.
If the sugar is not fully dissolved at this stage, the jam can develop a grainy texture later. Keep the heat controlled and steady.
Step 4 – Break Down the Fruit
As the mixture warms, the rhubarb will begin to soften and collapse. Stir gently to help it break apart without sticking to the bottom.
This stage should feel gradual. Avoid rushing the heat, as too much heat too soon can cause uneven cooking.
Step 5 – Increase Heat to Simmer
Once the sugar has dissolved and the rhubarb is soft, increase the heat slightly until the mixture reaches a gentle simmer.
Maintain a steady simmer, not a rolling boil. Stir frequently to prevent scorching, especially as the mixture thickens.
Step 6 – Cook Until Thickened
Continue cooking for about 10 to 15 minutes. The mixture will become visibly thicker and glossier as water evaporates.
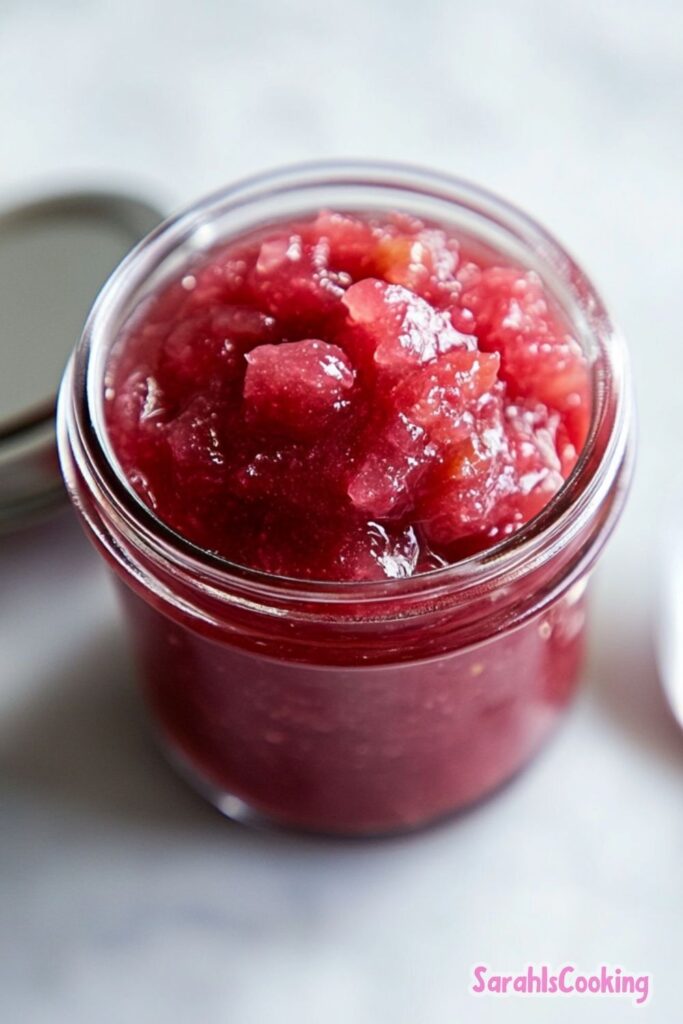
You are looking for a clear sign. When you drag a spoon through the jam and it leaves a brief trail before closing, it is ready.
Step 7 – Taste and Adjust
Before finishing, taste the jam. If you prefer a sharper flavor, add a little more lemon juice and stir it through.
This is the only adjustment point. After this stage, the structure is already forming, so changes should be minimal.
Step 8 – Fill the Jars
Pour the hot jam carefully into sterilized, warm jars. Leave about one centimeter of space at the top.
Seal immediately with clean lids. The residual heat will help create a proper seal as the jars cool.
Why This Recipe Works
The effectiveness of this recipe comes down to balance. Equal parts rhubarb and sugar ensure enough sweetness while still allowing the tart character to come through.
The resting step before cooking is key. It extracts moisture early, which reduces the need for aggressive heat later and leads to a smoother texture.
Lemon juice plays a structural role beyond flavor. Its acidity supports the breakdown of fruit fibers while helping the jam reach a stable consistency.
Finally, controlled heat prevents over-reduction. Instead of forcing thickness through high heat, this method builds it gradually for a cleaner result.
How I Tested and Refined This Recipe
I tested this recipe across multiple batches, adjusting sugar ratios and cooking times to find a consistent outcome. Early versions used less sugar, but the jam struggled to set properly.
In another version, I skipped the resting stage. That batch required longer cooking and developed a slightly dull flavor from extended heat exposure.
I also experimented with higher heat to speed things up. That approach led to uneven thickening and occasional scorching at the base of the pot.
The final version reflects what worked best. A short rest, gradual heating, and moderate simmering produced a jam that thickens reliably without losing brightness.
Common Mistakes and How to Avoid Them
- Cooking on high heat too early – This causes uneven breakdown and can scorch the sugars before they dissolve.
- Skipping the resting step – Leads to longer cooking times and less controlled texture development.
- Not stirring enough during simmering – Thickening jam sticks quickly and can burn at the bottom.
- Overcooking the jam – Results in a stiff, overly thick texture once cooled.
- Undercooking the jam – Leaves it too runny, especially after storage.
- Using cold jars – Can cause cracking when hot jam is added.
Make-Ahead, Storage, and Freezing Guidance
This jam stores well in sealed jars for several months when kept in a cool, dark place. Once opened, it should be refrigerated and used within a few weeks.
Over time, the texture may firm up slightly as the sugars continue to settle. This is normal and does not affect quality.
For freezing, allow the jam to cool completely before transferring to freezer-safe containers. It holds its texture well when thawed.
To use after freezing, thaw in the refrigerator overnight. Stir gently before serving to restore a smooth consistency.
Tips
- Cut rhubarb evenly to ensure consistent cooking.
- Use a wide pot to encourage faster evaporation.
- Stir with a flat-edged spoon to prevent sticking.
- Watch for visual cues instead of relying only on time.
- Keep jars warm until the moment you fill them.
- Label jars with date to track freshness.
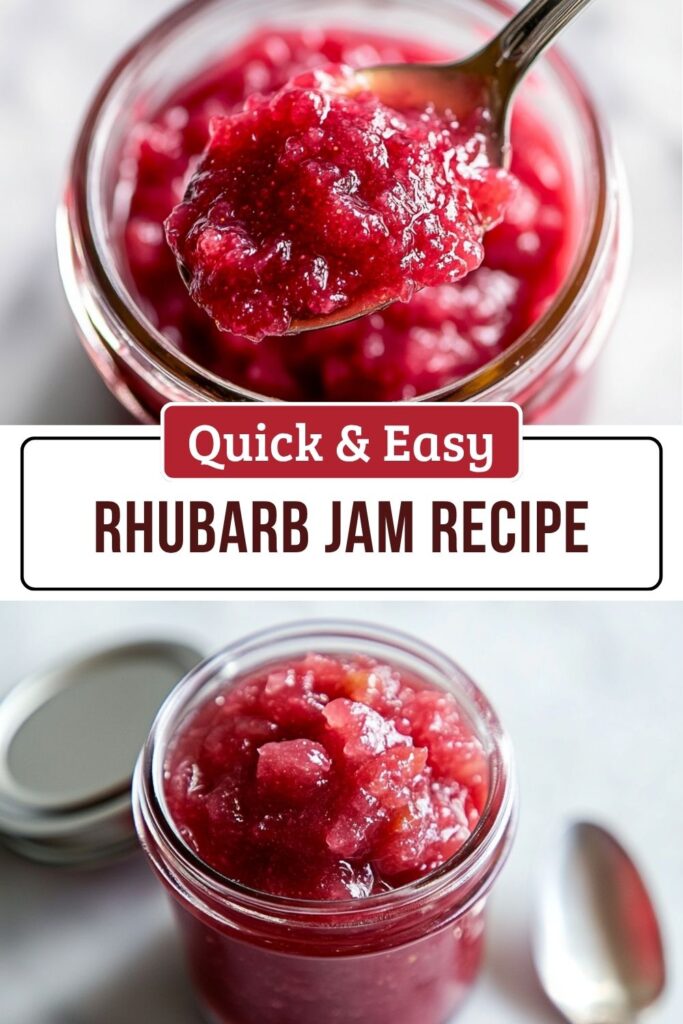
Easy Rhubarb Jam Recipe
Description
This Easy Rhubarb Jam recipe captures the sweet, tart, and earthy flavors of fresh rhubarb in a gloriously pink spread. Perfect for toast, scones, or as a gift, this simple stovetop jam requires just three ingredients and minimal effort. It’s a fantastic way to use up a garden harvest or market finds, resulting in a bright, fresh flavor that tastes like summer in a jar.
Ingredients
Jam Base
Equipment Needed
Instructions
Preparation & Cooking
Prepare the Rhubarb
Wash the rhubarb stalks thoroughly. Trim off any leaves (which are toxic) and the tough ends. Chop the stalks into small, uniform pieces (about 1-2 cm).Uniform pieces ensure even cooking.Macerate the Mixture
In a large non-reactive bowl or pot, combine the chopped rhubarb, sugar, and lemon juice. Stir gently to coat. Let the mixture sit at room temperature for about 1 hour (or overnight in the fridge) until the sugar draws out the juices from the rhubarb.This step helps dissolve the sugar evenly and prevents burning.Dissolve Sugar
Place the pot over low heat. Stir frequently until the sugar has completely dissolved and the rhubarb begins to break down and release more liquid. Taste and add a little more lemon juice if you prefer a tarter jam.Do not rush this step; undissolved sugar can cause crystallization.Simmer and Thicken
Increase the heat to medium-low to bring the mixture to a gentle simmer. Cook for 10-15 minutes, stirring often to prevent sticking. The jam is ready when it thickens noticeably and leaves a trail on the bottom of the pot when you drag a spoon through it.Be careful not to overcook, as jam thickens further as it cools.Jar the Jam
While the jam cooks, ensure your jars are sterilized and warm (you can warm them in a low oven). Carefully ladle the hot jam into the warm jars, leaving about 1 cm (½ inch) of headspace at the top. Wipe the rims clean.Using warm jars prevents thermal shock and cracking.Seal and Cool
Screw the lids on tightly. As the jars cool, the lids should seal (the button on the lid will pop down). If any jars do not seal, store them in the refrigerator and use within 2 weeks. Sealed jars can be stored in a cool, dark place for up to 6 months.Refrigerate after opening.
Nutrition Facts
Servings 40
Serving Size 1 tablespoon (20g)
- Amount Per Serving
- Calories 45kcal
- % Daily Value *
- Total Fat 0.1g1%
- Sodium 1mg1%
- Potassium 55mg2%
- Total Carbohydrate 11.5g4%
- Dietary Fiber 0.3g2%
- Sugars 11g
- Protein 0.1g1%
* Percent Daily Values are based on a 2,000 calorie diet. Your daily value may be higher or lower depending on your calorie needs.
Note
Storage Tips: Unopened, properly sealed jars can be stored in a pantry for up to 6 months. Once opened, keep refrigerated and consume within 2-3 weeks.
Variations: Add a teaspoon of vanilla extract or a pinch of ginger for a different flavor profile. You can also mix in some strawberries or raspberries for a mixed berry-rhubarb jam.
Sterilization: To sterilize jars, wash them in hot soapy water or a dishwasher, then place them in an oven at 160°C (320°F) for 15-20 minutes. Keep them warm until ready to fill.