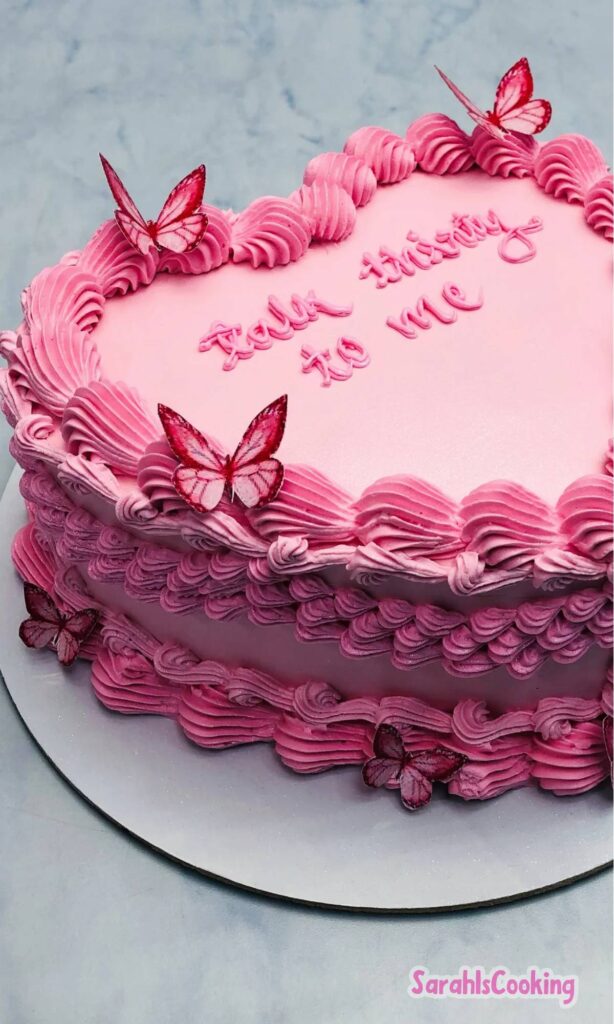
This vintage heart cake is one of those projects that looks far more complicated than it actually is. I have made it enough times now to trust the process, and that trust matters when you are baking something meant to be shared. This is not novelty baking or decorative fluff. It is a sturdy, tender yellow cake paired with a stable buttercream that holds detail and forgives small mistakes.
I like recipes that reward patience and logic. This one does exactly that. You do not need a heart-shaped pan, special equipment, or professional training. You need time, attention, and a willingness to slow down. The result is a cake that feels thoughtful and intentional, not rushed.
Who This Recipe Is For
This recipe is for home bakers who want reliable structure and predictable results. If you enjoy understanding why something works instead of just following steps, you will be comfortable here. The cake is approachable, but it does require care.
If you have ever wanted to try vintage-style piping but felt intimidated, this is a good place to start. The buttercream is forgiving, and the shape gives you natural borders to guide your hand. You do not need to be fast. You need to be steady.
Why This Recipe Works
The cake itself is built on balance. Butter and sugar are creamed thoroughly for lift, eggs provide structure, and sour cream keeps the crumb moist without making it fragile. The layers bake evenly and cut cleanly, which matters when shaping.
The frosting is classic American buttercream for a reason. It pipes cleanly, sets well, and supports detail without melting into itself. This matters when you are adding shells, ruffles, and dots that need to hold their shape for hours.
Ingredients Needed for the Recipe
- Unsalted butter – Provides structure and flavor for both cake and frosting. Softened butter blends smoothly and traps air during creaming.
- Granulated sugar – Sweetens and aerates the batter when properly creamed with butter.
- Eggs – Whole eggs add richness and help the cake rise evenly.
- Egg whites – Extra whites lighten the crumb without adding additional fat.
- Vanilla extract – Builds a warm, familiar flavor base in both cake and frosting.
- All-purpose flour – Provides structure while still producing a tender crumb.
- Baking powder – Gives the cake lift and helps it bake evenly.
- Baking soda – Reacts with sour cream to support rise and texture.
- Salt – Balances sweetness and sharpens flavor.
- Milk – Adds moisture and helps control batter consistency.
- Sour cream – Keeps the cake soft and moist without weakening structure.
- Confectioners’ sugar – Sweetens and thickens the buttercream for stability.
- Food coloring – Optional, but useful for classic vintage contrast.
How to make Vintage Heart Cake?
Step 1 – Cream the butter and sugar
Start with fully softened butter. Creaming is not just mixing. You are building air into the batter, and that takes time. Beat until the mixture looks pale and fluffy, not just combined.
Once the eggs and whites are added, continue mixing until the batter looks smooth and cohesive. This is your base structure, and rushing here shows later.
Step 2 – Incorporate dry and wet ingredients
Alternate dry ingredients with milk on low speed. This prevents overworking the gluten while still fully hydrating the flour. Stop as soon as the batter comes together.
Sour cream goes in last. Mix just until incorporated. Overmixing at this stage leads to a dense cake that does not cut cleanly.
Step 3 – Bake and cool the layers
Divide the batter evenly between two prepared pans. Even layers bake at the same rate, which makes stacking and shaping easier.
Cool the cakes completely before handling. Warm cake tears easily and sheds crumbs into the frosting.
Step 4 – Prepare the buttercream
Beat the butter until light before adding sugar. This creates a smoother frosting with fewer air pockets. Add sugar gradually to maintain control over texture.
The final frosting should be smooth, thick, and pipeable. If it is too soft, details will slump. If too stiff, piping becomes uneven.
Step 5 – Cut the heart shape
Use a sharp serrated knife. Make two angled cuts at the bottom of each round layer to form the point. The removed pieces become the rounded top.
Level first if needed. Flat layers stack more securely and frost more cleanly.
Step 6 – Assemble and crumb coat
Frost acts as glue here. Attach the rounded pieces firmly and hold them in place briefly to set. Stack the second layer carefully.
Apply a thin crumb coat and chill. This step locks in crumbs and sets the shape before final decoration.
Step 7 – Frost and decorate
Apply the final coat smoothly before piping details. A smooth base makes decorative elements stand out.
Work slowly with piping. Vintage designs reward control, not speed. Clean your tips often for sharp detail.
Visual and Texture Cues to Watch For
The baked cake should be lightly golden with a springy center. Press gently. It should bounce back without sinking.
Buttercream should hold a soft peak when lifted with a spatula. If it droops, chill briefly. If it cracks, add a teaspoon of milk.
Common Mistakes and How to Fix Them
Uneven layers usually come from uneven batter distribution. Use a scale if needed. It makes shaping easier later.
If frosting slides during piping, the cake is too warm or the buttercream too soft. Chill both and continue.
Substitutions and What They Change
Whole milk can replace 2% milk, producing a slightly richer crumb. Non-dairy milk works, but texture may be less tender.
You can use a different cake flavor entirely, but the structure must be similar. Very soft cakes are harder to cut cleanly.
Tips
- Weigh your pans after filling to ensure even layers.
- Chill the cake whenever it feels unstable.
- Use firm piping pressure for clean edges.
- Keep a damp towel nearby to wipe piping tips.
Vintage Heart Cake Recipe
Description
Despite plenty of piped and frosted details, this vintage heart cake is easier to assemble than it looks. You don't even need a heart-shaped pan! Transform two round yellow cake layers into a stunning heart-shaped dessert perfect for Valentine’s Day, birthdays, or any special occasion.
ingredients
Cake
Frosting
Instructions
Cream the butter and sugar
Preheat the oven to 350°F (175°C). In a stand mixer fitted with the paddle attachment, beat the softened butter and sugar on medium speed until soft and fluffy, 3–4 minutes. Beat in the eggs and egg whites, then add the vanilla extract. Beat for another 1–2 minutes until fluffy.Add the dry ingredients
In a large bowl, whisk together the flour, baking powder, baking soda and salt. Add half the flour mixture and half the milk to the butter mixture, beating on low speed. Repeat with the remaining flour mixture and milk until incorporated. Then, mix in the sour cream on low speed. Do not overmix.Bake the cakes
Place a round piece of parchment in the bottom of two 8-inch round cake pans and coat with cooking spray. Evenly divide the batter between the two cake pans. Bake for 23–25 minutes or until a toothpick inserted into the center comes out clean. Allow the cakes to cool in the pans for 10 minutes before transferring to a wire rack to cool completely.Make the frosting
In a large bowl, beat the softened butter until soft and fluffy, 1–2 minutes. Beat in 2 cups confectioners’ sugar, the milk and the vanilla extract on low speed. Gradually add the remaining confectioners’ sugar and beat the frosting until smooth.Cut the heart shapes
Place one cooled cake layer on a cutting board. At the bottom middle of the circle, make two slices to create the pointed bottom of the heart. Set the two leftover pieces aside to make the rounded top of the heart. Repeat with the second layer.Assemble the cake
Place one of the larger pointed cake layers on a cake stand or plate. Use the buttercream frosting to attach the rounded tops. The frosting will act as a glue to keep them in place. Spread buttercream frosting over the top and repeat with the second layer. Spread a thin layer of frosting over the cake to create a crumb coat. If desired, trim parts of the cake to emphasize its shape, applying frosting after any additional cuts. Chill the cake for 30 minutes.Frost and decorate
Transfer half the remaining frosting to two bowls, and add food coloring to each as desired. Spread half of the frosting on the entire cake and smooth with a spatula. Use piping bags to pipe the colored frosting onto the top and bottom borders on the cake. Add additional piped details such as ribbons or dots if desired. Slice and serve.
Nutrition Facts
Servings 16
Serving Size 1 slice
- Amount Per Serving
- Calories 580kcal
- % Daily Value *
- Total Fat 30g47%
- Saturated Fat 18g90%
- Cholesterol 95mg32%
- Sodium 420mg18%
- Potassium 180mg6%
- Total Carbohydrate 75g25%
- Dietary Fiber 1g4%
- Sugars 58g
- Protein 6g12%
- Calcium 8 mg
- Iron 2 mg
* Percent Daily Values are based on a 2,000 calorie diet. Your daily value may be higher or lower depending on your calorie needs.
Note
- Make ahead: Bake and freeze cake layers up to 2 months in advance. Thaw before assembling.
- Color options: Customize frosting colors to match any holiday or celebration theme.
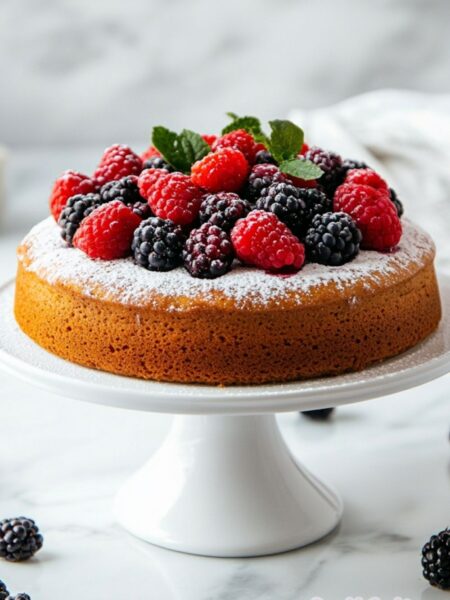
- Serving suggestion: Pair with fresh berries or a drizzle of raspberry sauce.