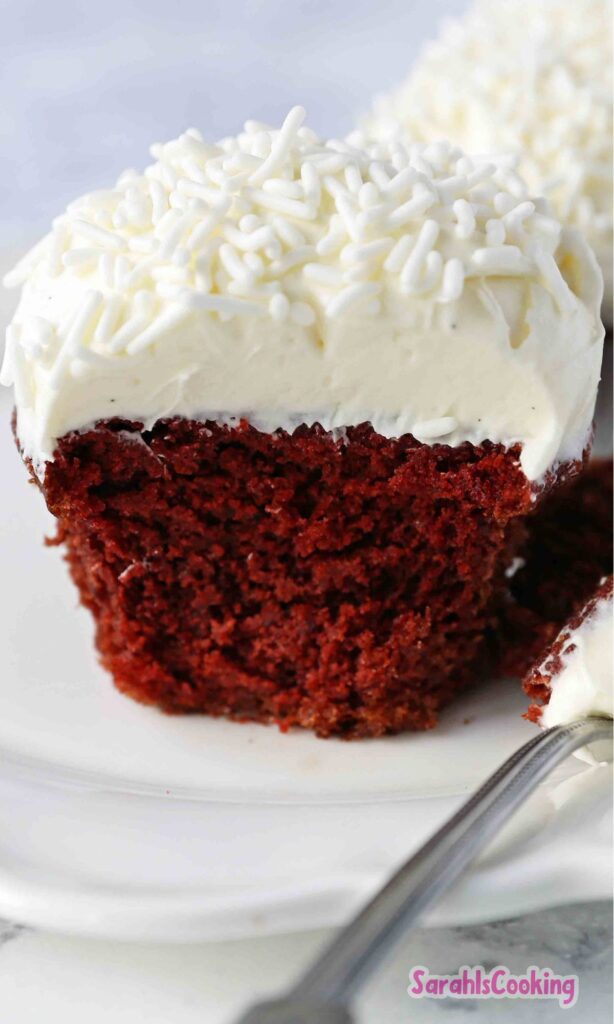
There’s something quietly dramatic about red velvet cupcakes. They don’t shout, but they do linger. Rich without being heavy, soft without being fragile, they sit right in that sweet spot between comfort and celebration.
I’ve baked a lot of cupcakes over the years, and these are the ones I come back to when I want something reliable but still special. They feel classic, a little nostalgic, and just indulgent enough to slow you down.
What makes these red velvet cupcakes stand out isn’t just the color. It’s the balance. A gentle cocoa note, a subtle tang, and a texture that stays tender even the next day.
This recipe wasn’t rushed. I tweaked it, baked it again, adjusted one thing at a time, and paid attention to how it felt at every stage. The end result is something I trust and actually enjoy making.
The frosting matters just as much as the cupcake itself. Creamy, fluffy, not overly sweet, and smooth enough to swirl without fighting you. Together, they feel bakery-level but still homemade.
Ingredients Needed for the Recipe
- Hot coffee or boiling water – blooms the cocoa and deepens the chocolate flavor.
- Unsweetened natural cocoa powder – gives that subtle chocolate backbone without bitterness.
- All-purpose flour – forms the structure while keeping the crumb soft.
- Baking powder – adds lift for a light, fluffy texture.
- Baking soda – reacts with acidic ingredients for proper rise.
- Fine sea salt – sharpens and balances the sweetness.
- Ground cinnamon – optional, but adds warmth and depth.
- Granulated sugar – sweetens and keeps the cupcakes moist.
- Vegetable oil – adds moisture that lasts beyond day one.
- Unsalted butter – brings flavor and richness.
- Egg – binds everything together and adds structure.
- Buttermilk – creates tenderness and that signature red velvet tang.
- Vanilla extract – rounds out the flavors gently.
- Red gel food coloring – delivers that classic deep red hue.
- Distilled white vinegar – enhances flavor and reacts with baking soda.
- Unsalted butter for frosting – forms the base of a creamy topping.
- Powdered sugar – sweetens and stabilizes the frosting.
- Cream cheese – adds tang and smoothness to the frosting.
- Vanilla paste or extract – finishes the frosting with warmth.
Every ingredient here has a job. Skipping or swapping too casually changes the whole personality of the cupcake, and not always in a good way.
How to make Red Velvet Cupcakes?
Step 1 – Prepare the oven and pan
Start by heating the oven to 350°F and lining a standard muffin tin with good-quality liners. This small step saves a lot of frustration later.
Set everything out before you begin. When ingredients are ready and visible, the process feels calmer and smoother.
Step 2 – Bloom the cocoa
Whisk the hot coffee and cocoa powder together in a small bowl. Cover it and let it sit for a few minutes.
This step wakes up the cocoa. You won’t taste coffee in the final cupcake, but you’ll notice the depth it brings.
Step 3 – Mix the dry ingredients
In a medium bowl, whisk together the flour, baking powder, baking soda, salt, and cinnamon. Make sure everything is evenly combined.
This helps the cupcakes bake evenly and keeps pockets of bitterness or salt from sneaking in.
Step 4 – Combine fats and sugar
In a large bowl, whisk the sugar with the oil and melted butter until smooth and glossy.
This blend gives you moisture from the oil and flavor from the butter, without sacrificing texture.
Step 5 – Add the egg
Whisk in the egg and keep going for about twenty seconds. The mixture should look cohesive and slightly thicker.
This little extra mixing here helps the structure later, so don’t rush it.
Step 6 – Add liquid ingredients
Pour in the buttermilk, vanilla, and food coloring, then whisk until evenly colored.
Add the vinegar and the cocoa mixture next. The batter will darken and loosen, which is exactly right.
Step 7 – Incorporate dry ingredients
Sift the dry mixture into the batter in three additions, whisking gently each time.
The batter will be thin and pourable. That’s not a mistake, it’s part of the magic.
Step 8 – Fill and bake
Divide the batter evenly into the liners, filling them about two-thirds full. Tap the pan lightly to release air bubbles.
Bake until the tops spring back lightly and a toothpick comes out clean, usually around 17 to 20 minutes.
Step 9 – Cool completely
Let the cupcakes cool in the pan briefly, then move them to a wire rack.
They need to be fully cool before frosting, even if you’re impatient. Warm cupcakes and cream cheese frosting don’t get along.
Step 10 – Make the frosting
Beat the butter and powdered sugar slowly at first, then increase speed until smooth.
Add the cream cheese and vanilla, beating just until fluffy and light. Stop once it looks smooth and airy.
Tips
- Use real buttermilk for the best flavor and texture.
- Keep ingredients at room temperature for a smooth batter.
- Measure flour carefully to avoid dense cupcakes.
- Gel food coloring gives stronger color with less liquid.
- Do not overmix once the flour is added.
- Pull cupcakes out as soon as they’re done.
- Cool completely before frosting to keep swirls intact.
Why this balance of flavors works
Red velvet isn’t meant to taste like chocolate cake dyed red. It’s softer than that, gentler, with more nuance.
The cocoa plays a supporting role here, while the buttermilk and vinegar bring a light tang that keeps things interesting.
I like how the cinnamon barely whispers in the background. It’s not obvious, but you’d miss it if it were gone.
The cream cheese frosting ties everything together. Sweet, yes, but also cool and slightly sharp, which keeps each bite from feeling heavy.
Storing and making ahead
These cupcakes hold up surprisingly well. At room temperature, they stay moist for a full day when covered.
In the refrigerator, they last a few days, though I prefer letting them come back to room temperature before serving.
Unfrosted cupcakes freeze beautifully. Wrap them well, freeze flat, and thaw slowly when needed.
The frosting can be made ahead too. A quick re-whip brings it back to life.
That flexibility makes this recipe practical, not just pretty. You can plan ahead without sacrificing quality.
And when you finally sit down with one, soft crumb and creamy swirl included, it feels like time well spent.
Red Velvet Cupcakes Recipe
Description
These Red Velvet Cupcakes are soft, tender, and perfectly moist with a subtle hint of cocoa, a gentle tang from buttermilk and vinegar, and a vibrant red hue that makes them as festive as they are delicious. Topped with silky cream cheese frosting, they’re a bakery-worthy treat that’s surprisingly easy to make at home.
ingredients
For the cupcakes:
For the cream cheese frosting:
Instructions
For the cupcakes:
- Preheat oven to 350°F (177°C) and line a standard 12-cup muffin tin with high-quality paper liners.
- In a glass measuring cup or small bowl, whisk the hot coffee and cocoa powder together. Cover and let stand for 5 minutes.
- In a medium mixing bowl, whisk together the flour, baking powder, baking soda, salt, and cinnamon (if using).
- In a large mixing bowl, whisk together the sugar, vegetable oil, and melted butter until smooth.
- Add in the egg and whisk for 20 seconds or until very well combined.
- Add the buttermilk, vanilla, and red gel food coloring. Whisk to combine. Then whisk in the vinegar and coffee mixture.
- Using a fine-mesh sieve, sift the dry ingredients into the wet batter in three additions, whisking gently after each until just incorporated. Do not overmix. The batter will be thin.
- Divide the batter evenly among the lined muffin cups (about ⅔ full). Tap the pan lightly on the counter to release air bubbles.
- Bake for 17–20 minutes, or until tops spring back when lightly touched and a toothpick comes out clean.
- Cool in the pan for 10 minutes, then transfer to a wire rack to cool completely before frosting (about 1 hour).
Make the frosting:
- In the bowl of a stand mixer fitted with the paddle attachment, beat the butter and sifted powdered sugar on low speed, gradually increasing to medium-high to avoid a sugar cloud.
- Beat for 3 minutes until smooth and creamy.
- Scrape down the bowl, then add the cream cheese and beat on medium-high for 1 minute until fluffy.
- Add vanilla and beat for 30 seconds until fully incorporated. Scrape bowl as needed.
- Frost cooled cupcakes using a piping bag or offset spatula.
Nutrition Facts
Servings 12
Serving Size 1 cupcake
- Amount Per Serving
- Calories 320kcal
- % Daily Value *
- Total Fat 16g25%
- Saturated Fat 8g40%
- Cholesterol 55mg19%
- Sodium 290mg13%
- Potassium 95mg3%
- Total Carbohydrate 42g15%
- Dietary Fiber 0.5g2%
- Sugars 32g
- Protein 4g8%
- Calcium 5 mg
- Iron 6 mg
* Percent Daily Values are based on a 2,000 calorie diet. Your daily value may be higher or lower depending on your calorie needs.
Note
- Use real buttermilk for best texture and flavor—DIY substitutes alter results.
- Gel food coloring is essential for vibrant color; liquid won’t give the same intensity.
- Cool cupcakes completely before frosting to prevent melting and sliding.
- Make ahead: Unfrosted cupcakes keep at room temp for 3 days or freeze for up to 2 months.
- Frosting tip: Add up to ¾ cup extra powdered sugar for sturdier piping consistency.