Let’s be honest, a big piece of meat can feel like a high-stakes project. It feels expensive, and the fear of overcooking it into a leathery disappointment is so real.
This method, the pre-season and reverse sear, is the ultimate confidence-builder. It’s not just a recipe; it’s a relaxed, slow dance that guarantees a juicy, perfect medium-rare center with a spectacularly crispy crust.
Once you try it, the old way of roasting just won’t make sense anymore. The logic is beautifully simple: you season deeply, cook gently to the exact temperature you want, and then finish with a blazing hot blast for that crust.
It turns what could be a stressful centerpiece into something you can actually look forward to making.
Ingredients Needed for the Recipe
Gathering your ingredients is the first quiet step toward something wonderful. You don’t need a pantry full of exotic spices here; the magic is in the technique and the quality of the beef itself.
- Beef Roast (7-9 lbs): An inside top round is my go-to for its lean, classic roast beef texture. This cut is the star, so choosing a good one is key.
- Coarse Salt: This isn’t just for seasoning; it’s for dry-brining. The coarse grains penetrate the meat, seasoning it from the inside out and improving texture.
- Freshly Cracked Black Pepper: We add this later, just before cooking, to avoid burning its delicate oils during the long pre-season in the fridge.
- Butcher’s Twine: Essential for trussing, which creates a uniform shape for even cooking from edge to center.
The Perfect Cut for Your Roast
While an inside top round is fantastic, you do have some delicious flexibility here. The important thing is to understand what you’re working with. Bottom round or a sirloin roast are also excellent choices for roasting.
These are typically leaner, more economical cuts that become incredibly tender and flavorful when cooked with this low-and-slow method and sliced thinly.
What you want to avoid are the already-tender, quick-cooking cuts like tenderloin; they don’t benefit from the same slow render and can dry out.
Think of cuts that love a long, gentle coaxing. Ask your butcher for a recommendation, tell them you’re reverse-searing, and they’ll point you right.
A “denuded” round simply means the butcher has already trimmed all the fat and silver skin, which is a fantastic head start.
How to make Roast Beef Recipe?
Step 1- Prep and Pre-Season
Start by trimming any large, hard pieces of fat and that translucent silver skin from your roast; it’s tough and won’t render. Pat the meat completely dry with paper towels.
Now, take your butcher’s twine and truss the roast into a nice, even cylinder. This isn’t just for looks; it ensures every slice cooks at the same rate. Here’s the first secret: season it aggressively on all sides with coarse salt. I mean, really coat it
Place the trussed and salted roast on a rack set over a baking sheet, and slide it, uncovered, into your refrigerator. Let it sit there for at least 4 hours, or up to 48. This dry-brine is transformative, pulling the salt deep into the meat and setting you up for phenomenal flavor.
Step 2- The Gentle Warm-Up
Pull the roast from the fridge about 30 minutes before it goes in the oven, just to take the deep chill off. Preheat your oven to a very modest 225°F. This low temperature is the heart of the reverse sear.
Insert an oven-safe meat thermometer into the very center of the roast, coming in from the top. Now, grind a generous amount of black pepper all over the surface. No need to add more salt; that work is already done.
Place the roast, on its rack and sheet pan, right onto the middle oven rack. Then, just close the door and walk away. This is the easy part. You’re not basting, you’re not fussing.
You’re just waiting for that thermometer to read 120-125°F for medium-rare. It will take a few hours, filling your kitchen with a gentle, savory aroma.
Step 3- The Crucial Rest
When the thermometer hits your target, carefully remove the entire pan from the oven. Transfer the roast to a clean cutting board or platter and tent it loosely with aluminum foil.
Now, this is critical: let it rest. For a long time. We’re talking 30 to 90 minutes. The internal temperature will actually rise a few degrees and then settle back down.
This rest period allows the frantic, hot juices to redistribute evenly throughout the entire roast. If you sliced it now, all those precious juices would just flood onto the board. Use this downtime wisely, maybe to whip up a quick garlic butter or a simple gravy.
Step 4- The Sizzling Finale
About 15 minutes before your rest is done, crank your oven up as high as it will go, to 500°F or even its broil setting. You want it fiercely hot. Once the oven is screaming hot and the meat has rested, it’s showtime.
Remove the foil and place the roast back in the oven, right on the middle rack. Watch it closely. You’re looking for a deep, glorious, brown crust to form—that’s the Maillard reaction in all its flavor-producing glory.
This should only take 10 to 15 minutes. There’s no need to rest it again after this sear; that important work is already done. You can slather it with herb butter right away, watching it melt and seep into every crackle of the crust.
Step 5- Slice and Serve
This final step is non-negotiable. Use the sharpest knife you own. Carefully cut the twine off and discard it. Now, slice the beef across the grain into the thinnest slices you can manage, aiming for no more than 1/4-inch thick.
Slicing thinly and against the grain shortens the muscle fibers, making each bite melt-in-your-mouth tender. Arrange those beautiful, pink-centered slices on a platter. Pour over any accumulated juices from the board.
Serve it with those sides you prepared, and get ready for the quietest, most satisfying compliment of all: the sound of people happily eating.
Tips
- Invest in a good instant-read or leave-in thermometer. It removes all the guesswork and is the single best tool for perfect meat.
- Don’t skip the trussing. A lopsided roast cooks unevenly, leaving you with overdone and underdone sections in the same slice.
- When you slice, if the center looks a bit more done than you wanted, just wait a moment. The red myoglobin will often bloom back, giving you that perfect pink hue.
How to Serve Your Masterpiece
This roast beef is incredibly versatile beyond the classic Sunday dinner. For a holiday feast, pair it with creamy horseradish sauce, crispy roasted potatoes, and glazed carrots.
For fantastic weeknight meals, pile thin slices onto crusty rolls with horseradish mayo for next-level sandwiches. Toss slices into a salad for a hearty protein boost, or layer them into a cheesy gratin.
The leftovers, if you have any, are a treasure. Thinly sliced cold roast beef with a little sea salt is a snack fit for royalty. It’s a centerpiece that keeps on giving, long after the main event is over.
Storing and Reheating with Care
To store, let the roast cool completely, then wrap the whole piece or slices tightly in plastic wrap and refrigerate for up to 4 days. For longer storage, you can freeze it for about a month.
Now, reheating roast beef is tricky because you risk overcooking it. The best method is gentle and steamy. Place the sliced beef in a baking dish with a splash of beef broth, cover tightly with foil, and warm it in a 300°F oven just until heated through, about 10-15 minutes.
This helps reintroduce moisture. Understand that the slices will cook a bit more, likely moving to a medium doneness. It’s a trade-off, but it’s far better than zapping it in the microwave, which will guarantee toughness.
Why the Science Works for You
This method isn’t just folklore; it’s delicious science working in your favor. The long, uncovered fridge time allows the salt to penetrate and the surface to dry, which leads to a better sear later.
Cooking at 225°F gently brings the entire mass of meat to the same perfect temperature edge-to-edge, with no ugly gray band of overcooked meat.
The final high-heat blast creates the Maillard reaction—a complex chemical process between amino acids and sugars that creates hundreds of new flavor compounds.
That’s the source of that deep, savory, nutty, irresistible crust. Finally, the long rest lets the muscle fibers relax and reabsorb the juices. Every step has a purpose, and together, they deliver a result that feels both impressive and completely achievable.
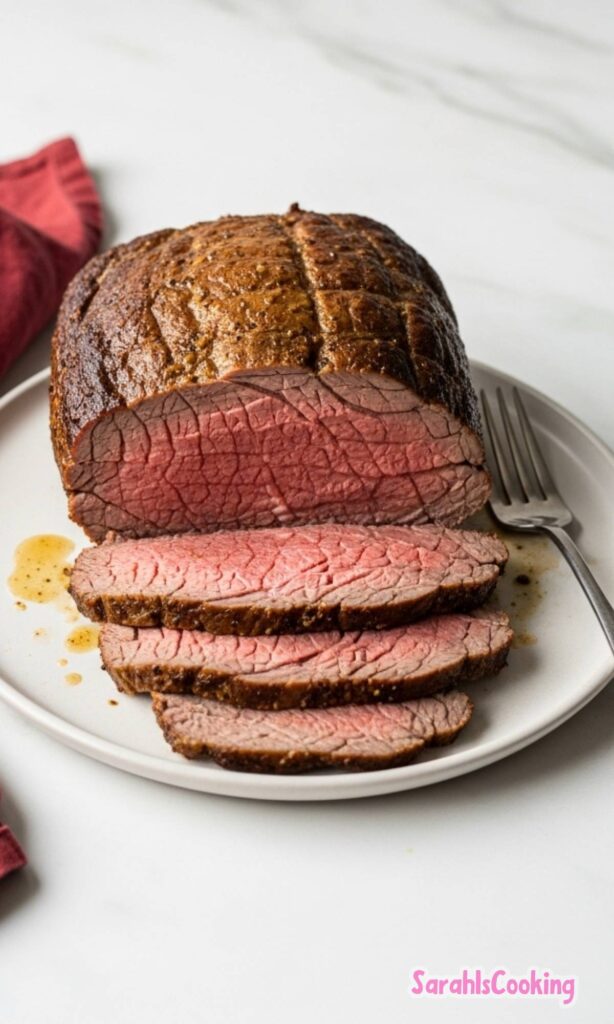
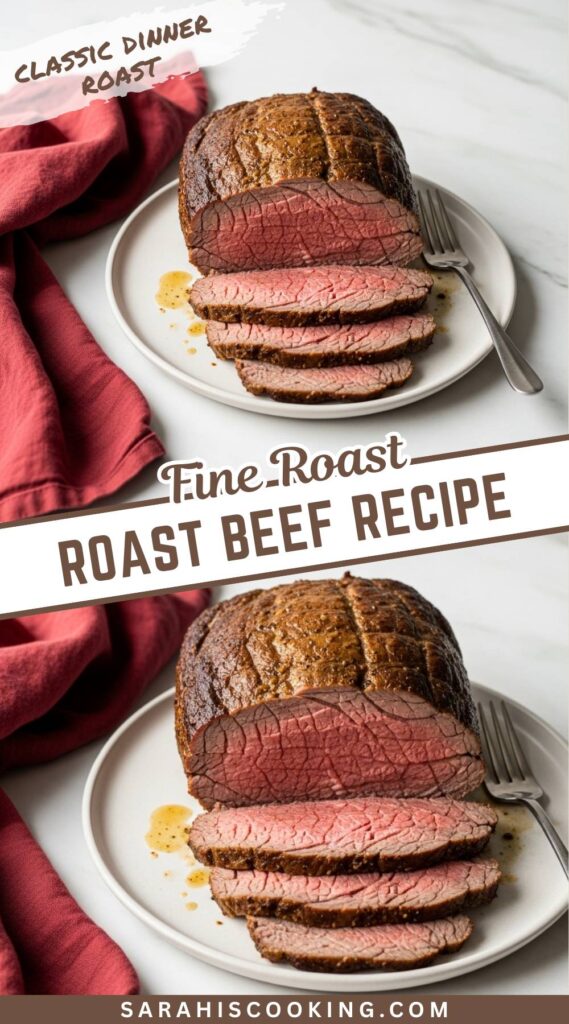
Roast Beef Recipe
Description
This tried-and-true Roast Beef Recipe is well seasoned, slow-cooked, and finished on high heat until golden brown and at a perfect medium-rare temperature. Using the reverse-sear method, this roast stays incredibly juicy, flavorful, and tender—ideal for Sunday roasts or holiday gatherings.
Ingredients
Instructions
- Trim the top round roast of any excess fat and silverskin. Leave a thin layer of fat if desired for flavor.
- Truss the beef roast securely with butcher’s twine to maintain shape during cooking.
- Generously season the roast on all sides with coarse salt (about 1 to 1½ tablespoons).
- Place the roast on a wire rack set over a rimmed baking sheet. Refrigerate uncovered for 4 to 48 hours to dry-brine (pre-season).
- Remove the roast from the refrigerator and let it sit at room temperature for 30 minutes before cooking.
- Preheat the oven to 225°F (107°C). Insert a meat thermometer into the thickest part of the roast from the top.
- Season the top and sides with freshly cracked black pepper (about 1 teaspoon).
- Roast in the center of the oven until the internal temperature reaches 120–125°F for medium-rare (about 3 to 3.5 hours).
- Remove the roast, tent loosely with foil, and let it rest for 30 to 90 minutes. Use this time to prepare garlic butter and beef gravy if desired.
- About 10–15 minutes before the rest is complete, increase oven temperature to 500°F (260°C).
- Return the roast to the oven and sear for 10–15 minutes, or until a deep golden-brown Maillard crust forms. Watch closely to avoid overcooking.
- Remove from oven, top with garlic butter if using, and slice immediately into very thin pieces (no thicker than ¼ inch).
- Serve with optional sides like Yorkshire pudding, beef gravy, or roasted vegetables.
Nutrition Facts
Servings 10
Serving Size 1 serving (approx. 6 oz sliced beef)
- Amount Per Serving
- Calories 380kcal
- % Daily Value *
- Total Fat 18g28%
- Saturated Fat 7g35%
- Cholesterol 120mg40%
- Sodium 580mg25%
- Potassium 550mg16%
- Total Carbohydrate 1g1%
- Protein 50g100%
- Calcium 20 mg
- Iron 4 mg
* Percent Daily Values are based on a 2,000 calorie diet. Your daily value may be higher or lower depending on your calorie needs.
Note
- For rare: Remove roast at 115–120°F. For medium: 125–130°F. Medium-well: 135–140°F. Well-done: 140–150°F.
- Dry brining tip: The longer you pre-season (up to 48 hours), the more flavorful and tender the roast becomes.
- Resting is key: Myoglobin redistributes during rest—sliced meat may look overdone at first but will regain pink color within seconds.
- No drippings? This method locks in juices—don’t expect pan drippings for gravy (use store-bought or make ahead).