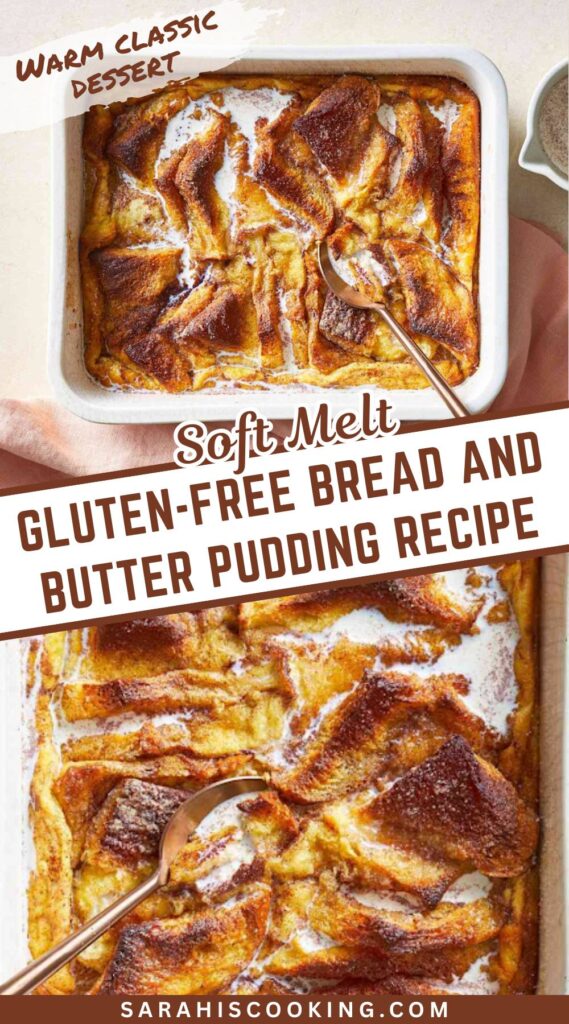
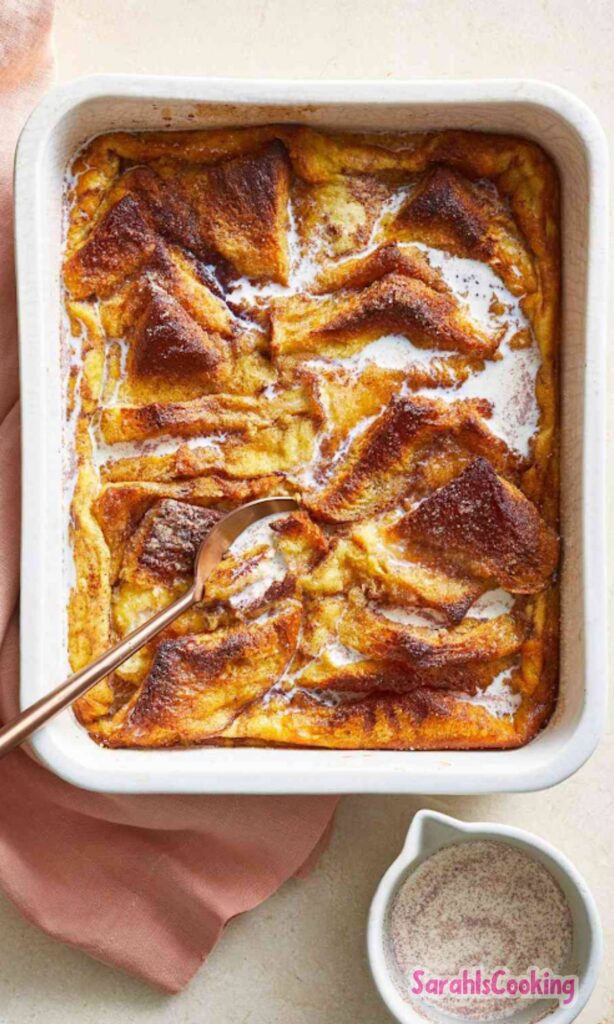
If you’re reading this, then it probably means you’re a fan of bread and butter pudding, and well, same here. I’m Sarah, and I find this dessert so wonderfully comforting.
It’s incredibly simple to make, with just a handful of ingredients, yet it delivers the most delicious texture and cozy warmth. I love it served with a scoop of ice cream for dessert, or even with a dollop of yogurt for a special breakfast.
What I Love About This Recipe
This pudding holds a special place in my heart for a few simple reasons. It feels like a warm hug from the kitchen, and it’s incredibly adaptable to different needs.
I love that it uses straightforward ingredients you can find at any grocery store. It’s naturally sweetened with honey, which feels a little lighter, and it can easily be made completely dairy free.
It’s the kind of recipe that feels both a little bit fancy and deeply humble at the same time. You can make it for a quiet family dinner or for a weekend brunch with friends, and it always feels just right.
Ingredients Needed for the Recipe
- Gluten-Free Bread: This is our base, of course. I find a sturdy, plain white gluten-free loaf works beautifully here, giving us that classic structure.
- Large Eggs: These are the key to creating that rich, custardy texture that sets the pudding perfectly.
- Soy Milk: This forms the liquid part of our custard, keeping things dairy-free, but you can use any milk you prefer.
- Honey: This is our natural sweetener, adding a gentle, floral sweetness that I find just perfect.
- Vanilla Extract: A dash of this adds a lovely warmth and depth of flavor to the entire dish.
- Mixed Fresh Berries: I use strawberries, blueberries, and raspberries for little bursts of juicy, tart flavor throughout.
- Butter: Softened butter is for spreading on the bread, creating those rich, delicious layers we all love.
How to Make Gluten Free Bread and Butter Pudding?
Step 1 – Preheat and Prepare
Start by preheating your oven to 180°C (or 160°C if you’re using a fan-forced oven). Then, take a small baking dish or a loaf tin, and grease it lightly with a little butter or oil. This will prevent our pudding from sticking later on.
Step 2 – Make the Custard Base
In a large mixing bowl, crack in the six eggs. Pour in the soy milk, honey, and vanilla extract. Now, just whisk it all together until it’s beautifully smooth and combined. You’ll see the honey dissolve into the mixture, which is exactly what we want.
Step 3 – Assemble the Layers
Take your slices of gluten-free bread and spread a generous layer of softened butter on each one. Place about four of these buttered slices into the bottom of your prepared dish, covering the base. Now, scatter most of your fresh berries over this first layer of bread. Place the remaining two slices of buttered bread on top, creating a second layer.
Step 4 – The Water Bath and Baking
Slowly and carefully, pour your custard mixture over the layered bread and berries. Now, place this smaller dish inside a larger baking dish. Fill the larger dish with hot water until it comes about halfway up the sides of the smaller one. This water bath is our secret for a perfectly creamy, non-rubbery texture. Bake for about 55 minutes, covering the top with aluminium foil after the first 20 minutes to prevent it from browning too much.
Step 5 – Check for Doneness
Once the time is up, remove the pudding from the oven very carefully. To check if it’s done, insert a sharp knife into the centre. If it comes out clean, with no unset liquid, it’s ready. If not, just pop it back in for a few more minutes.
Step 6 – Serving Warm
Let the pudding sit for just a minute or two before serving. I love it best when it’s still warm, dusted with a little icing sugar and with a scoop of my favorite ice cream melting over the top.
Choosing Your Gluten-Free Bread
The bread you choose is the foundation of this pudding, so it’s worth a little thought. A plain, sturdy gluten-free white loaf is my go-to, as it holds its shape well and absorbs the custard nicely. You don’t need to use stale bread, fresh works perfectly fine here.
If you’re feeling festive, this recipe is absolutely wonderful made with gluten-free panettone around the holidays. Just ensure that whatever bread you choose, it’s a type you enjoy eating on its own, as that flavor will shine through in the final pudding.
Tips
- For a dairy-free version, simply use your favorite vegan butter and ensure your bread is certified dairy-free.
- Don’t skip the water bath. It gently cooks the custard, ensuring a silky smooth result instead of a scrambled one.
- If your oven tends to run hot, do check the pudding a little earlier. The foil tent is key to a golden, not burnt, top.
- Let the pudding rest for 5-10 minutes after baking. This helps it set further, making it easier to slice and serve.
Fun Flavor Variations
This recipe is a wonderful canvas for your own creativity. If you’d like to mix things up, here are a few ideas I enjoy. For a chocolatey twist, swap the berries for a quarter cup of dark chocolate chips. The melty pockets of chocolate are just divine.
You could also spread a thin layer of orange marmalade on the buttered bread for a bright, zesty flavor. For a more traditional take, leave out the berries and add a quarter cup of raisins or sultanas to the layers instead.
If you love warm spices, try adding a quarter teaspoon of ground cinnamon and a tiny pinch of nutmeg right into the custard mixture. It makes the whole kitchen smell amazing.
Storing and Reheating Your Pudding
Any leftovers can be stored covered in the refrigerator for up to three days. I like to keep it right in the baking dish, wrapped tightly with cling film, or you can transfer portions to an airtight container.
When you’re ready for another serving, it’s best reheated gently. A quick zap in the microwave until just warm brings back that lovely, soft texture perfectly. It makes for a very lovely treat the next day, almost like a planned pleasure.
Gluten Free Bread and Butter Pudding Recipe
Description
This Gluten Free Bread and Butter Pudding is a comforting, naturally sweetened dessert that's perfect with berries, custard, or ice cream—or even for a luxurious breakfast! Made with simple pantry staples, it’s allergy-friendly (gluten-free, nut-free, and easily dairy-free), and bursting with warm, cozy flavors. A nostalgic treat reimagined for modern diets!
ingredients
Main Ingredients
Berries
To Serve (Optional)
Instructions
- Preheat the oven to 180°C (160°C for fan-forced). Grease a small baking dish or loaf tin with butter (or olive oil for dairy-free).
- In a large mixing bowl, whisk together the eggs, soy milk, vanilla extract, and honey until well combined and smooth.
- Butter each slice of gluten-free bread. Layer 4 slices in the bottom of the prepared baking dish.
- Scatter the strawberries, blueberries, and raspberries evenly over the bread layer.
- Top with the remaining 2 buttered bread slices.
- Slowly pour the egg-milk mixture evenly over the layered bread and berries, ensuring all pieces are soaked.
- Place the small baking dish inside a larger roasting pan. Fill the larger pan with hot water until it reaches halfway up the sides of the pudding dish (water bath).
- Bake for 55 minutes. After 20 minutes, cover loosely with aluminum foil to prevent over-browning.
- Remove from oven (carefully—water will be hot!). Let rest for 5 minutes. Test doneness by inserting a knife into the center—it should come out clean or with minimal custard residue.
- Serve warm, dusted with icing sugar and topped with a scoop of your favorite ice cream or a drizzle of custard.
Nutrition Facts
Servings 6
Serving Size 1 slice (approx. 1/6 of recipe)
- Amount Per Serving
- Calories 320kcal
- % Daily Value *
- Total Fat 14g22%
- Saturated Fat 6g30%
- Cholesterol 210mg70%
- Sodium 340mg15%
- Potassium 280mg8%
- Total Carbohydrate 35g12%
- Dietary Fiber 2g8%
- Sugars 18g
- Protein 14g29%
- Calcium 120 mg
- Iron 2 mg
* Percent Daily Values are based on a 2,000 calorie diet. Your daily value may be higher or lower depending on your calorie needs.
Note
- Dairy-Free Option: Use vegan butter and ensure your bread is dairy-free. Grease the dish with olive oil if preferred.
- Bread Tip: Stale bread works beautifully, but fresh is fine too. Panettone makes a festive holiday version!
- Variations: Try chocolate chips, raisins, orange marmalade, or a pinch of cinnamon and nutmeg for different flavors.
- Storage: Keep covered in the fridge for up to 3 days. Reheat gently in the microwave or oven.