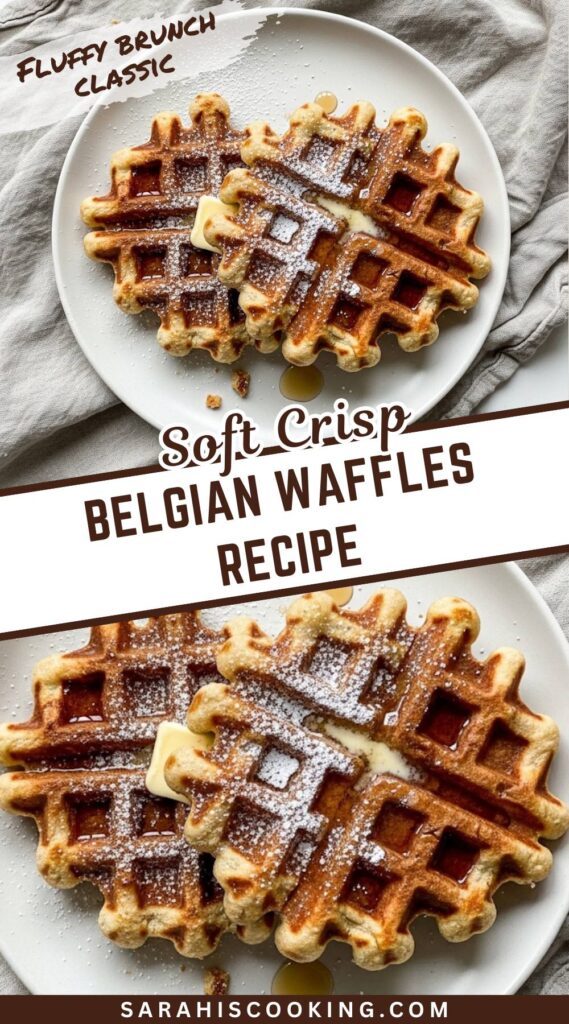
A really good Belgian waffle has a way of slowing everyone down at the table, even on busy mornings. What makes this one stand out is the balance—crisp edges that crackle slightly when you cut into them, followed by an interior that’s soft, airy, and surprisingly light.
That contrast doesn’t happen by accident. It’s the result of a few intentional choices that turn a simple breakfast into something that feels bakery-level.
Over the years, I’ve learned that Belgian waffles reward patience. Taking a couple of extra minutes to separate eggs or fully preheat the iron makes a noticeable difference. The payoff is a waffle that doesn’t need to be drowned in toppings to taste good. It holds its own, which is exactly what I look for in a recipe I come back to again and again.
Ingredients Needed for the Recipe
All-purpose flour: This gives the waffle structure without making it heavy. I’ve tested versions with cake flour and bread flour, and all-purpose consistently hits the sweet spot—sturdy enough to crisp, but still tender inside.
Sugar: Beyond sweetness, sugar plays a key role in browning. It helps the exterior caramelize, creating that deep golden color and slightly crisp shell that defines a proper Belgian waffle.
Baking powder: This adds extra lift alongside the whipped egg whites. Skipping or reducing it leads to waffles that look good at first but fall flat once they come off the iron.
Eggs, separated: Separating the eggs may feel like an extra step, but it’s essential. The yolks enrich the batter and add flavor, while the whipped whites introduce air that gives the waffles their signature lightness.
Whole milk: Whole milk brings enough fat to keep the interior moist and flavorful. Lower-fat milk works in a pinch, but the texture won’t be quite as satisfying.
Butter: This recipe doesn’t hold back, and for good reason. Butter contributes flavor, tenderness, and that irresistible aroma that fills the kitchen as the waffles cook.
Vanilla extract: A small amount goes a long way. Vanilla softens the richness of the butter and eggs, making the flavor feel warm and well-rounded rather than heavy.
The Heart of the Matter: Belgian vs. Regular
Belgian waffles aren’t just regular waffles with deeper pockets. While the iron certainly helps create that iconic shape, the batter is where the real difference lies. Belgian waffle batter is richer and slightly thicker, designed to rise higher and hold its structure.
The use of whipped egg whites is what truly sets them apart. Instead of relying solely on chemical leavening, the batter traps air, giving the finished waffle a lighter, almost cake-like crumb. This structure also makes Belgian waffles better suited for toppings—they stay crisp longer and don’t collapse under syrup, fruit, or whipped cream.
How to make Belgian Waffle Recipe?
Step 1- Combine Your Dry Ingredients
Start with a large mixing bowl and whisk together the flour, sugar, and baking powder. This step isn’t about aggressive mixing—just enough to evenly distribute everything. Properly blending the dry ingredients ensures the waffles rise evenly and don’t end up with bitter pockets of baking powder.
Step 2- Whisk the Yolk Mixture
In a separate bowl, lightly beat the egg yolks until smooth. Add the milk, melted butter, and vanilla extract, whisking until the mixture looks glossy and uniform. Letting the butter cool slightly before adding it prevents scrambling the yolks and keeps the mixture silky.
Step 3- Bring the Batter Together
Pour the wet mixture into the bowl of dry ingredients. Using a spatula, gently stir until just combined. The batter should look thick but not stiff, with a few small lumps remaining. Overmixing here can develop gluten, which leads to tougher waffles—something I learned the hard way early on.
Step 4- Whip the Egg Whites
In a clean, dry bowl, beat the egg whites until stiff peaks form. They should look glossy and hold their shape when the beaters are lifted. Room-temperature whites whip more easily and create a more stable foam, which helps maintain that airy texture during cooking.
Step 5- Fold Gently
Add about one-third of the whipped egg whites to the batter and stir gently to loosen it. Then fold in the remaining whites using a light hand. The goal is to preserve as much air as possible. Slow, deliberate folding makes all the difference here.
Step 6- Cook to Golden Perfection
Preheat your Belgian waffle iron thoroughly. A properly heated iron ensures immediate crisping when the batter hits the surface. Add the batter, close the lid, and cook until the steam slows significantly and the waffle turns a rich golden brown. That visual cue is more reliable than the timer alone.
Choosing Your Waffle Iron
A Belgian waffle iron with deep grids is essential for this recipe. The depth allows the batter to rise fully without overflowing and creates pockets that stay crisp. Heavier irons tend to distribute heat more evenly, reducing pale spots and uneven cooking. Consistent heat is the difference between a waffle that’s uniformly crisp and one that’s soft in the center.
Tips
Make sure your egg whites are completely free of yolk, as even a small amount of fat can prevent them from whipping properly.
Avoid opening the waffle iron too early. Doing so releases steam and can cause the waffle to tear or deflate before it sets.
Once cooked, transfer waffles to a wire rack instead of stacking them. This prevents trapped steam from softening the crust.
If your waffle iron isn’t non-stick, lightly brush it with oil or butter between batches to avoid sticking and tearing.
Serving & The Joy of Toppings
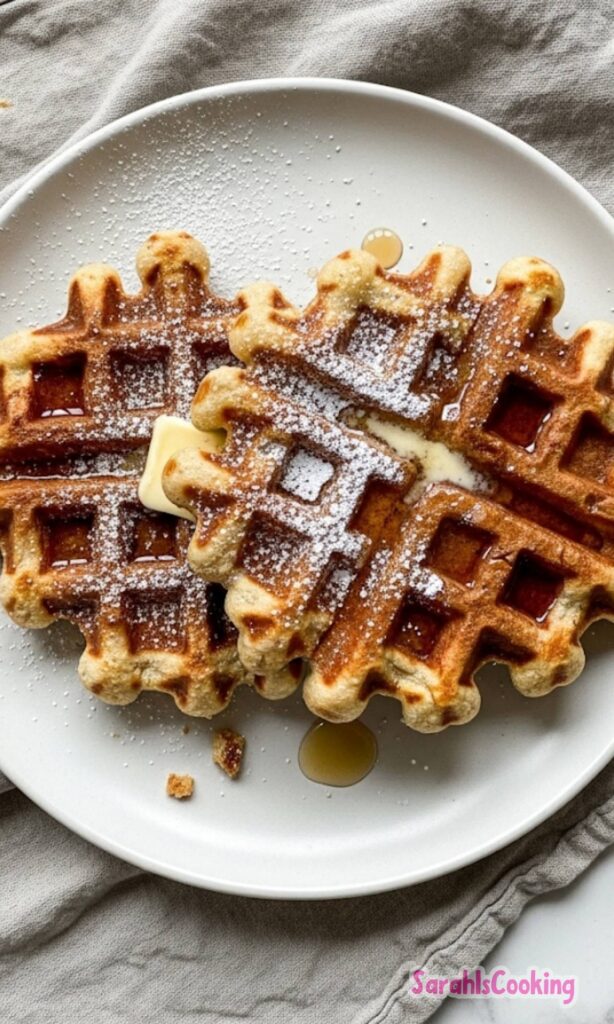
These waffles are best served immediately, when the contrast between crisp exterior and fluffy interior is at its peak. Classic maple syrup is always welcome, but these waffles are versatile enough to handle more creative toppings.
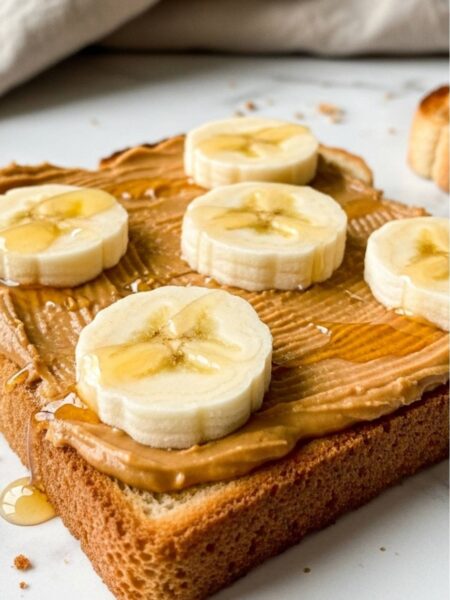
Fresh berries with lightly sweetened Greek yogurt make a balanced option, while nut butter and honey add richness without overwhelming the waffle itself. For dessert, warm waffles paired with ice cream or a drizzle of chocolate sauce feel indulgent but still structured enough to eat neatly.
Storing for Later
Allow leftover waffles to cool completely on a wire rack before storing. This step prevents condensation, which can make them soggy. Once cooled, store them in an airtight container in the refrigerator for several days, or freeze them for up to three months. Layering parchment paper between waffles keeps them from sticking together.
Reheating for That Fresh-Made Feel
For the best texture, reheat waffles in a toaster, toaster oven, or standard oven set to about 375°F. The dry heat restores crispness while warming the interior evenly. Microwaving may be faster, but it softens the waffle and dulls the texture—something I avoid when the goal is that fresh-off-the-iron experience.
Belgian Waffle Recipe
Description
Preheat the waffle maker and start whipping up your egg whites. This traditional Belgian waffle recipe will transport you straight to Brussels. Our Belgian waffle recipe is just as fun to make as it is to eat. Once the waffles are cooked and you’ve broken through the golden, crispy crust, sinking your knife into the tender center, you’ll be glad you woke up a little earlier to make these Belgian waffles.
ingredients
Instructions
- In a large bowl, whisk together the flour, sugar, and baking powder.
- In another bowl, lightly beat the egg yolks. Add the whole milk, melted butter, and vanilla extract; whisk until well combined.
- Pour the wet ingredients into the dry ingredients and stir just until combined. Do not overmix; a few lumps are okay.
- Using a hand mixer or whisk, beat the egg whites until stiff peaks form.
- Gently fold the whipped egg whites into the batter, being careful not to deflate the mixture.
- Preheat your Belgian waffle maker according to manufacturer’s instructions.
- Ladle the batter onto the hot waffle maker and cook until golden brown and crisp—usually about 3–5 minutes per waffle.
- Serve immediately with fresh fruit, a dusting of confectioners’ sugar, or your favorite maple syrup.
Nutrition Facts
Servings 5
Serving Size 2 waffles
- Amount Per Serving
- Calories 701kcal
- % Daily Value *
- Total Fat 42g65%
- Saturated Fat 25g125%
- Cholesterol 179mg60%
- Sodium 689mg29%
- Potassium 320mg10%
- Total Carbohydrate 72g24%
- Dietary Fiber 1g4%
- Sugars 34g
- Protein 10g20%
- Calcium 250 mg
- Iron 2 mg
* Percent Daily Values are based on a 2,000 calorie diet. Your daily value may be higher or lower depending on your calorie needs.
Note
- Storage tip: Let waffles cool completely before storing in an airtight container. They keep in the fridge for up to 3 days or freeze for up to 3 months.
- Reheating: Reheat in a toaster oven or regular oven to maintain crispness—never microwave if you want to keep them crunchy!
- Variations: Add cinnamon, nutmeg, blueberries, or chocolate chips to the batter for a fun twist.
- Pro tip: Ensure your egg whites are completely yolk-free and your bowl is grease-free for best volume when whipping.