There’s something truly special about a classic pumpkin pie, a dessert that feels like a warm hug at the end of a big meal.
It’s a symbol of celebration, of gathered families, and of course, the cozy flavors of the season.
The Story of a Classic Dessert
Long before it became a holiday staple on our tables, pumpkin pie was a symbol of resourcefulness and comfort.
Early American colonists, adapting old English recipes for spiced squashes, began filling hollowed-out pumpkins with sweetened milk and spices, then roasting them in the embers of a fire.
This humble beginning evolved over centuries into the creamy, spiced custard we know and love today.
It’s a dessert with a history as rich and deep as its flavor, a true piece of culinary heritage.
Ingredients Needed for the Recipe
Using the right ingredients is the first, and most important, step to a perfect pie.
Each one plays a specific role in creating that silky, spiced filling and flaky crust.
- Pie Crust: A single, unbaked crust forms the buttery, crisp foundation for the entire pie. You can use your favorite homemade recipe or a quality store-bought one to save time.
- Light Brown Sugar: This does more than just sweeten; its molasses notes add a deep, caramel-like flavor that white sugar simply can’t provide.
- All-Purpose Flour: Just a single tablespoon acts as a stabilizer, helping the custard set perfectly without being overly dense or gummy.
- Ground Cinnamon, Ginger, Nutmeg, & Cloves: This is the soul of the pie. Cinnamon provides warmth, ginger adds a little zing, and nutmeg and cloves offer those classic, aromatic undertones.
- A Pinch of Salt: Never underestimate the power of salt to make all the other flavors, especially the pumpkin, pop and taste more vibrant.
- Large Eggs: They are the backbone of the filling, binding everything together and giving the pie its signature custard texture as it bakes.
- Pumpkin Puree: Be absolutely certain you’re using plain pumpkin puree, not the pre-sweetened “pumpkin pie filling.” The only ingredient should be pumpkin.
- Evaporated Milk: This rich, concentrated milk is the secret to an exceptionally creamy and luxurious filling that doesn’t weep or separate.
How to make Pumpkin Pie?
The process is straightforward, but a few key techniques will elevate your pie from good to exceptional.
We’ll start with the crust, because a partially baked, or “blind-baked,” shell is the best way to prevent a soggy bottom.
Step 1- PREPARE THE PIE CRUST
Begin by rolling out your pie dough into a circle about 12 inches in diameter.
Gently transfer it to your pie dish, being careful not to stretch the dough, as this can cause it to shrink dramatically in the oven.
Step 2- TRIM AND CRIMP
Neatly trim the overhanging dough, leaving about a half-inch overhang to work with.
Then, tuck this overhang under itself to create a thick edge that sits right on the rim of the pie plate, and crimp it decoratively with your fingers or a fork.
Step 3- CHILL THE DOUGH
Place the entire pie plate with the fitted crust into the refrigerator for at least 15 minutes.
This crucial resting period allows the gluten in the dough to relax, which, again, minimizes shrinking and keeps your beautiful crimped edges intact.
Step 4- DOCK AND WEIGHT THE CRUST
Once chilled, use a fork to prick the bottom and sides of the dough all over; this “docking” prevents large air bubbles from forming.
Line the cold crust with parchment paper or foil and fill it to the top with pie weights, dried beans, or even uncooked rice.
Step 5- PARTIALLY BAKE THE SHELL
Bake the weighted crust in a preheated 400°F (200°C) oven for 15 minutes, until the edges just start to look set.
Carefully remove the parchment and weights, then return the bare crust to the oven for another 5 minutes to dry out the bottom. It won’t look fully cooked, and that’s perfectly fine.
Step 6- WHISK THE DRY INGREDIENTS
While the crust is baking and cooling slightly, reduce the oven temperature to 375°F (190°C).
In a small bowl, whisk together the brown sugar, flour, salt, and all those wonderful, fragrant spices until they are completely combined.
Step 7- COMBINE THE WET INGREDIENTS
In a separate, larger bowl, lightly beat the three eggs until the yolks and whites are just blended.
Then, whisk in the pumpkin puree and the evaporated milk until the mixture is smooth and homogenous.
Step 8- BRING THE FILLING TOGETHER
Pour the dry spice and sugar mixture into the wet pumpkin mixture.
Whisk it all together gently, just until you no longer see any streaks of flour or pockets of dry ingredients. Overmixing can incorporate too much air, so be swift and efficient.
Step 9- FILL AND BAKE THE PIE
Place the partially baked pie shell on a baking sheet for easy handling, then pour the filling right into the warm crust.
Bake for 45 to 50 minutes at 375°F (190°C). To prevent the crust edges from burning, use a pie shield or strips of foil to cover them for the entire baking time.
Step 10- COOL AND SET COMPLETELY
The pie is done when the edges are set but the center still has a slight, gentle wobble when you jiggle the pan.
Let it cool completely on a wire rack for a few hours, then refrigerate it for several more, or even overnight, to allow the custard to fully set for clean slices.
Choosing Your Pumpkin Puree
While canned pumpkin puree is a fantastic, consistent option, making your own can be a rewarding autumn project.
Smaller sugar pumpkins, often called pie pumpkins, have a denser, sweeter flesh and less water than their larger jack-o’-lantern cousins, making them ideal for baking.
Simply halve the pumpkin, scoop out the seeds and stringy pulp, and roast it cut-side down until the flesh is tender.
Scoop the soft flesh from the skin and puree it in a blender or food processor until completely smooth, then let it drain in a fine-mesh strainer to remove any excess liquid.
The flavor difference is subtle but lovely, a little earthier and more complex than the canned version, if you have the time to spare.
Tips
A few small touches can make a world of difference in your final result. Here’s how to ensure pie perfection.
- For the flakiest crust, handle the dough as little as possible and keep all your ingredients cold, from the butter to the water you use.
- If your pie crust recipe makes two disks, freeze one for later. You can even use the extra dough to cut out decorative autumn leaves for the top.
- Room temperature eggs incorporate more evenly into the filling, leading to a smoother, more uniform custard texture.
- To test for doneness, gently nudge the pie pan. The center should jiggle as a single, cohesive mass, not like a liquid wave.
- Resist the urge to cut into the pie while it’s still warm. Chilling it thoroughly is non-negotiable for achieving those picture-perfect, clean slices.
Serving and Topping Ideas
A slice of pumpkin pie is a delight on its own, but the right accompaniments can turn it into a masterpiece.
A generous dollop of freshly whipped cream, lightly sweetened and perhaps with a hint of vanilla, is the classic and timeless choice.
For a tangy contrast that cuts through the sweetness, a scoop of vanilla ice cream or a drizzle of salted caramel sauce creates a truly decadent experience.
If you’re feeling adventurous, a sprinkle of candied pecans or a dash of freshly grated nutmeg right before serving adds both texture and a burst of aroma.
And for the ultimate indulgence, a warm bourbon butterscotch sauce poured over a cold slice is a combination that is simply unforgettable.
Storage & Freezing
This pie is a fantastic make-ahead dessert, as its flavor actually improves after a day in the fridge.
Once completely cool, cover the pie tightly with plastic wrap or aluminum foil and store it in the refrigerator for up to 4 days.
For longer storage, you can freeze the entire pie, or individual slices, for up to 3 months.
To freeze, first chill the pie completely, then wrap it in a layer of plastic wrap followed by a layer of heavy-duty foil to prevent freezer burn.
Thaw it overnight in the refrigerator before you plan to serve it, and it will taste just as wonderful as the day it was baked.

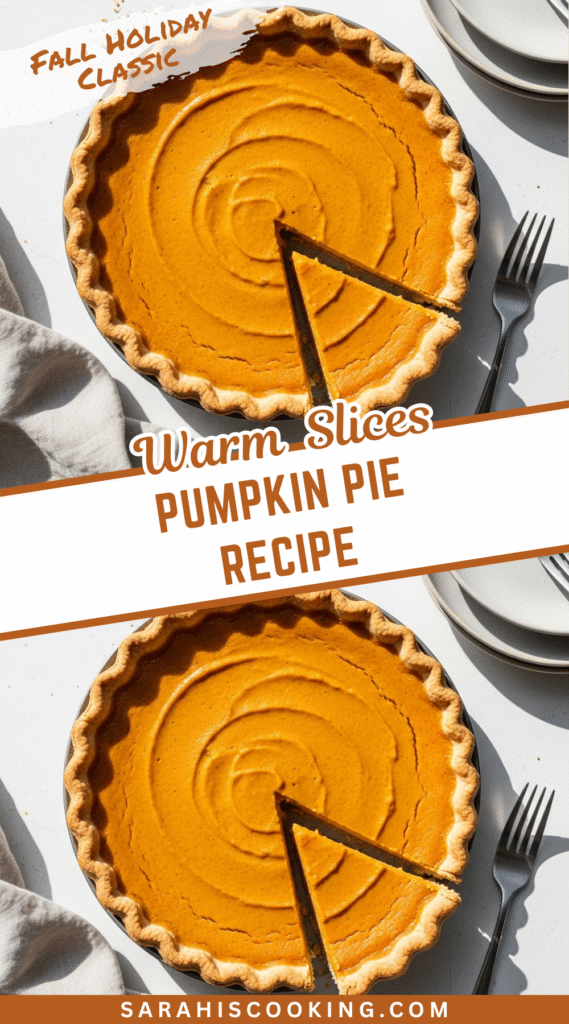
Pumpkin Pie Recipe
Description
This easy pumpkin pie recipe is made completely from scratch and is a great make-ahead dessert for the holidays!
ingredients
Pie Crust
Pumpkin Pie Filling
Instructions
To prepare the pie crust
- Preheat the oven to 400°F (204°C).
- Roll the dough out to 12-inches in diameter. Carefully transfer the dough to a 9-inch pie plate (at least 1½ inches deep), gently fit it into the plate, trim excess dough, and crimp the edges. Chill in the refrigerator for 15–20 minutes.
- Prick the bottom of the crust with a fork. Line with parchment paper or foil and fill with pie weights (or dried beans/rice).
- Bake at 400°F (204°C) for 15 minutes. Remove weights and parchment, then bake another 5 minutes. Set aside to cool slightly.
To prepare the filling
- Reduce oven temperature to 375°F (190°C). In a large bowl, whisk together brown sugar, flour, salt, cinnamon, ginger, nutmeg, and cloves.
- In another bowl, lightly beat eggs, then whisk in pumpkin puree and evaporated milk until smooth.
- Pour dry ingredients into wet ingredients and whisk until just combined.
- Pour filling into the partially baked crust. Bake at 375°F (190°C) for 45–50 minutes, until center is just slightly wobbly. Cover crust edges with foil if browning too quickly.
- Cool on a wire rack for 2–3 hours, then refrigerate for several hours or overnight before serving.
Nutrition Facts
Servings 8
Serving Size 1 slice
- Amount Per Serving
- Calories 320kcal
- % Daily Value *
- Total Fat 13 gg20%
- Saturated Fat 6 gg30%
- Trans Fat 0 gg
- Cholesterol 95 mgmg32%
- Sodium 320 mgmg14%
- Potassium 260 mgmg8%
- Total Carbohydrate 46 gg16%
- Dietary Fiber 3 gg12%
- Sugars 35 gg
- Protein 7 gg15%
- Calcium 180 mg
- Iron 2 mg
* Percent Daily Values are based on a 2,000 calorie diet. Your daily value may be higher or lower depending on your calorie needs.
Note
- Storage Instructions: Once cooled, cover tightly and refrigerate for up to 4 days.
- Spices: You may replace individual spices with 2–2½ teaspoons pumpkin pie spice.
- Make ahead: Pie crust and filling can be prepared 1–3 days in advance and stored separately in the fridge.
- Freezing: Fully cooled pie freezes well for up to 3 months. Thaw overnight in the fridge.