Ever have one of those days where you need a dinner that feels a little fancy but comes together with almost no effort? This is that recipe. It’s the kind of meal that makes everyone at the table think you’ve been slaving away, when in reality, you’ve been quietly sipping a glass of wine while the oven does all the work.
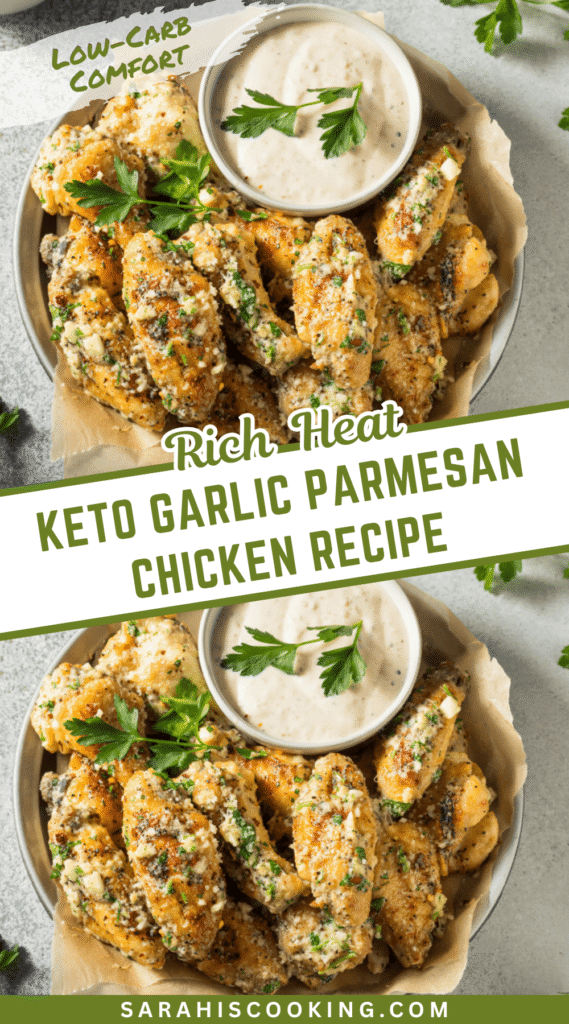
We’re talking about tender, juicy chicken cutlets, cloaked in a savory, golden crust of garlic and Parmesan. It’s a simple combination that, somehow, feels like pure magic. And the best part? It’s ready in about the time it takes to watch your favorite sitcom.
Why This Recipe Beats Takeout Every Time
Let’s be honest, the call of takeout on a busy weeknight is strong. It’s loud, it’s convenient, and it requires zero dishes. But this recipe, it’s a quiet contender that wins on every other front. It’s healthier, it’s more satisfying, and it fills your kitchen with the most incredible, garlicky aroma that no delivery bag can ever hope to replicate.
You get to control the ingredients, which means no mysterious additives or excessive sodium. Plus, there’s a certain pride that comes from creating something delicious with your own two hands. It’s a small, tangible victory at the end of a long day, and honestly, it often takes less time than waiting for a driver to find your house.
Ingredients Needed for the Recipe
Gathering your ingredients is the first step to a stress-free cooking experience. Here’s everything you’ll need to create this simple masterpiece:
- 4 Boneless, Skinless Chicken Breasts (or pre-made cutlets)
- 1 tsp Italian Seasoning
- 1/2 tsp Salt
- 1/4 tsp Black Pepper
- 1/2 tsp Onion Powder
- 2 tbsp Olive Oil
- 2 tbsp Minced Garlic (the kind from the jar is perfectly fine here!)
- 3/4 Cup Grated Parmesan Cheese
- 2 tbsp Fresh Parsley, Finely Chopped
- 3 tbsp Unsalted Butter, Melted
The Secret to the Perfect, Crispy Topping
That glorious, crispy, cheesy crust isn’t an accident. It’s a careful balance of texture and fat. The finely grated Parmesan is absolutely crucial here—it melts and crisps up beautifully, creating a delicate, savory shell around the chicken.
Combining it with the melted butter and minced garlic creates a paste that’s rich and clings to the chicken like a dream. Don’t be shy about pressing it onto the surface; you want every nook and cranny of that chicken to be covered in this flavor-packed blanket. It’s the heart and soul of the entire dish.
How to make Easy Low Carb Garlic Parmesan Chicken Cutlets in the Oven?
Follow these steps, and you’re guaranteed a fantastic result. It’s a straightforward process, but each step builds upon the last to create layers of flavor and texture.
Step 1: Getting Your Chicken Ready for Its Coating
First things first, preheat your oven to 400°F (200°C). This is the golden temperature for this recipe—hot enough to cook the chicken through and crisp the topping, but not so hot that it burns. While it’s heating, grab your chicken cutlets.
If you’re using chicken breasts, a little gentle persuasion with a rolling pin or meat mallet to get them to an even thickness is a game-changer. It means everything cooks at the same rate. Then, just pat them dry with a paper towel; this is a tiny step that makes a huge difference for browning.
Step 2: Creating the Flavor-Packed Garlic Parmesan Paste
In a small bowl, combine that glorious minced garlic, the finely grated Parmesan, the chopped fresh parsley, and the melted butter. Stir it all together until it forms a thick, fragrant paste. Seriously, take a moment to smell this mixture.
It’s the scent of good things to come. This paste is what will transform your simple chicken into something you’d be proud to serve to company. The butter helps it all bind together and promotes that beautiful, golden-brown finish we’re after.
Step 3: Seasoning and Assembling for Maximum Flavor
Now, let’s season the chicken itself. In a separate little dish, mix together the Italian seasoning, salt, black pepper, and onion powder. Sprinkle this mixture evenly over both sides of each chicken cutlet. This creates a foundational layer of flavor right on the meat itself.
Place the seasoned cutlets on a baking sheet lined with parchment paper or in a lightly greased oven-safe skillet. Then, take your garlic-Parmesan paste and spoon it generously over the top of each piece.
Step 4: The Baking and Broiling Process
Use the back of your spoon, or even your fingers (gloves are handy here!), to spread the paste evenly and press it down gently. You want it to adhere so it doesn’t slide off during baking. Now, pop that pan into your preheated oven and let the magic happen.
Bake for 12-15 minutes. The cooking time can vary a bit depending on the thickness of your chicken, so trust a meat thermometer—it should read 165°F (74°C) in the thickest part. For an extra crispy, bubbly, golden top, switch the oven to broil for just the last minute or two, watching it like a hawk!
Step 5: Resting and Serving Your Masterpiece
Once out of the oven, resist the urge to cut in immediately! Let the chicken rest for about 3-4 minutes. This allows the juices to redistribute throughout the meat, ensuring every single bite is moist and tender.
This is the perfect time to sprinkle on a little extra fresh parsley for a pop of color and freshness. Then, serve it up hot and watch it disappear. It’s that simple, and that good.
Tips
- For the most even cooking, try to bring your chicken out of the fridge 15-20 minutes before you start cooking. Letting it come closer to room temperature means it won’t shock in the hot oven and will cook more uniformly from edge to center.
- If you have the extra minute, freshly grating a block of Parmesan cheese instead of using the pre-shredded stuff makes a world of difference. Pre-shredded cheese often contains anti-caking agents that can prevent it from melting as smoothly and crisping as perfectly.
- Don’t overcrowd the pan! Giving each cutlet some space allows the hot air to circulate around them, which is essential for getting that topping crispy rather than steaming it. If you need to, use two pans or bake in batches.
Ingredient Substitutions for Every Pantry
No fresh parsley? Don’t let that stop you. You can use about two teaspoons of dried parsley instead. The flavor will be a bit more concentrated, and you’ll lose the fresh green pop, but the dish will still be wonderfully tasty.
If you’re out of Italian seasoning, it’s easy to make your own blend. Just mix equal parts dried basil, oregano, and thyme. A tiny pinch of dried rosemary can add a lovely depth, too. It’s your kitchen, your rules.
For a different cheesy flavor, try using Pecorino Romano for a sharper, saltier kick, or Asiago for something a little nuttier. You can even do a half-and-half mix with mozzarella for a stretchier, gooier topping that kids absolutely adore.
How to Store and Reheat for Best Results
Leftovers? They’re a blessing for tomorrow’s lunch. Let the chicken cool completely, then store it in an airtight container in the fridge. It will keep beautifully for 3 to 4 days. You can also freeze it for up to 3 months—just wrap it tightly to prevent freezer burn.
To reheat, the oven is your best friend. Preheat to 350°F (175°C), place the chicken on a baking sheet, cover it loosely with foil, and warm it for 15-20 minutes. Take the foil off for the last five minutes to re-crisp the topping. It will taste almost as good as new.
If you’re in a serious rush, the microwave works, but it will soften the crispy coating. To help, place a damp paper towel over the chicken to steam it gently and prevent it from becoming tough. Heat in short 30-second bursts until warmed through.
Creative Ways to Serve Your Chicken Cutlets
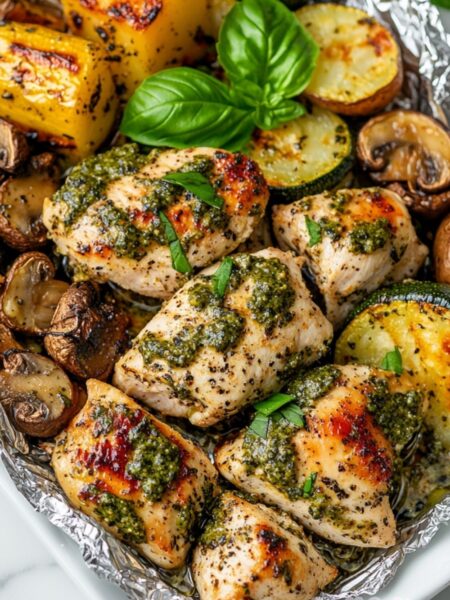
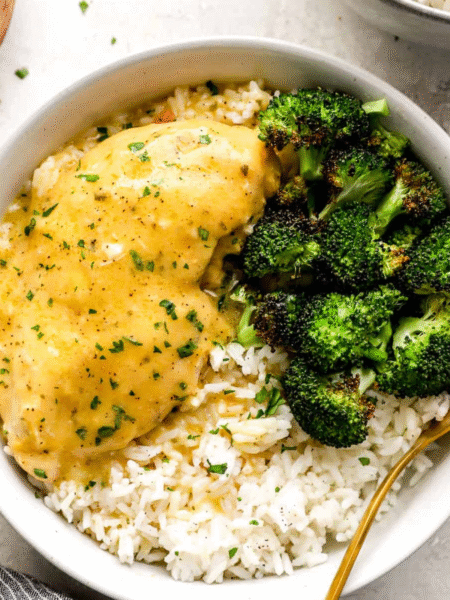
This chicken is incredibly versatile. Sure, you can serve it as a classic main course with a side of roasted broccoli or a simple green salad. But have you thought about slicing it up and tossing it through a fresh garden salad for a protein-packed lunch?
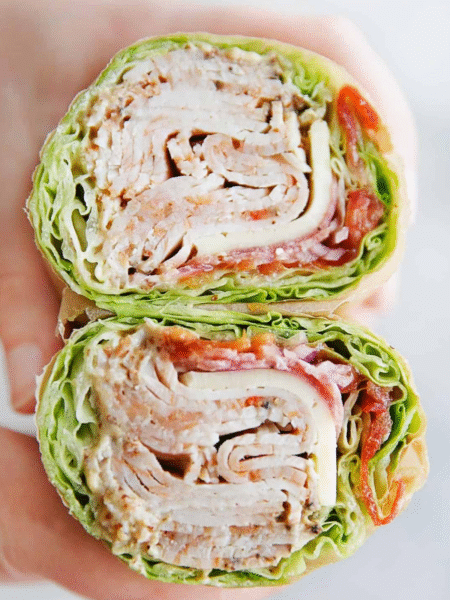
You can also slice it thinly and pile it into a low-carb wrap with some lettuce, tomato, and a drizzle of ranch dressing. Or, for a truly decadent experience, serve it over a bed of zucchini noodles or spaghetti squash and top it with a light marinara sauce. It’s a complete meal that satisfies every craving.
For a dinner party, it looks stunning served right in the cast-iron skillet you baked it in. Place it in the center of the table, family-style, and let everyone help themselves. It’s a warm, inviting, and deeply satisfying sight.

Easy Low Carb Garlic Parmesan Chicken Cutlets Recipe in the Oven
Description
Tender, juicy Chicken Cutlets baked to perfection in the oven with a flavorful garlic and parmesan coating, perfect for a quick and easy weeknight dinner or an impressive dinner party dish.
Ingredients
Instructions
- Preheat your oven to 400°F (200°C). Line a baking sheet with parchment paper or lightly grease a cast iron skillet.
- Season both sides of the chicken cutlets with Italian seasoning, salt, black pepper, and onion powder. Arrange on the prepared baking sheet or skillet.
- In a medium bowl, combine minced garlic, grated Parmesan cheese, chopped parsley, and melted butter. Mix until evenly combined.
- Spoon the garlic-Parmesan mixture evenly over each chicken cutlet, pressing it gently to adhere.
- Bake for 12–15 minutes, or until the internal temperature of the chicken reaches 165°F (74°C).
- For a crispier topping, broil for 1–2 minutes, watching closely to prevent burning.
- Let rest for 3–4 minutes before serving. Garnish with extra chopped parsley if desired.
Nutrition Facts
Servings 4
Serving Size 1 chicken cutlet
- Amount Per Serving
- Calories 400kcal
- % Daily Value *
- Total Fat 23g36%
- Saturated Fat 9g45%
- Cholesterol 135mg45%
- Sodium 620mg26%
- Potassium 580mg17%
- Total Carbohydrate 4g2%
- Sugars 1g
- Protein 42g84%
- Calcium 220 mg
- Iron 2 mg
* Percent Daily Values are based on a 2,000 calorie diet. Your daily value may be higher or lower depending on your calorie needs.
Note
- Pound the chicken: For even cooking, pound chicken breasts to 1/4-inch thickness.
- Dry the chicken: Patting it dry helps the seasoning stick and improves browning.
- Room temperature: Let chicken sit 15–20 minutes before cooking for even results.
- Freshly grated Parmesan: Offers superior flavor and texture over pre-shredded.
- Optional broil: Adds extra crispiness—just watch closely!