This section establishes Cheesy Garlic Chicken Wraps Recipe as a fast, high-protein meal built on practical technique rather than convenience shortcuts. It frames the recipe as dependable, flexible, and designed for real-life cooking schedules.
It should communicate confidence in outcome—crispy exterior, melted interior, balanced garlic flavor—while reinforcing that this is a repeatable method backed by deliberate testing and ingredient pairing.
Who This Recipe Is For
This section defines the recipe as ideal for busy home cooks, students, and families who need a satisfying meal in under 30 minutes without sacrificing texture or flavor. It emphasizes accessibility for beginners while still offering efficiency valued by experienced cooks.
It should clarify that the recipe works especially well for those using leftovers or pre-cooked proteins, including guidance that aligns naturally with preparing chicken ahead using a method like the Shredded Chicken.
Why Cheesy Garlic Chicken Wraps Recipe Works
This section explains the structural logic of combining cooked chicken with a creamy mayo–yogurt base to create moisture and cohesion without making the wrap soggy. Garlic and hot sauce provide sharpness that balances the richness of melted cheese.
It should highlight how layering cheese both under and over the filling creates insulation, allowing the tortilla to crisp while the interior becomes fully heated and cohesive.
Ingredient Insights and Function
This section breaks down how each ingredient contributes to texture and performance: yogurt adds tang and lightness, mayonnaise ensures spreadability, and shredded cheese acts as both binder and melt layer. Tortillas are chosen for flexibility to allow tight rolling without tearing.
It should also explain how green onion introduces freshness to offset richness, a principle that can be reinforced when paired with bright sides like Cucumber Salad for contrast.
Step-by-Step Success Guidance for Cheesy Garlic Chicken Wraps Recipe
Preparation Phase
This subsection outlines mise en place and emphasizes mixing the filling thoroughly so the sauce evenly coats the chicken, preventing dry pockets. It should note the importance of ingredient distribution for consistent flavor in every bite.
Guidance here should reduce reader risk by clarifying that pre-cooked chicken must be well-chopped for proper binding and even heating.
Execution Phase
This subsection explains the assembly order and why filling is placed on the lower third to enable tight rolling. It highlights folding technique to prevent filling loss and ensure a compact wrap that toasts evenly.
It should call attention to cooking seam-side down first to seal the wrap and create structural integrity during flipping.
Finishing and Doneness Cues
This subsection teaches readers to look for a deep golden surface and a firm, crisp texture as indicators of proper pan contact. Covering the pan briefly allows heat to circulate, ensuring complete cheese melt without overbrowning.
Visual and tactile cues should be emphasized so doneness is judged by observation rather than strict timing.
How I Tested and Refined Cheesy Garlic Chicken Wraps Recipe
This section explains testing variations in dairy ratios, cheese placement, and cooking method to prevent sogginess while maintaining a creamy interior. It should describe how balancing yogurt with mayonnaise created the most stable filling.
It also documents trials with uncovered cooking versus covered finishing, demonstrating that trapped heat produced the most reliable melt and texture.
Common Mistakes When Making Cheesy Garlic Chicken Wraps Recipe
This section anticipates reader missteps such as overfilling, using chicken pieces that are too large, or skipping the initial cheese layer that protects the tortilla. Each mistake should be tied to a clear structural consequence.
It should also address heat management, explaining that excessively high heat crisps the outside before the center warms, while moderate heat allows controlled browning.
Make-Ahead, Storage, and Freezing Guidance
This section clarifies that the filling can be prepared up to three days in advance, making it ideal for meal prep, while assembled wraps should be cooked fresh to maintain texture. It reinforces storing components separately for best performance.
Storage guidance should include reheating in a skillet or air fryer to restore crispness and suggest serving with bright accompaniments such as Pickled Red Onions Recipe to refresh leftovers without adding heaviness.
Serving Context and Meal Pairing Ideas
This section positions the wraps as a standalone meal but encourages pairing with fresh, acidic, or crunchy sides to balance richness. It should guide readers toward building a complete plate without complicating preparation.
Suggestions can include adding a simple protein-prep variation inspired by techniques used in Pan Fried Chicken Breast for those who prefer to cook chicken fresh instead of using leftovers.
Cheesy Garlic Chicken Wraps Recipe
Description
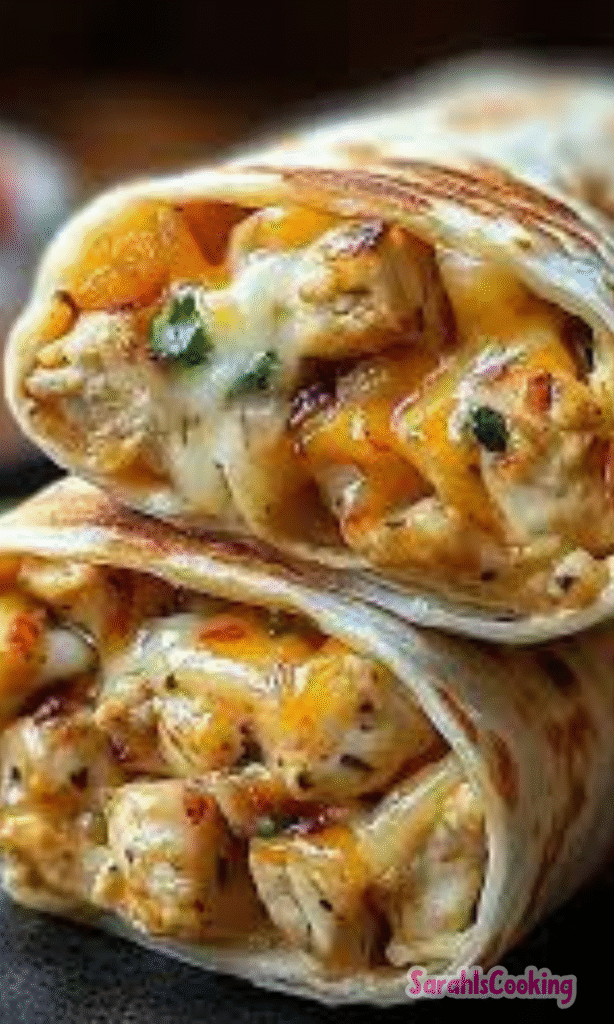
Cheesy garlic chicken wraps — crispy on the outside, gooey and garlicky inside, and honestly just the kind of easy comfort food I keep coming back to. Bonus, it’s high-protein and satisfying, great for lunch or dinner.
ingredients
Instructions
- In a bowl, mix chopped chicken, garlic, mayonnaise, yogurt, hot sauce, and salt.
- Lay out your wrap. On the lower third of the tortilla, sprinkle about 2 tablespoons of cheese, then top with about ⅔ cup of the chicken mixture. Add another tablespoon of cheese and a sprinkle of green onion.
- Fold in the sides of the tortilla, then roll it up tightly from the bottom.
- Heat a non-stick pan over medium-high. Spray with olive oil.
- Place wraps seam-side down. Cook for 3–4 minutes per side until crispy and golden. Cover with a lid to help heat the inside.
- Slice in half and serve!
Nutrition Facts
Servings 2
Serving Size 1 wrap
- Amount Per Serving
- Calories 476kcal
- % Daily Value *
- Total Fat 27g42%
- Saturated Fat 11g56%
- Trans Fat 0.01g
- Cholesterol 120mg40%
- Sodium 1090mg46%
- Potassium 347mg10%
- Total Carbohydrate 19g7%
- Dietary Fiber 1g4%
- Sugars 2g
- Protein 38g76%
- Calcium 376 mg
- Iron 3 mg
* Percent Daily Values are based on a 2,000 calorie diet. Your daily value may be higher or lower depending on your calorie needs.
Note
- Covering the pan helps melt the cheese and warm the filling faster.
- Make the chicken filling ahead and keep in the fridge for up to 3 days.
- For a lighter version, reduce the cheese (but honestly, that melty middle is magic).
- Air fryer works too — 375°F (190°C) for about 6–8 mins.
- Can I bake these instead of pan-frying? Yes, bake at 400°F (200°C) for 10–12 minutes, flipping once. But they’re crispier in a pan or air fryer.
- Use up leftover filling in toasties, quesadillas, or even stuffed into baked potatoes.
- Storage tips: Store cooked wraps in the fridge for up to 2 days. Reheat in a skillet or air fryer to bring back that crisp. I wouldn’t freeze the wrapped version, but the filling can be frozen for up to 1 month.
- Make-ahead tips: You can make the chicken filling 2–3 days ahead and keep it chilled. Just wrap and cook when ready to eat.
- Serving suggestions: These wraps are a full meal on their own, but I like to serve them with a big, crunchy salad or some roasted veggies. They’re also great with pickles or a side of salsa for dipping. Bonus points for chips on the side if we’re keeping it real.